Converting A Shed Into A Chicken Coop
It is important when choosing what to house your chickens in that you pick a place that your chickens will not outgrow too quickly. This post will walk you through converting a shed into a chicken coop so you can repurpose what you already have into a long term house setup for your flock.
When raising chickens, you will want to have adequate housing. A shelter that will keep them warm, dry, and protected throughout the year. Knowing what to have inside your coop and why will help you to ensure the setup makes sense for your chickens.
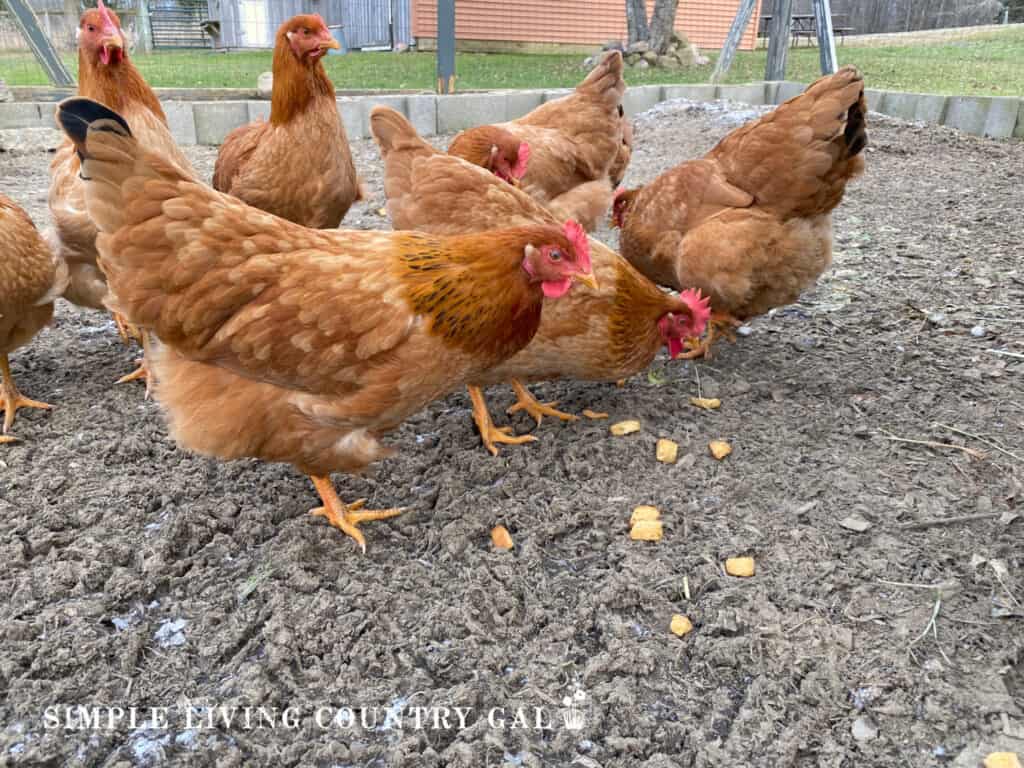
Raising chickens is something that is both fun and rewarding, so much so that the number of chickens you have now may increase in size year over year.
Sure, you may start with only 2-3 chicks, but before you know it, you have a whole flock running around your yard that rivals a poultry city.
If you are not sure how many chickens is a good number for your family and homesteading goals, you can read: How Many Chickens Do I Need? to get a better idea.
As a homesteader, repurposing what we have keeps our budget intact. Finding a solution without having to go to the store is one of the reasons I love homesteading so much. So when we got our first chickens, and they quickly outgrew the coop we had built, I went looking for a new home, and what I stumbled on was an old shed set up on the back part of our property.
Years ago, we used to house our pigs in a 10 x 13-foot shed, but we soon found ourselves with more pigs than our shed could hold, so we had to relocate them to a bigger area. That shed was now sitting vacant, waiting for a new purpose.
The good news is that shed would be a perfect coop for our chickens. The bad news was it was in the wrong spot.
Moving the shed to where we needed it would be a day-long event especially since our property is very wet.
Shed to coop Project Timeline
The timeline for our coop repurposing project was about five days in total. Here is the breakdown:
- One day, to clean the shed from top to bottom.
- One day to move the shed to its new location.
- One day, to rebuild the inside so it had all the elements needed for a flock of chickens.
- Two days to build the enclosed outside run.
Supply list and Costs
- Misc lumber for the door and and interior walls – $25.
- A roll of chicken wire for the door and wall – $15-$20.
- Doggie door – $15.
Since we were able to find most of the supplies on our property, including the doggie door, our costs were significantly lower than what is listed above. Never underestimate a scrap pile of wood when working on a project.
Not sure what a coop needs? Be sure to grab your FREE Chicken Coop Checklist below!
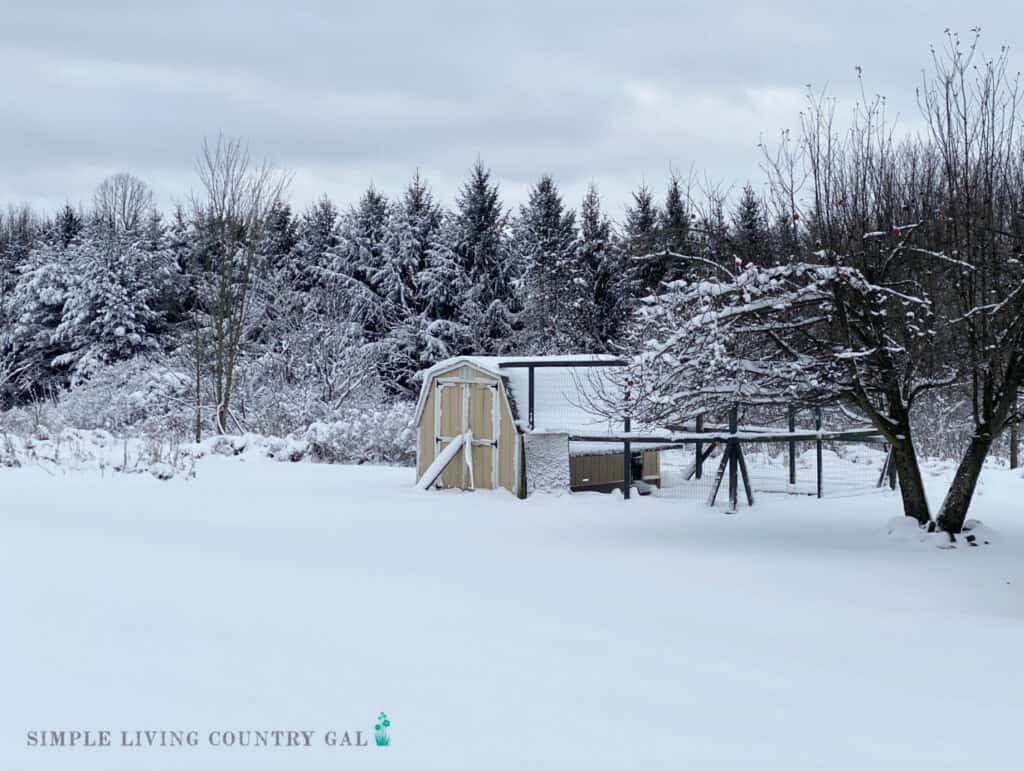
Functionality is more important than looks and sure, our coop may not grace the covers of Better Homes and Gardens, but it’s solid, keeps our chickens warm and dry, and will hold up for many years to come even in our brutal winters.
Be sure to grab the FREE Chicken Coop Layout guide below!
Converting a Shed Into a Chicken Coop
Turning an old shed into a new coop is relatively easy since the framework is already done. The most time will be spent setting up the inside, including all the parts a flock of chickens needs to be comfortable. Let’s break it down.
Backyard Chicken Guide + Record Journal

Step #1. Pick a Location for your coop
When choosing where to keep your chicken coop and run, location does matter. This includes the weather, protection from any predators, and keeping things close for easier upkeep.
#1. If you live in a four-season area, try to locate your coop where it will have warm sun in the winter and cool shade in the summer.
#2. To help with chores, keep your coop near to a water source and a compost area.
#3. If you have a garden, putting the coop nearby will help with waste removal.
#4. If you want to let your hens free-range, you need to be careful where you put your coop. Chickens will scratch not only in flower beds but also in vegetable gardens, making a big mess in a short amount of time.
Chickens also poop pretty often and will leave droppings all over, making it hard to walk around without getting your feet or shoes messy. Because of this, you will want to choose the location of your chicken coop carefully.

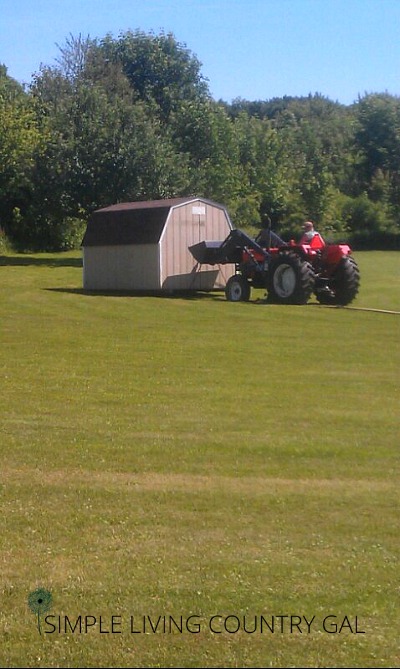
Step #2. Relocate the Shed
Since we chose a spot near the barn and garden, we needed to move the shed to the other side of the property. This is not an easy task when you are talking about roughly 850 pounds.
How we did it:
- We used heavy chains that we were able to attach to reinforcement boards that were underneath the shed. Those chains were then attached to the bucket of our tractor.
- Next, we used logs as a rolling bed to better help with the movement of the shed. This also helped to keep the damage to our yard to a minimum.
- As the shed progressed, we would shift the back log to the front and so on.
This was a very slow process, but it allowed us to move this heavy shed more easily.
Step #3. Stabilize the Base
Once you have your shed in the right location, you will need to use supports to level it out. Here’s how we did it:
#1. We leveled the ground first by removing any hills, rocks, roots, and stumps.
#2. We then put down a layer of sand and tamped it for a more even and level base.
#3. Finally, we used concrete blocks at the corners and in the middle of the shed to lift it off the ground. This helps the shed’s floor last longer as it will be off the wet ground.
#4. Check the floor of the chicken coop for holes or cracks that may allow predators to get inside. If you see an opening, use scrap wood to cover it using screws or nails to secure it in place.
SLCG Pro Tip: If you are worried about animals getting in, you can read these tips on how to keep rodents out of your coop.
Step #4. Set Up the Interior
Next is the inside setup of your new chicken coop. The main parts to have inside are:
- A roost – Where chickens perch on at night to sleep.
- A feeder and waterer
- Nesting boxes – Where chickens lay their eggs.
How much room do you need in a coop for your chickens?
As a guide, each hen needs 2-3 square feet of space inside the coop and 6-8 square feet of space outside the enclosed run. If you raise larger breeds of chickens, you will need to increase that number to 4 square feet inside the coop per chicken and 8-10 square feet outside in the run.
It is important to ensure you have enough space for your flock to prevent any hen pecking. Crowded birds are stressed birds, and they will not lay as many eggs. It is better to have more space than not enough.
Neareen Nesting Boxes for Chickens, 3 Compartment Roll Out Heavy Duty Chicken Coop Nesting Box with Lid Cover to Protect Eggs with Perch for Up to 15 Hens, Light Green, Wall Mounted Harris Farms Poultry Drinker | Simple and Easy to Use for Any Size Flock | Made of BPA-Free Plastic | 6.25 Gallon, GreenZINZINULER Automatic Port Chicken Feeder and Cup Waterer Set – Chicken Coop Accessories, No Waste Poultry Feeder, 3 Gallon/16 PoundsPETSFIT Chicken Swing Set for Pet’s Healthy & Happy,4 Chicken Perches with Swing Fit for 8-10 Chicks, Chicken Toys for Coop Accessories


More Hen Pecking Resources:
- How to Discourage Hen Pecking in Your Flock
- Help for Hen Pecked Chickens
- Keep Chickens From Getting Bored
If room allows, you can also have an area for storage. Here, you can have a tote or barrel to hold feed, making chore time easier. We did this when we first converted our shed into a coop, and it was convenient.
Now, however, we keep food for all of our animals in a feed room inside our barn that is about 50 feet away. Yes, that means I need to bring all the supplies with me each time I do chores in both the winter and the summer. Again, this is something to keep in mind when choosing the location of your coop.
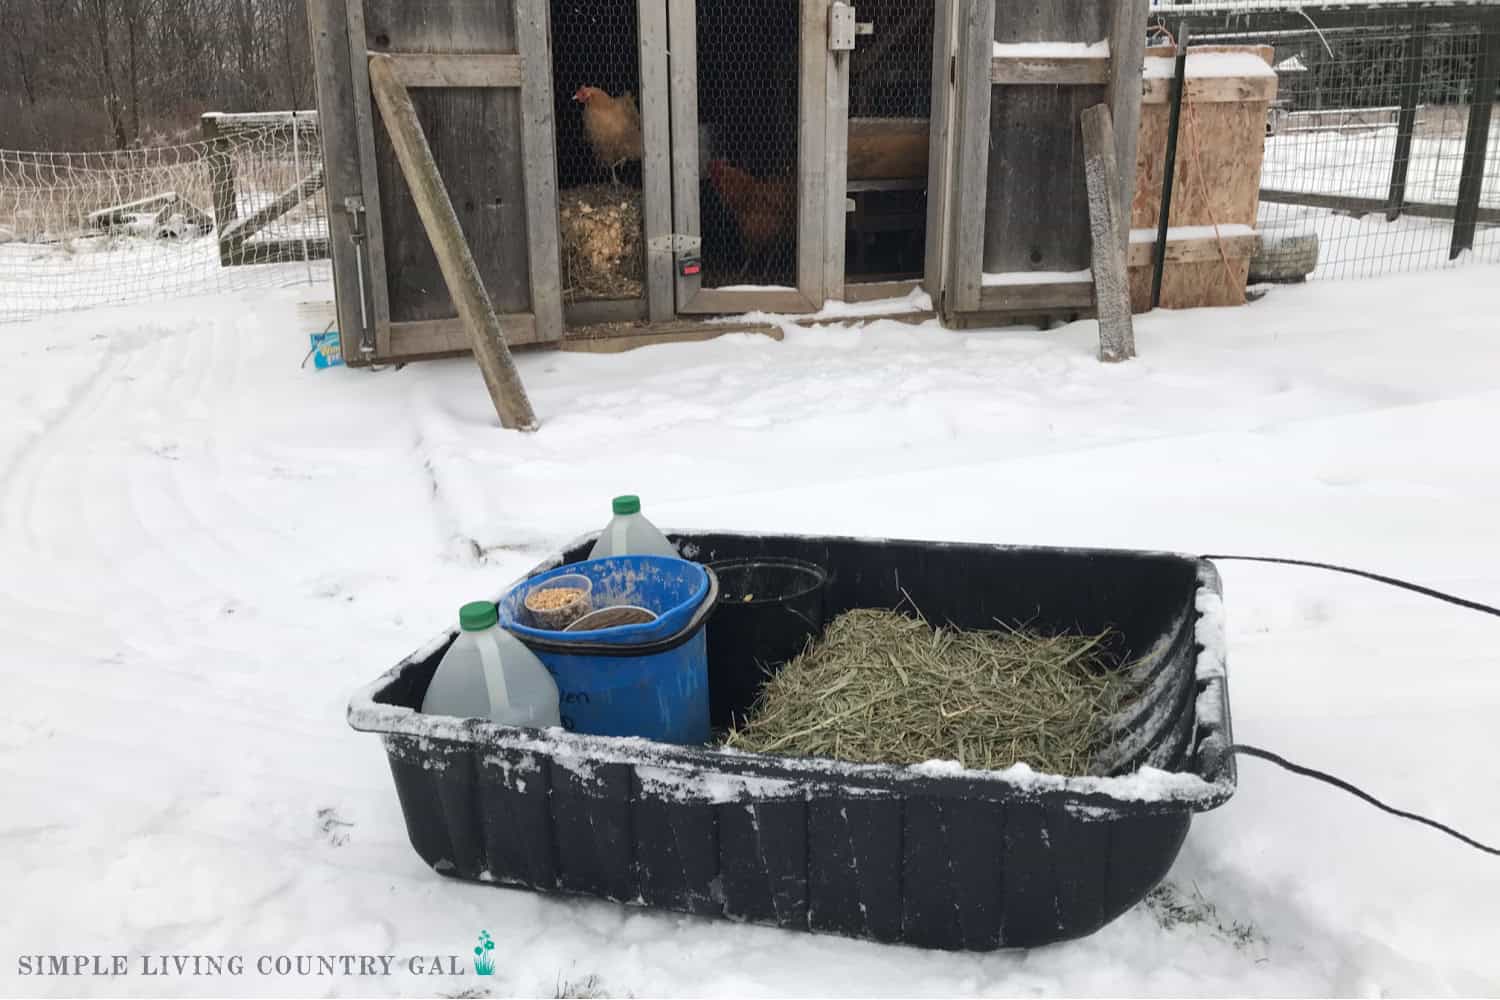
If you are a midlife homesteader, then having tools that help to make chores easier is a must. I love this utility sled, as it makes moving things around easy when there is snow on the ground. In the summer, I use a wagon or, if I have a lot of supplies to move, our utility vehicle.
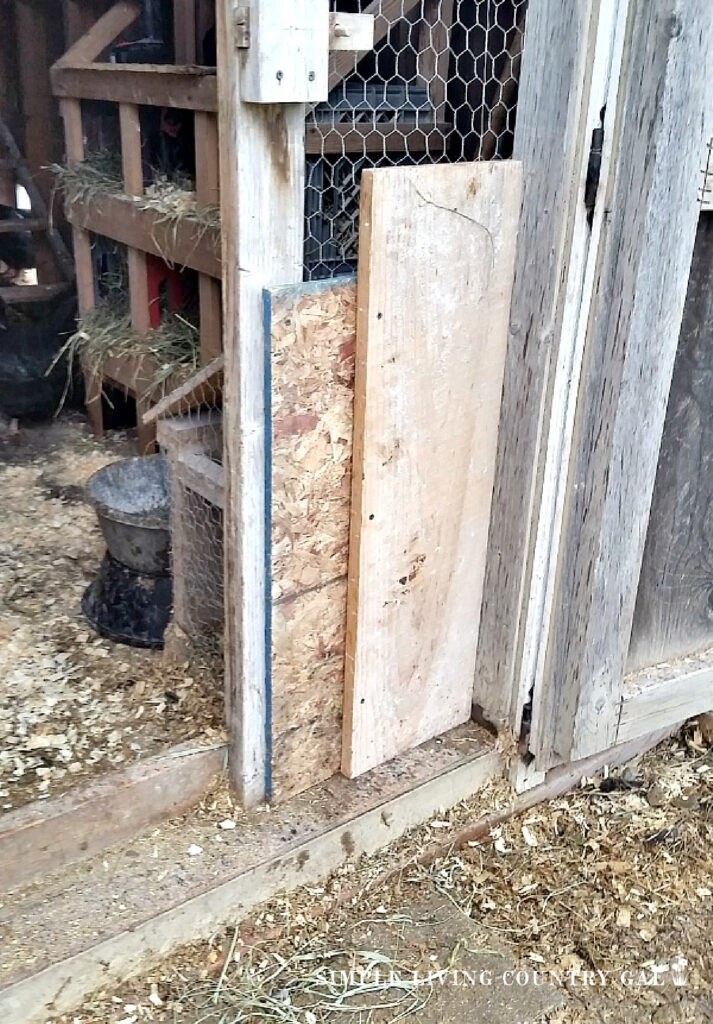
Step #5. Construct a Wall and Door
Once the shed is leveled and settled into place, you will want to have a door that will allow for fresh air to come into the coop while keeping everyone inside where they are safe.
Lucky for me, my wonderful father, who was visiting us on vacation at the time, stepped in to do the interior renovations. He built a framed wall with a door that was all covered in chicken wire that we stapled into place.
Over the years, we found we needed more space for our growing flock and ended up moving the door all the way to the main opening of the shed. The best part of building your own coop is the ability to make changes as they are needed.
Step #6. Have a way for chickens to access the run
You will need to have a door or other access to the outside run area. One that you can close up at night to ensure your entire flock is safe inside. Not only do you want to make sure your hens can’t get out unless you want them to, but you also want to be sure that nothing can get in that may harm them.
Backyard Chicken Guide + Record Journal
An old doggie door was perfect for our setup, and we installed it in the back corner of the coop. This allows me to easily close things off at night, keeping any nocturnal predators out and away from our precious flock.
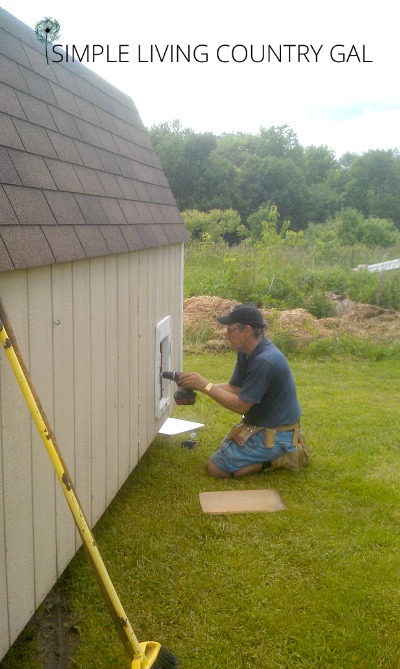
The chickens took to that door right away and it has worked well all these 8+ years. Easy to let the hens in and out and secure enough to keep them safe each evening.
Chicken Coop Resources:
It does let in a bit of cold air during the winter months, but we have since learned to insulate for the winter, and that has helped quite a bit.
![I must say it works perfectly![spacer height="20px"]](https://simplelivingcountrygal.com/wp-content/uploads/2016/05/shed-to-coop-dog-door.png)
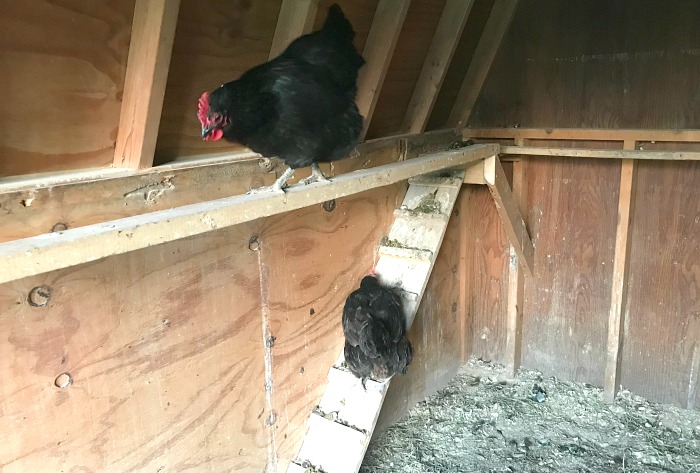
We also constructed a ramp that our chickens could use to get in and out of the coop more easily. This is not a requirement but it did help to keep everyone calm when the door was opened each morning.

Since then, we replaced the doggie door and upgraded to a solar-powered coop door. This was a cost investment but it was a game changer for me.
Since I am now struggling with back issues, I am always looking for ways to continue living this lifestyle without risking stress or injury to my back.
Now the chickens are let out each morning and safely closed in each evening automatically. This limits the number of trips I need to make out to the coop each day.

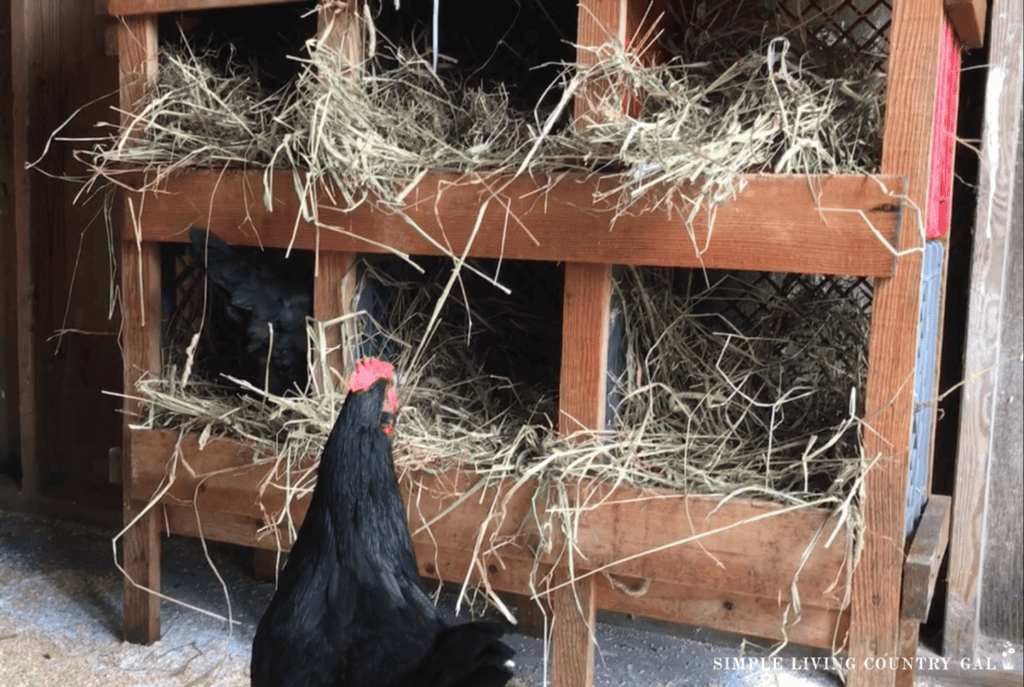
Step #7. Nesting Boxes
Since nesting boxes take up a lot of space, I suggest adding these early on. You will want to have at least one nesting box for every 4-5 hens.
Be sure to grab your FREE Chicken Coop Checklist below!
What is a chicken nesting box?
A nesting box is where your chickens will go to lay their eggs. This can be a box, bucket, wash tub, or even an old milk crate. Hens prefer a bit of privacy when egg-laying so by having a few nesting boxes inside of your coop you will keep those eggs safe and protected until you can collect them.
Don’t worry too much about height; hens can fly surprisingly high and will easily be able to “jump” up to a box.
When choosing the location for your nesting boxes, try to place them in a spot that is free from drafts, rain, and snow. Knowing the wind’s direction will help you better choose a dry and warm area for your hens to lay their eggs.
You can Build Your Own Nesting Boxes using leftover scraps of wood and plastic milk crates or buckets. These have held up well over the years and work great to keep our eggs protected until we can get out to collect them.
![Once the boxes are in, it's ready to go! A little bit of hay for comfort is all you need. I just love this design, the plastic crates are very easy to clean, the frame is extremely light weight so I can move it in and out very easily by myself and the hens really love it as well and fit very comfortably. I have even found two hens in one crate together just as happy as can be![spacer height="20px"]](https://simplelivingcountrygal.com/wp-content/uploads/2016/07/clean-nesting-boxes.jpg)
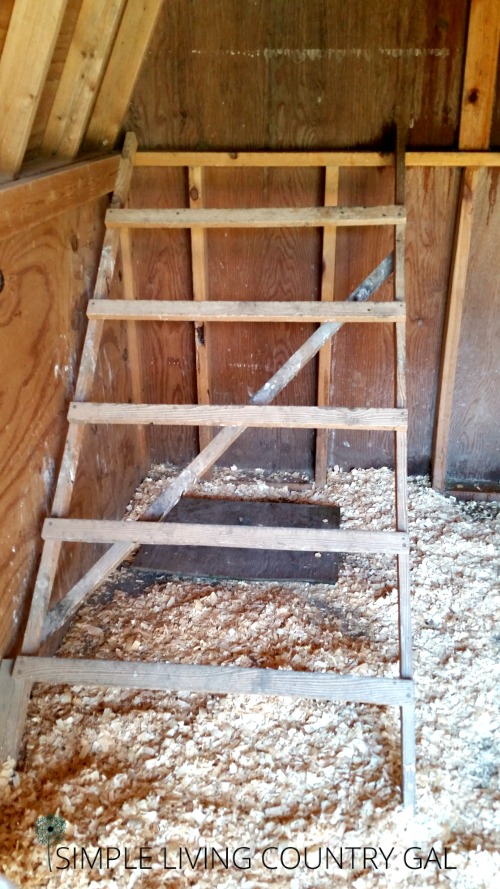
Step #8. Chicken Roosts
Next, you will want to add a roost for your chickens to perch on at night so they can sleep safely up off the ground.
What are chicken roosts?
A roost is a place for your hens to perch on at night to sleep. Chickens prefer to be up off the ground while they sleep. It is their instinct to do so, and it helps them to feel safe after dark. For this reason, you will want a roost that is large enough to hold all of your hens.
A roost also helps with the flock hierarchy. There is a pecking order in every flock and the roost shows that in a coop. Any chickens at the top are usually the more dominant hens, while the chickens at the bottom are less dominant.
Roost Options:
When choosing the best roost, be sure to have enough space for your flock. A good rule of thumb is 6-8 inches of space for each bird. Here are three roost setups we have used over the years.
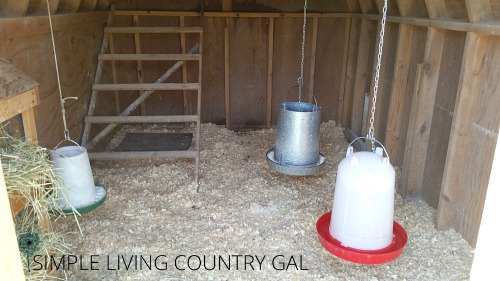
#1. Multi-Level Roost. This roost resembles a ladder and works great for a larger flock with a complicated pecking order. You can build one out of scrap wood as we did. Just be sure to secure it to the coop wall so it doesn’t shift or move under the weight of your chickens.
#2. One Level Roost. If you are short on space, you can build a one-level roost that is higher up off the ground. This is the setup we use in our own coop and it works well without taking up floor space.
#3. Small Coop Roost. You can use a step ladder, but be sure to secure it to the floor. Another option is using 2 cinder blocks with a board through the block’s openings.
CHICKEN ROOST 101 – EVERYTHING YOU NEED TO KNOW
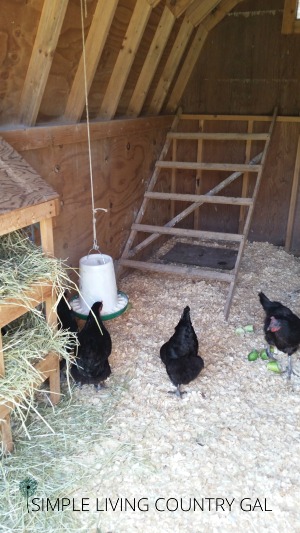
Step #9. Hang the Waterer and Feeder
I highly recommend hanging both your waterer and your feeder, as this cuts down on waste. Use a chain attached to the handle and a nail at the ceiling to suspend it. Be sure it is at a level that is comfortable for your chickens to use but not low enough that they can get debris in the food or water.
Chickens like to scratch all the time, and when they do, they kick up bedding that can get tossed into their water or feed.
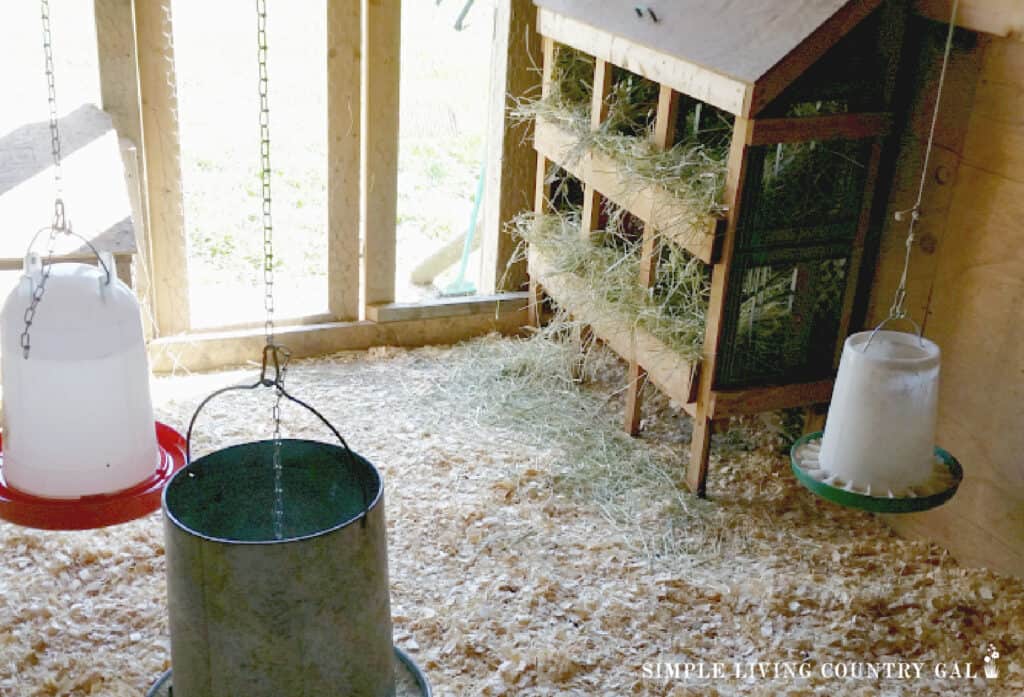
Raising the height of your chicken’s feeder and waterer will help to keep both free of debris and dirt. Try to choose a height that is easy for them to reach without having to stretch too much. I like to keep things about 8-10 inches off the ground for full-grown hens.
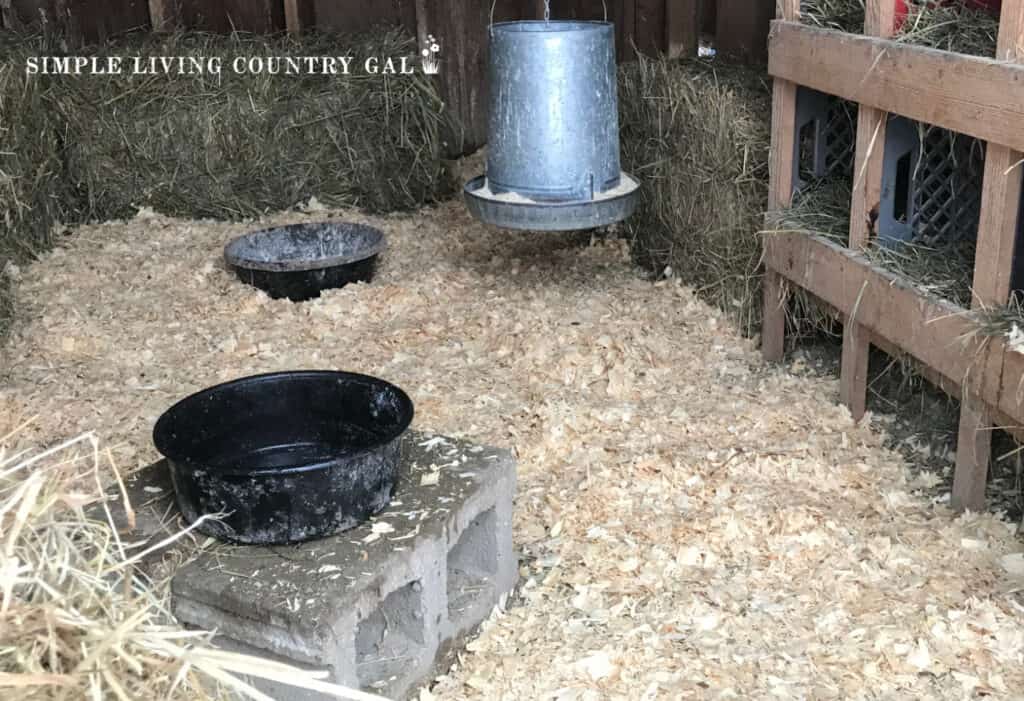
Another option for water is a rubber water bowl set on a cinderblock. This is a great option in the colder months especially when the water freezes. With a rubber bowl, you can get the ice out more easily and refill it with fresh, warm water.
Read here for a list of our top picks for the Best Chicken Waterers.
What we use:
In the summer, I use a plastic hanging waterer and this does well in the warmer months.
In the winter, I prefer to use a rubber bowl with a large rock inside to keep it from tipping over. Chickens like to perch on the side of anything, and the rock helps to keep things stabilized. This is the rubber water bowl we use in our coop.
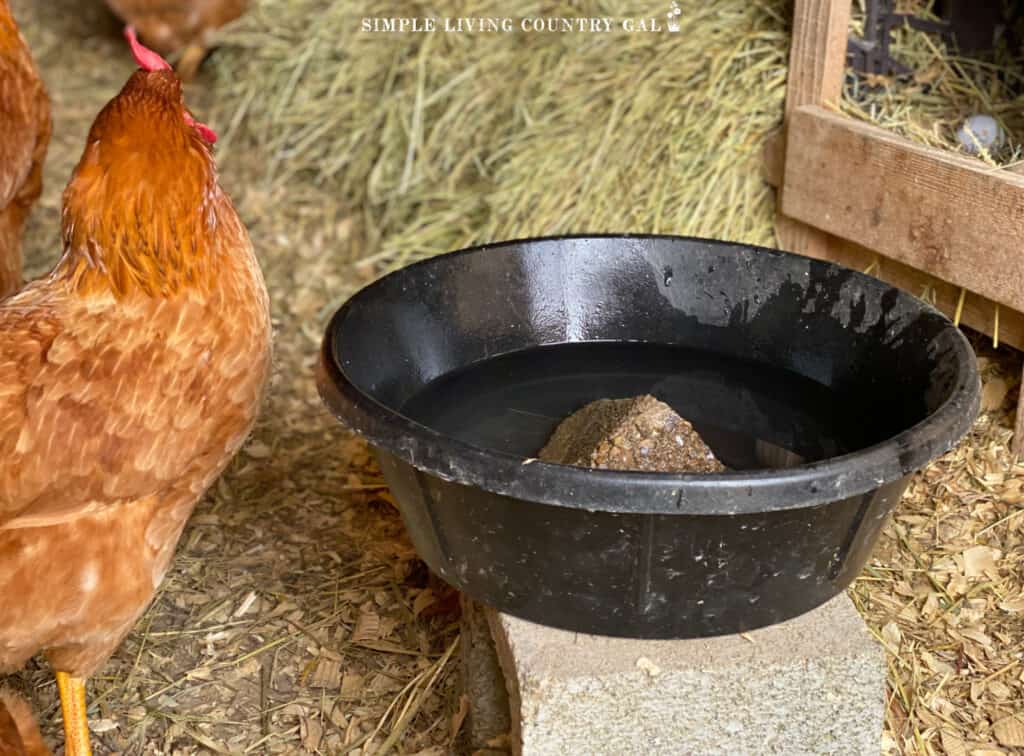
Water freezes quite easily in the winter, and plastic waterers tend to crack easily. By using the thicker water bowls, I can easily bend them to break up the ice and fill them with fresh water.
You can see why in How To Winterize Your Chicken Coop.
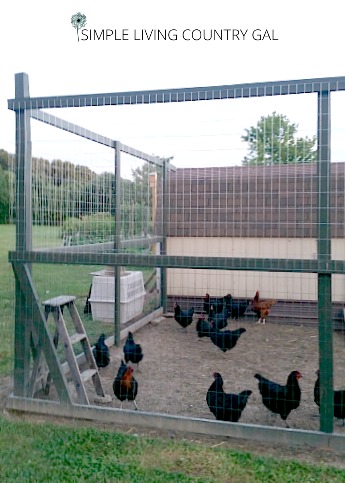
Step #10. Set up an Outdoor Run
Even if you plan to free-range your chickens, I highly suggest you build an outside chicken run as well. This will allow you to have an area where you know your chickens will be able to scratch and relax in safety.
Chickens still like to be outside at dusk when it starts to get dark. They also want to be out first thing in the morning before sunrise. This can be a time when there are quite a few predators out, so having a safe outdoor chicken run for them to browse is always a good idea.
Make sure to include access such as a gate, for you to get into the run as needed. Where we live, our chicken run needs maintenance quite often since we live in a very wet area. The rain and snow can make our run extremely muddy, so I always need to get into that area to be sure our chickens have a dry area.
A wet chicken run can be very muddy and messy, for both the inside of the coop and the eggs they lay as well.
SLCG PRO TIP: When adding a door for you to use, be sure it is a high door so your chickens can not fly up over it and get out. Ours was a waist-high gate, as you see in the photo above. We quickly learned that our chickens could very easily hop up and back down to freedom, making them vulnerable to all sorts of hidden dangers.
Step #11. Bedding
Once you have everything set up inside you can then add in some bedding of your choice. I have tried many things over the years in our chicken coop.
This includes wood shaving, sawdust, straw, or sand. For me, wood shavings work the best and do a great job keeping the dust down. It is also the lightest option, making it easier for me to do cleanouts without having to enlist help.
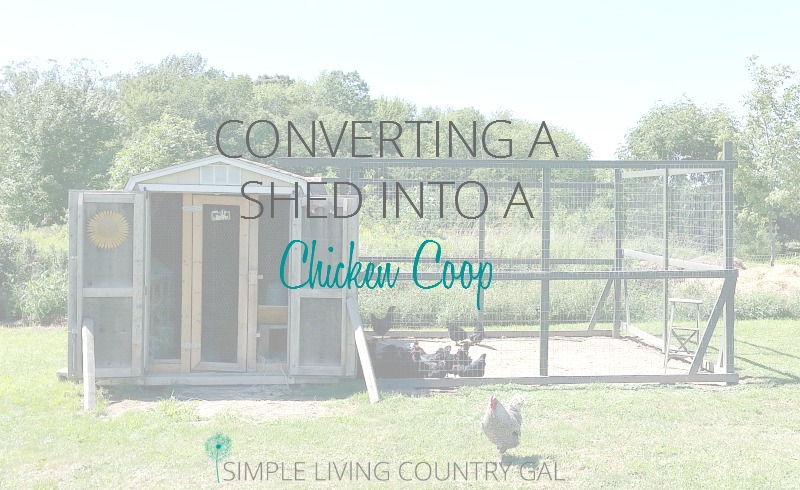
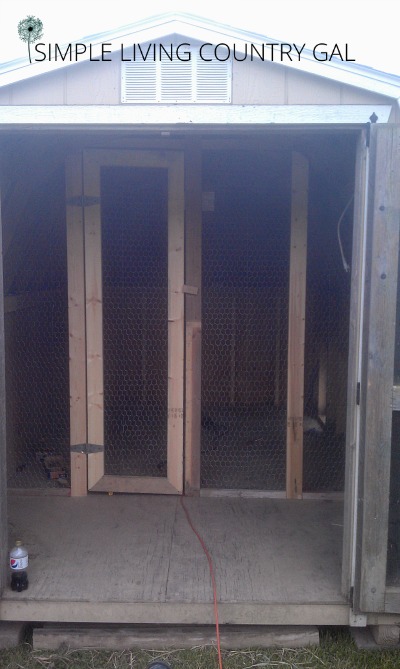
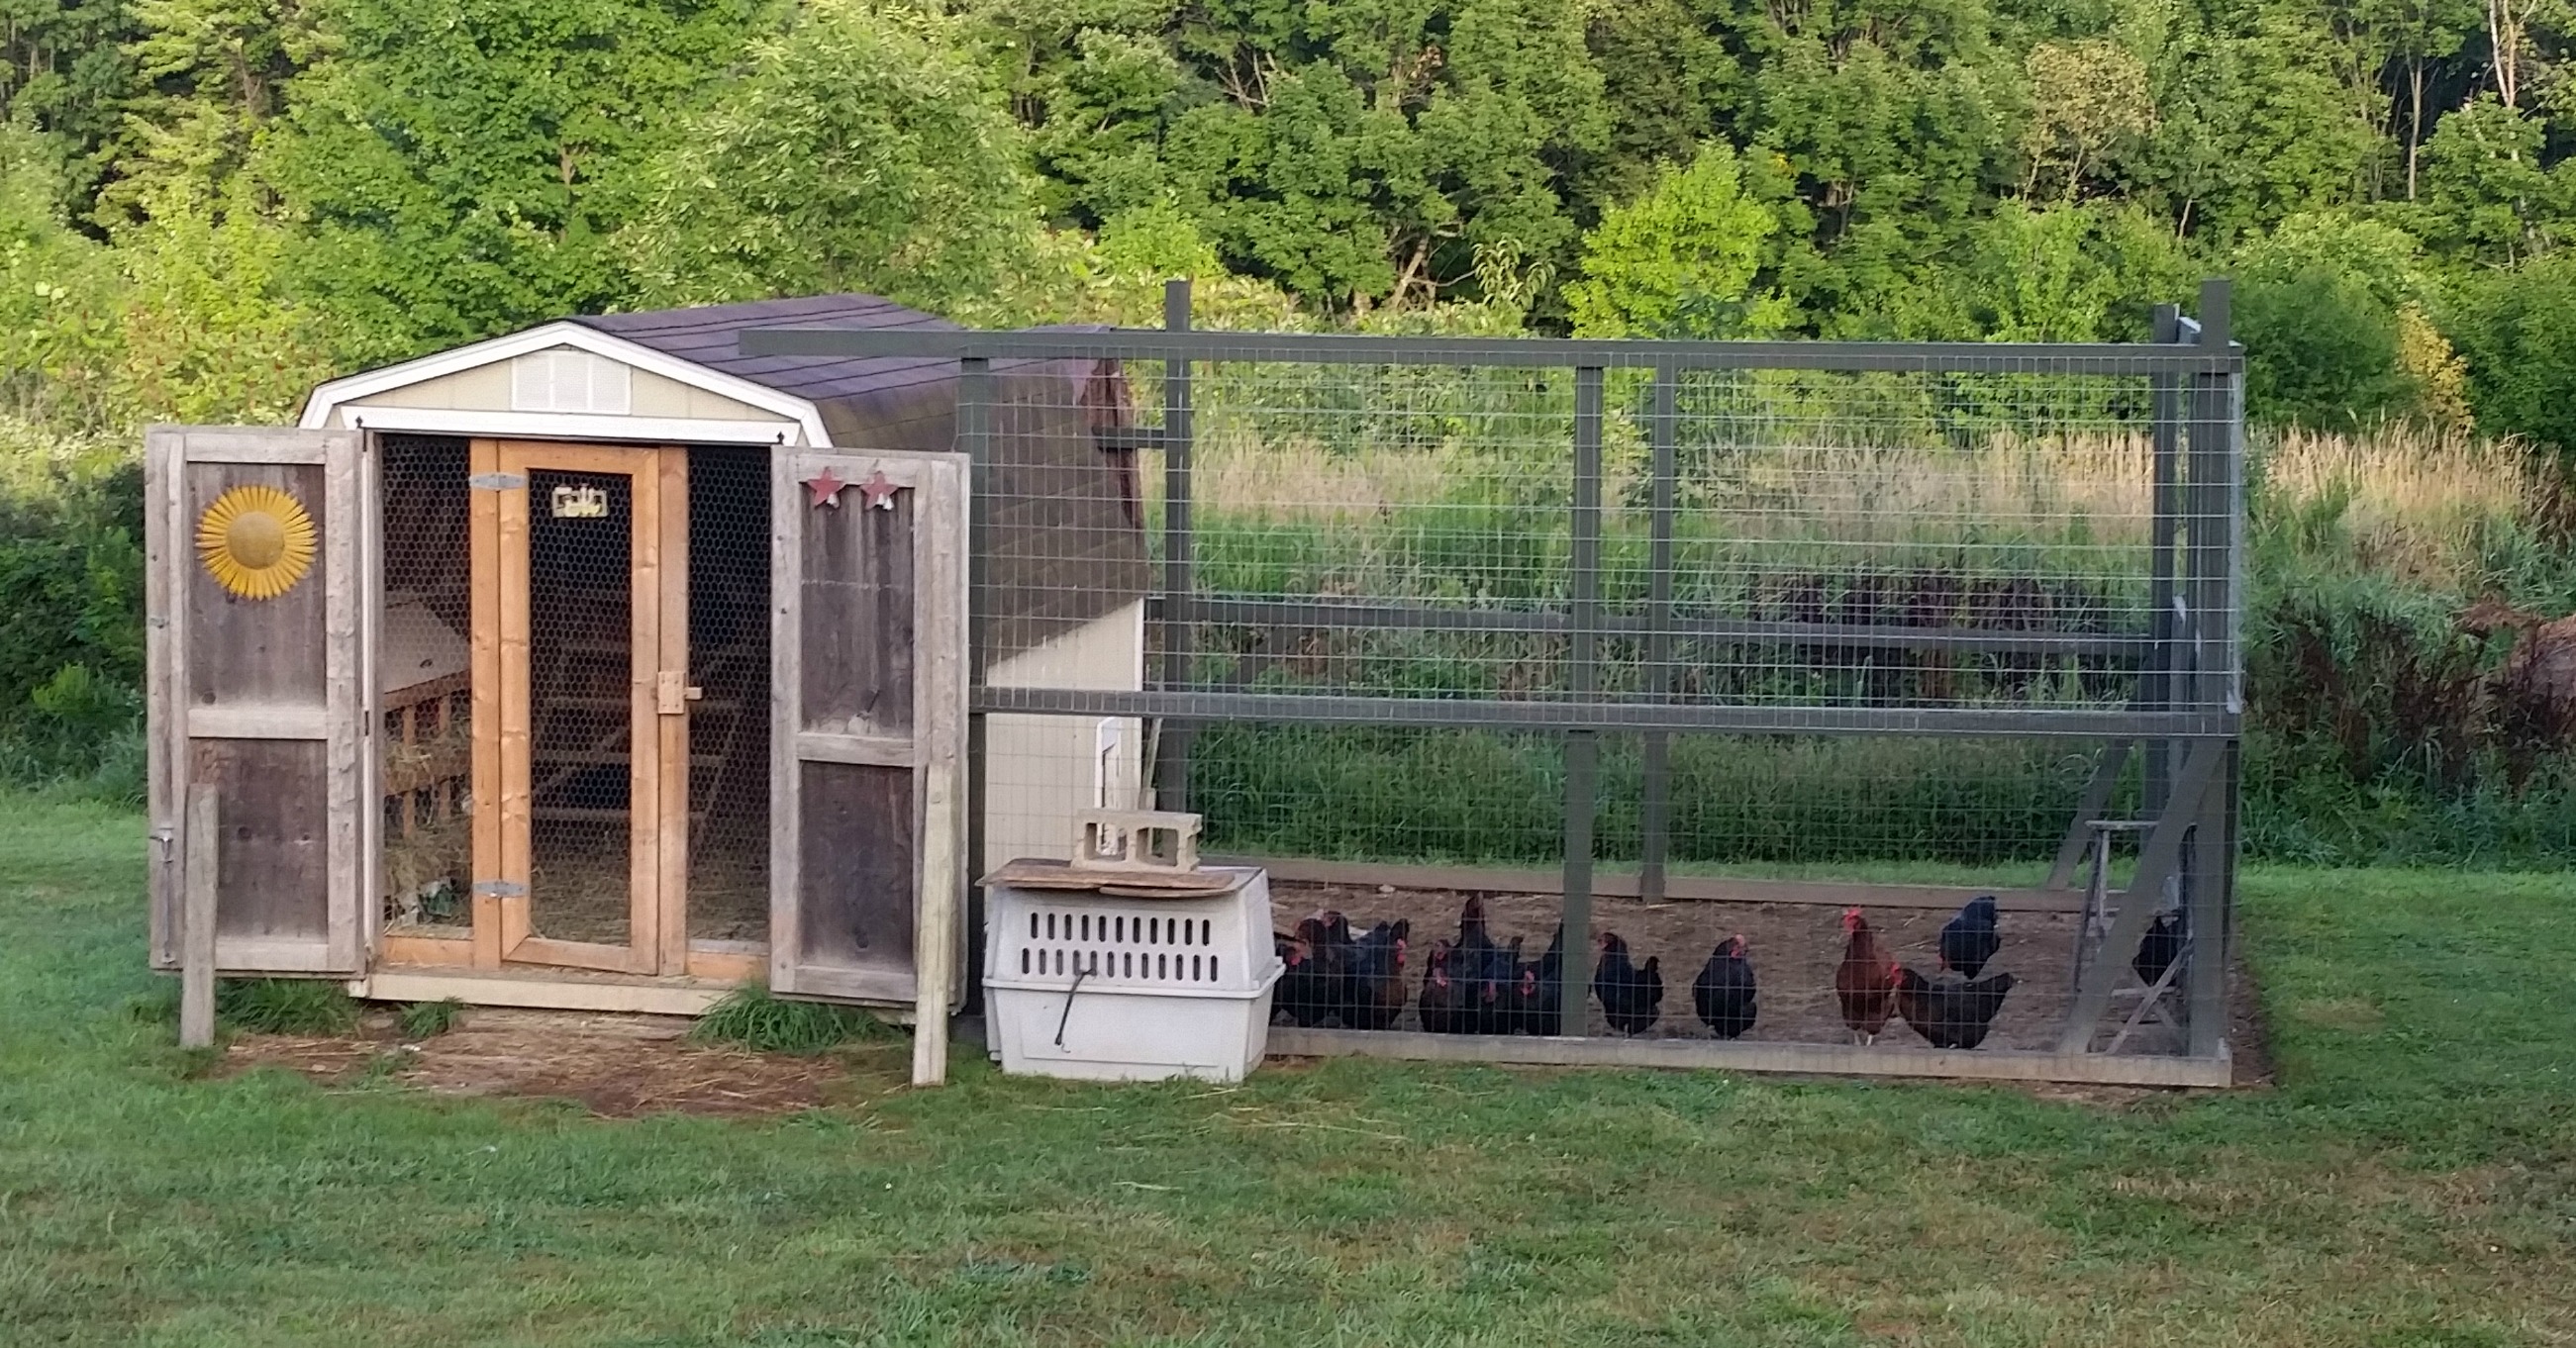
And here is the final product of our chicken coop shed.
Little did I know 8 years ago, when we bought this shed for our boy’s 4H projects that, it would someday be a chicken house for our hens. It’s funny how things evolve on a farm. 🙂
Why is it so important to have a strong, sturdy, and safe home for raising chickens? So, you know your animals are safe and protected from predators and the weather.
I hope you found this guide on converting a shed into a chicken coop helpful. Use it to create a safe and secure home to raise chickens in your own backyard.
Thank You So Much!!! This is just what I was looking for!! And hopefully soon will be able to start my flock!!
I am so glad this helped Karen, good luck. I hope you are able to get your chickens soon. 🙂
Tracy Lynn
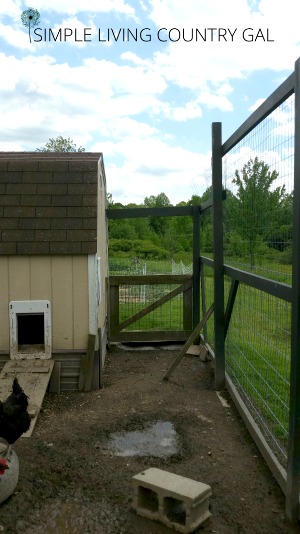
Awesome article. I can’t see but am assuming there is a door to the run?
Hi Roger,
Yes there is on the back side. I went out and got a picture this morning so you can see. It was raining so the coop is a bit of a mucky mess! It is a half door with fencing above it. We need to duck down to get in, but this keeps the birds from getting out.
Tracy Lynn
This is great. What are you doing for water. Or did I miss it?
Hi, Beth!
For right now we use a rubber dish for water. I simply have it up on a cinder block. One in the coop and one or two outside in the run if it’s really hot. We find it so much easier to use the dishes. Simple to change the water (just dump and refill) and easy to clean plus 1/3 the cost. I water all 50 of my chickens this way!
Tracy Lynn
We are moving to an acreage in the coming weeks and so excited to start our chicken adventures! I love the design of your coopand run-just a question. Inthe picture under number 5, it looks like the gate and chicken wire interior wall are set into the shed with the nesting boxes outside the gate. But in the end picture, it looks like the gate/wall are right at the shed entrance and the nesting boxes are now inside. Am I looking at it wrong? Any help is appreciated as we prepare to build ours again, I love your design. Thanks!
Hi, Tanya!
Wow, you are observant! Yes, we needed to expand the coop when we increased our flock so there are two different pictures. I found early on to have MORE room than suggested for your hens. Hen pecking can be a terrible thing to break in a flock so try not to give them a reason to start. Plenty of room to roost is also important.
Thanks for stopping by, I will get those pictures updated. 🙂
Tracy Lynn
Hi Tracy,
I had a question it does not look like the very top of the yard where the chickens are is not covered? Do you have any problems
with Hawks or Owls? I really like the way you have things set up inside of the coop and hanging the food and water makes sense.
Hi, Michelle,
We do not have the top covered, and luckily we do not have problems with owls and hawks. We are just lucky I think, since we do have quite a few here. I am sure having a rooster helps with this since he alerts us(and our poor neighbors) to anything that is out of the ordinary.
Hanging the food and water really helps to keep things clean too. 🙂
I hope this helps!
Tracy Lynn
Hi Tracy!
It looks like you live some place that is warm. I live in Ohio. Did you, or would you recommend doing something to keep them warm in the winter?
Thank you,
Holly
Hi, Holly!
Actually, I live in Northwestern Pennsylvania! The only thing I do to keep them warm is make sure they are able to get out of the elements, shovel them a dry patch each morning in their run, and make sure they always have fresh water and food. Chickens are pretty durable if they are healthy and given time to adapt to the cold and I have not found the need to do more for them. Now, if the temps get really cold like negative 20’s like we can get at times, I will bring in some hay and put it in the coop so they can snuggle down in if they need to.
Hope this helps!
Tracy Lynn
Do you ever close off access to the chicken run? Or are they free to go back and forth from the Coupe to the Run as they please?
Hi, Sara,
I close them off the run from dusk until dawn. During the day they have access to the full run. There are too many predators that could hurt/kill our chickens so we lock them up at night to keep them safe.
Hope that helps!
Tracy Lynn
Thank you for this article. We are thinking of doing this! Do you close the main solid shed doors at night? Thanks for sharing!
Hello, Jennifer!
Yes, I do close things up and night. We have weasels and other predators that it is important that the girls are safe while they are sleeping. Even though the run is enclosed we still do not give our hens access after dark.
Tracy Lynn
I was wondering if the chickens would go into the shed at night by themselves?
Yes, they do! They are drawn to safety and for them, that is the coop. But you will still need to closet them in, at least we do. Because we have quite a few raccoons that need to be kept out.
Hope this helps!
Tracy
Just found your site: LOVE this article! I can’t wait to explore more!
Hello there Rachael!
So glad you stopped by, hope you find some help and inspiration 🙂
Tracy Lynn
How many chickens does an average wood shed house?
A chicken requires between 2-3 square feet inside of a coop and 1 square foot each on a roost. Our shed is pretty large, 8 x 10 feet so we can house about 20 hens. If you free range your birds you can get away with a bit more since they tend to be inside so little.
I hope this helps!
Tracy Lynn
Hi there! This is a great setup. I was wondering how you deal with new chicks and older hens. Do you keep them separated until they are all the same size? I am trying to redesign our coop, which is about the same size as yours, to perhaps accommodate a separate area for chicks but can’t figure out a good design. Thanks for any suggestions!
Hello, Joanna,
I like to keep the chicks and hens separate until they are very close to the same size. I then add everyone at night. Just carry them out and put them on the roost. It’s almost funny how the chickens do not even realize that I added anyone new. They are silly!
Good Luck!
Tracy Lynn
Hi Tracy!
I just wanted to say I love your chicken coop. I’m in the process of designing one for my own Homestead. I’m in southern Ontario Canada and I think I’ve narrowed down my choice to having a flock of buff Brahma standard size chickens of 20 hens and one rooster. I want to house them all one them together so I guess what I’m asking is your coop design large enough for this size of group? I’ve really looked and studied your photos I think I want to give them a larger chicken run. I think they can handle our warmer winter days to go outside but they may need to stay inside coop on those really fridge cold days. Lots of questions and ideas lol any advice would be welcomed so I don’t make a terrible error? Thanks Sonya
Hello, Sonya!
My coop is 8 x 10 and I have 23 chickens inside. The rule of thumb is 2-3 square feet per chicken. I have a small run but it opens up into a large fenced in area of about 100 x 160. So they have plenty of room to run!
I like having the shed because there is lots of room for them and me when I go inside 🙂
I hope this helps a bit!
Tracy
Hi, thanks for the info in your article. I found it helpful. I was wondering how do you clean the inside of the coop? Is it a wooden shed? We’re thinking of using a shed as well but we aren’t sure how we would clean it if it’s wood. We’re pretty new at this and we want to learn as much as possible before getting the chickens. Thanks!
Cecilia L.
Hi,
I just use a shovel and a wheelbarrow to clean it out. That shed housed pigs for 8 years before we put chickens in and have never had to replace the floor. The key is to not let it stay wet. So I am continually adding bedding as needed, maybe a bucket of wood shavings 2 times a week just to keep it dryer, and that works just fine.
Then come spring, we use a large shovel and clean it all out, then sweep it hose it, let it dry and we are done. 🙂
You can read how we clean out the coop HERE.
Hope this helps!
Tracy Lynn
I put down cheap linoleum over my plywood & put my pine shavings on it.
Hi, Tracy! I LOVE your coop! I stumbled upon your post by accident through Pinterest and it was nearly exactly what I am planning on doing! My shed is an 8×12, but I am putting up a wall to separate a “feed room” as I saw you had in yours before expanding. I plan to start with 5-10 birds, so hopefully I won’t outgrow this space too soon!
I have a question for you, though. When I decided to convert the shed to a coop, some well-meaning chicken enthusiasts really emphasized the importance of having good ventilation and now I’m a little worried that my shed won’t be ventilated enough to keep my girls healthy! So, since your size and setup is so similar to what I will have, I am wondering if you have had any ventilation problems, or how much ventilation you have? My shed has a vent at the top on each end, and also two windows that can open (which will be covered in hardware cloth, of course!).
Thanks for sharing your wonderful setup! I can’t wait to have my own flock!
Jess
Hello, Jess!!
I am so glad you like our coop set up! I have two vents just like you said your shed has, but no windows and my hens have been fine for years. With the windows, you will be fine too!
Good luck, let me know when you get your chickens!
Tracy Lynn
Hi, Tracy! I’m so glad I stumbled onto this site. Your renovation is exactly what I am looking for to convert our shed into a chicken coop. I was wondering, though, if I should put up wooden walls inside of our 10 x 14 shed since it’s a metal shed? I’m leaning towards doing it just bc we also live in Pennsylvania and I’m thinking of it as extra insulation.
If you live in Pennsylvania, then I would put the plywood on. Unless you live on the Easter side where the weather is a bit more mild. Where we live, in Northwestern PA, winters are rough and since I do not have insulation I put hay/straw bales around the inside, to help just a bit to keep things warmer. Adding plywood will definitely help to keep things just a bit warmer than the metal. But the metal will be much easier to clean than the wood.
You will want to weigh all the factors before adding the wood.
Cost
Weather
Ease of use
Then make your call.
I hope this helps!
Tracy Lynn
Hi Tracy! I’m so glad I found this article! I just spend my entire day cleaning out and exterior room in my barn to house my chickens. I’m a first time chicken owner but work at a farm supply store that sells chickens for a few months out of each year. I consider myself knowledgeable about what they require care wise but boy is it difficult deciding how to set this coop up. Being in southern Vermont I worry about the cold as well as predatory animals especially because my barn is 150+ years old and there are a couple holes I found in the siding that I need to fix before my chicks move from their brooding tank into the coop. Do you have any suggestions on how to tell if the chicks are ready to be out of the brooder and in the coop?
Hi, Stephanie!
Welcome to chicken ownership, I am sure you have many days of fun ahead. I think chickens are funny and laugh at them (still) daily. 🙂
I like to keep chicks inside until I “feel” they are ready to be on their own. I know not the answer you want to hear but when it comes to safety it really doesn’t matter what their age is.
Just be sure your coop is secure, there is a roost so they can get up off the ground at night, you have secure and solid nesting boxes and enough of them, oh and there are enough water and feed options to deter bullying and you are good to go.
If the barn is close you can also put a cheap baby monitor out there so you are alerted to anything getting in (if you are truly worried).
I hope this helps!
Tracy Lynn
Great article and great questions from others. My first obstacle is moving the shed!! Thank you for all you posted
Hi Tracy! Thank you so much for sharing this! I am currently trying to find out if buying a coop or DIYing one is cheaper. I was wondering if you had an estimate of how much you spent on converting the shed?
Thanks,
Carolina
Hello, Caroline!
I believe we spent about $50 on wood and fencing. The rest we reused from what we had just lying around. Since then we have become much more resourceful and now spend even less when doing outdoor projects!
Hope this helps’
Tracy Lynn
We really like your design. We have a metal shed we are going to convert to a coop for our 8 chicks. I like the nesting boxes made from milk crates. I have about 30 right now ready to be used. For your nesting boxes, do you have access from the outside of the coop or do you go in and get the eggs?
Hello, Greg!
I go into the coop to collect my eggs since I need to do the feed, water, and scrape boards as well. I also like to take a look at my flock every day so I can catch anything that may be off early on.
I hope this helps!
Tracy Lynn
Hello! Thank you so much for taking the time to write this and respond to everyone’s questions! I too am considering converting my existing shed into the coop, and we are building the run. I’m trying to figure out your door situation, it looks like you added an additional door inside? Can you explain why? And is the new door covered in chicken wire? I’m a sponge for all the info right now
Thank you so much!
Hello, Shannon!!
Yes, that is a door we made, framed in with wood, and then covered in chicken wire. I used to store our chicken feed and bedding in that front area because our flock was small. As my lock grew I found I needed all the space I could get my hands on so we opened the inside up completely but still kept the door. That chicken wire wall/door allows me to open up the double doors and let that airflow in.
I hope that helps!
Tracy Lynn
Hi – my kids and I are raising chicks this spring. we lost hens2 yrs ago to an urban threat So we are converting a shed to try again. Question about your doggie door for night time: 1) it has a flap- how do you keep it open? 2) how do you secure it at night?
Thx!
Hello, Melynda!
It is a slide in doggie door. That way I can open it up in the morning and lock them in tight at night.
I hope this helps!
Tracy Lynn
We did this with our old shed. Concerting it into a chicken shed wired out very well for many years’.
Y our article was very helpful. I converted a metal lawn shed into a chicken coop. It has a cement floor covered with pine shaving and straw. There is a shelf and a roost. A ladder to get to the shelf. There are ventilation areas at peak of roof. I want to eventually put in window for light.and to let the heat out in hot weather. Still need to put in a poultry door for the birds. Put foam insulation around outside to stop water from getting in. Trying to line inside walls with cardboard and plywood. Could you tell me I need to do anything else to make it better for my chickens?
wow, you setup sounds amazing, Alanna!
Don’t forget nesting boxes for the amazing eggs!
also, a water source, food source, and maybe a toy or two just for fun.
Tracy Lynn
This is exactly what I need! I have an old wooden shed and didn’t know where to start. Thanks so much!