Cleaning Out The Chicken Coop Naturally and Safely
If you are looking for a more natural way to spring clean your chicken coop naturally, this guide will help. Get tips on what areas need to be cleaned, what tools to use, and how to fit it into your spring schedule.
When raising chickens a dust and mud-free home is important for a healthy flock. Be sure to grab the FREE Chicken Coop Recipe + Cleaning Guide Below!
With spring just around the corner, everyone and everything is just itching to get outside into the fresh air. And as the snow begins to melt, we start to see all the damage the winter months did to our homestead.
That usually means that our to-do lists begin to take on a life of their own beginning to resemble something out of a horror movie. If you have chickens, then I know at the top of your spring chore list every year, is cleaning out the chicken coop.
Hens and ducks do not do well in a coop that is dusty and dirty. A stuffy coop does not promote good egg layers and too much dust can cause issues with illness.
The more proactive you can be with your coop the healthier your flock will be giving you a good and steady supply of eggs.
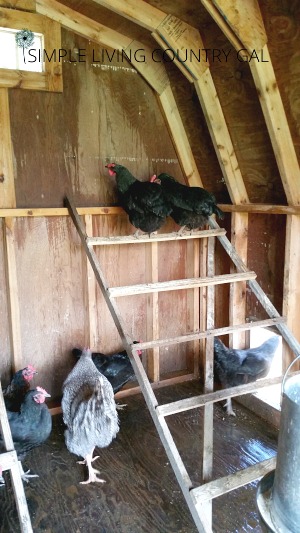
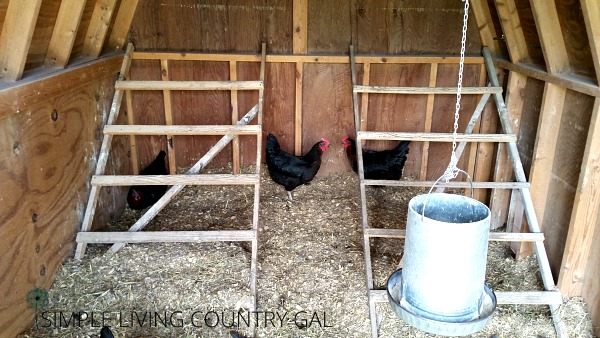
Where we live, the winters can be pretty brutal, to help keep our flock warm, we prefer to use the deep litter method from fall to early spring. We find this is a great way to house our hens when the temps are well below zero.
Unfortunately, this also gives us a pretty big clean-up chore come spring.
Now, if you have read my guide on the Deep Litter Method, you know that it has many advantages. Leaving all the bedding in the coop helps to insulate and keep the hens pretty warm even on the coldest of days.
The downfall when using the deep litter method is in the spring, you will have quite a bit of debris to remove from the inside of your chicken coop.
Why is it important to keep a chicken coop clean?
A clean coop will help you to have healthy chickens. Dust can cause severe respiratory illnesses, so the more you can keep the air clean the healthier your entire flock will be.
Another reason is cleaning out the coop will remove any pests or bugs that can cause problems for your hens. For this, you will need to do more than clean out the bedding you will also need to wash and sterilize a lot of the walls and surfaces.
Cleaning out the Chicken Coop
I prefer to do things naturally whenever I am able to and when cleaning out the coop you can do that, most of the time. However, there may be an issue that requires you to bring in chemical cleaners and we will go over that later in this article.
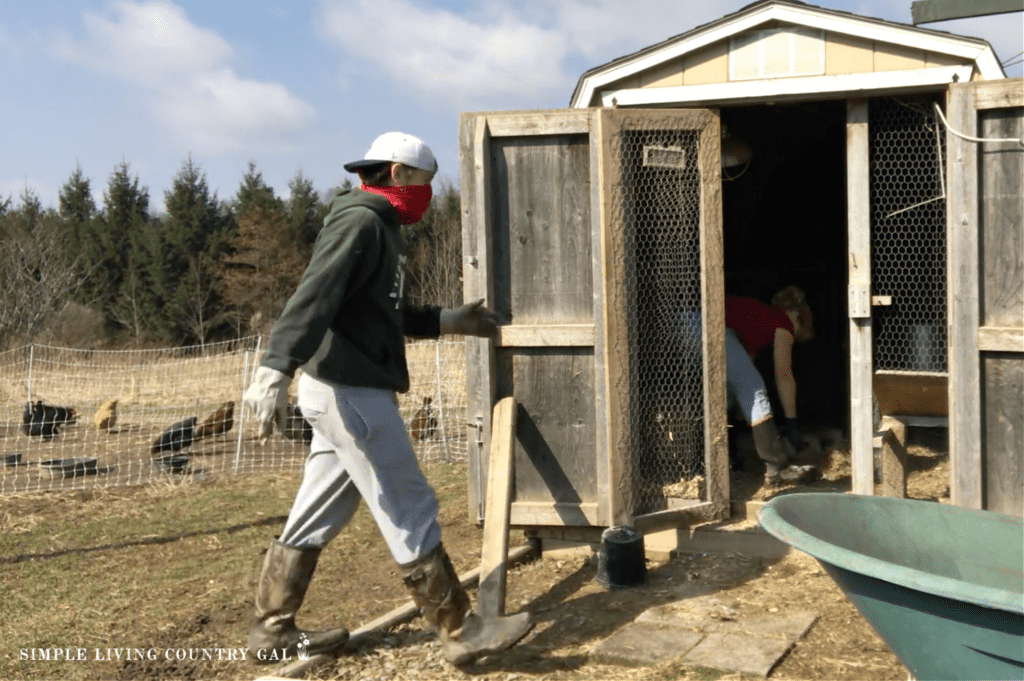
Step #1 Remove the chickens, rooster, and ducks
It is easier to clean a coop without your chickens inside. If you free-range your flock, you can usually do the cleaning without much interference. If you do not free-range, set up a temporary area for your chickens to stay while you are cleaning.
A tip to remember is to try to clean in the afternoon as this will give your hens time to lay their eggs before you send them out.
If you free-range, keeping some fresh feed and water near the coop usually helps to keep the chickens outside and away from shovels and rakes.
You don’t want anyone getting hurt and you will be amazed at just how curious those hens will be. They tend to snoop around getting underfoot risking injury to them and to us.
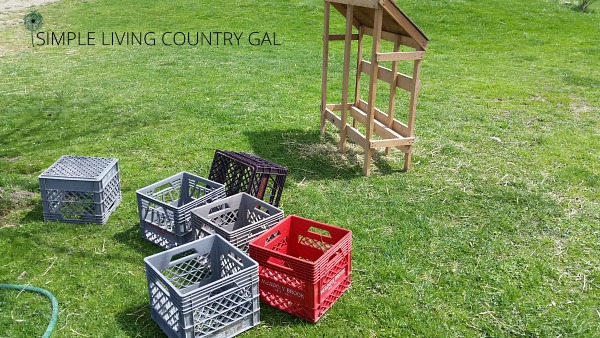
Step #2 Remove what you can from the chicken coop
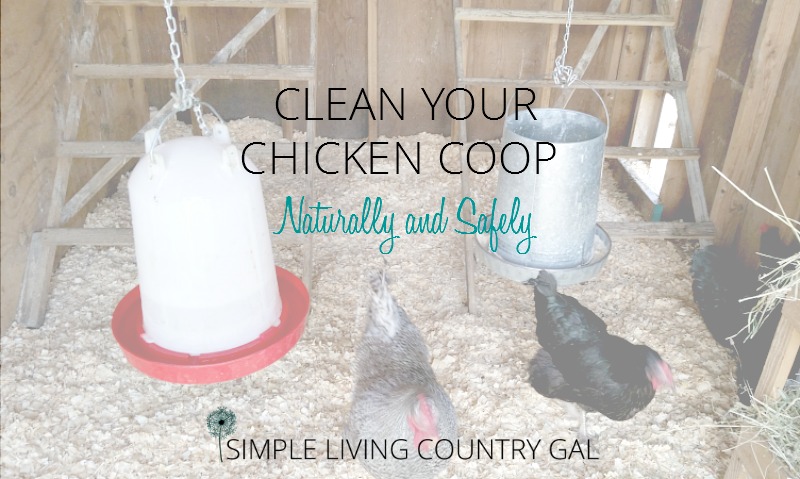
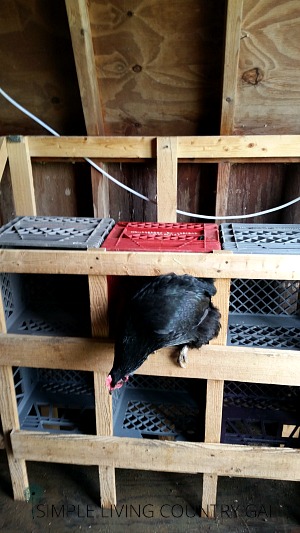
If it is not nailed down, you will want to take it outside when cleaning. This includes the feeder, waterer, toys, dust baths, and nesting boxes if you are able.
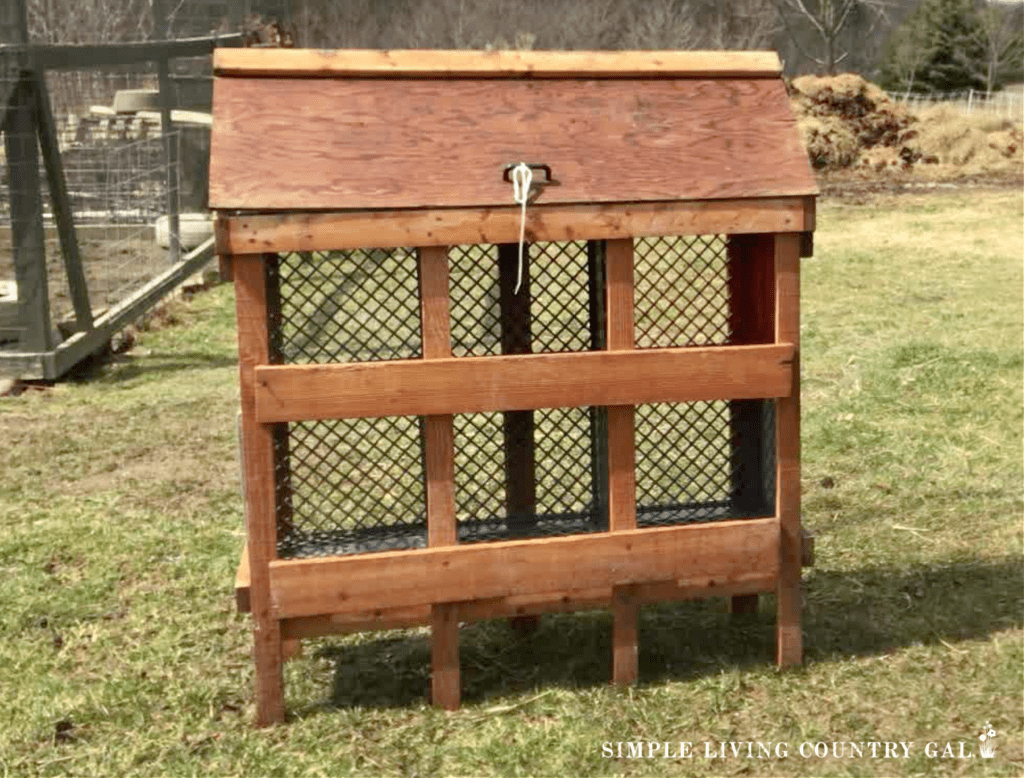
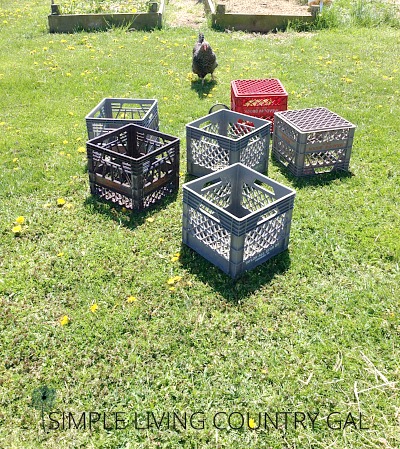
In our coop, we use a portable nesting box setup that we built about 8 years ago. They are very lightweight and easy to disassemble for cleaning. We built this setup using primarily scrap wood we had lying around our home.
Since we used hickory, it is lightweight enough that I can pick the entire thing up and carry it outside where it is easier to wash and dry.
How to Clean Nesting Boxes:
- Remove any loose debris.
- Use a paint scraper for any stuck on dirt.
- Rinse off excess dirt with a hose and nozzle.
- Scrub each nesting box and frame using a brush, soap, and water.
- Rinse thoroughly.
- Allow to dry in the sun.
Be sure to grab the FREE Chicken Coop Recipe + Cleaning Guide Below!
The sun is a great way to sterilize the chicken’s nesting boxes naturally.
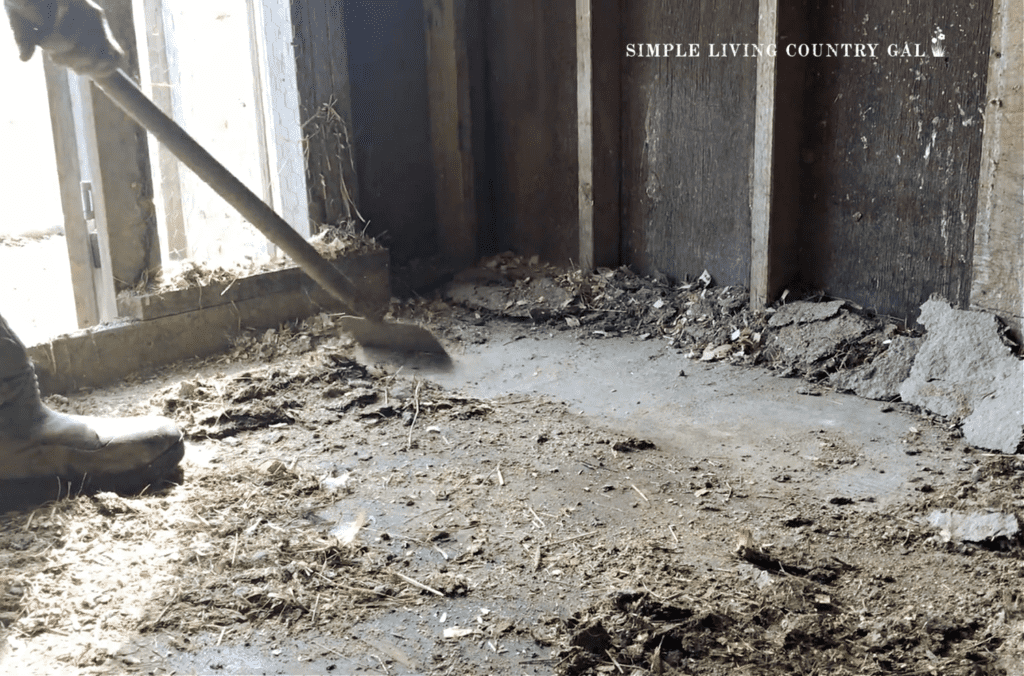
Step #3 Shovel out all the bedding
This is the back-breaking part and one I suggest you enlist help for. Use a good wide manure shovel and an easy-to-move wheelbarrow to keep things easier on your back and knees.
You may find a layer of compacted bedding that can not be removed with a shovel. I like to use a floor scraper for this job, and it does a good job without much strain on my back.
If your bedding is wet or is composted down, it can go directly into your garden until you are able to work it into the ground with a garden shovel or garden rototiller.
Our bedding never seems quite ready, so I put ours into our compost pile to sit in the hot sun. Usually, it is ready to use in a few weeks if the conditions are right.
READ: Backyard Garden Composting
SLCG Pro Tip: Never add chicken manure, or any manure for that matter, directly to your plants, or you will run the risk of burning your plants. Either add it to a compost bin or mix it well with soil, then add it to your plants.

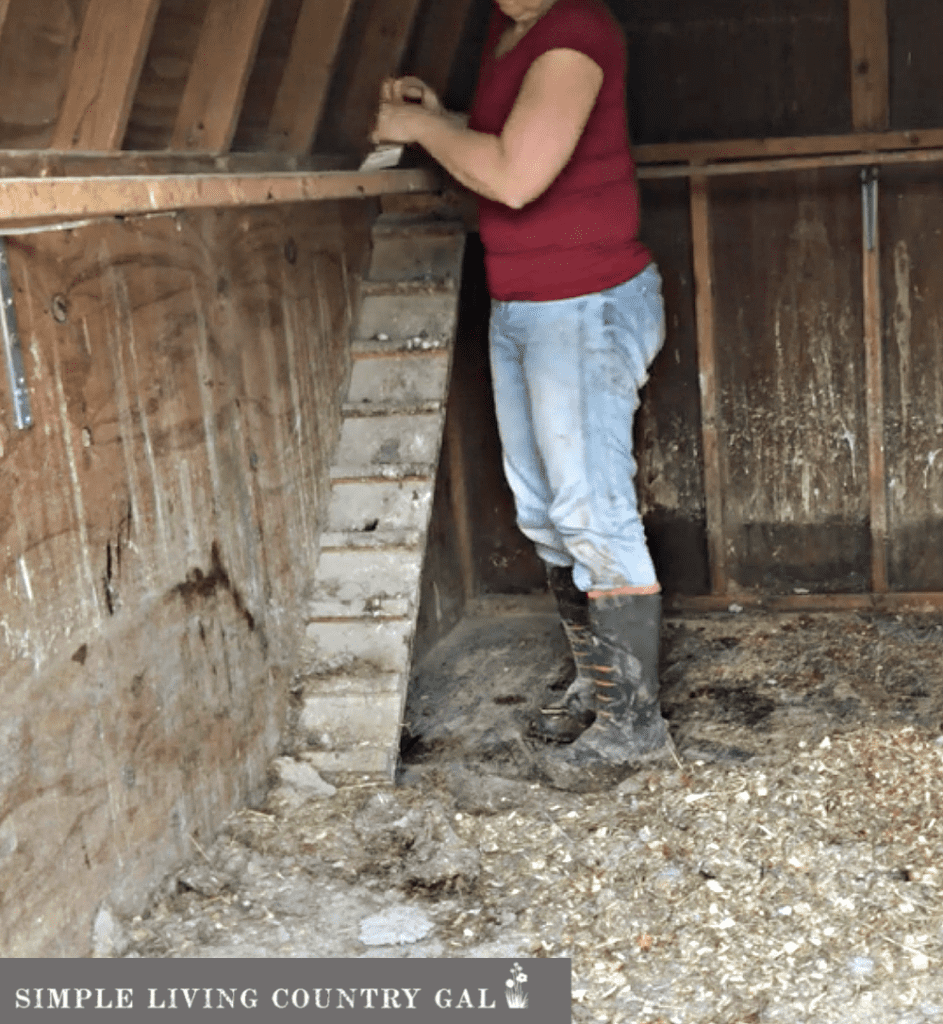
Step #4 Sweep out your chicken coop
You will be amazed at the amount of dust a chicken coop can hide in the corners, on the walls, and even in the vents. To dust out a coop, I find nothing works better than a good stiff, quality broom.
The easiest way to clean out the dust and mess is with a stiff handheld broom.
Sweep the entire coop out, starting high and working your way down low. This includes the walls, corners, floor, air vents, windows, and even the ceiling. Chickens create quite a bit of dust, so take the time to be thorough and remove as much as possible.
Remember to protect your lungs during this step by wearing breathing protection.
A few protection options are:
Step #5 Hose everything out
Once you have all the dust and dirt out of the hen house, you will want to hose everything down. A broom can only get so much, and I have found that a strong hose and nozzle can get what was missed along with what is hard to see.
Make sure to spray from top to bottom. Start with the ceiling, the corners, the vents, the floor, and the roost.
Use a stiff hand brush to remove what dirt is still remaining after.
How to Clean a Chicken Roost:
- Use a broom to brush any loose dirt or manure off.
- Use a paint scraper to get any that is remaining or caked on.
- Repeat with the brush and scraper until the roost is clean.
- Using soap and water, wash the roost getting all sides.
- Rinse thoroughly and allow to dry.
Step #6 Let it dry as long as possible
Drying can take quite a bit of time, depending on how big of a coop you have and how much water you used to clean it out.
The good news is, you might need a break, and that means you can put your feet up and catch your breath while things dry.
Since our coop is a converted shed, we drilled a few drainage holes in the floor to better help with the water that tends to pool up. This really speeds up the drying process.
If you have electricity in your coop a few box fans can help as well.
Step #7 Wash other items
Next up you will need to wash the items you removed from the coop. This will include any feeders, waterers, dust containers, and toys.
How to Clean Coop Equipment:
- Put any food or treats into a container.
- Remove any loose dirt and cobwebs.
- Scrape off any caked-on manure or debris.
- Wash with a stiff brush and soapy water.
- Rinse thoroughly.
- Allow to dry in the sun.
Once everything is cleaned and rinsed I will spray with our DIY Spray to naturally and safely disinfect.
Step #8 Disentfect and protect
Allow what you can to dry in the hot sun. The sun is a great way to dry as it will also disinfect your items naturally. Take advantage of mother nature and plan your coop cleaning chore on a sunny day.
To help protect your entire flock from pests, you can sprinkle a layer of food-grade Diatomaceous Earth, also known as DE. Be sure to only do this once the inside of your coop is completely dry. Also, were a mask to protect your lungs.
If you are unfamiliar with DE, you can read more HERE.
Diatomaceous Earth is fossilized remains of diatoms. Small pests such as fleas and lice hate the stuff. The crumbled mixture is sharp and “cuts” the pests causing them to leave. By putting a layer of DE in the coop it will get onto your chicken’s feet and feathers deterring pests from infesting your flock.
You can purchase food grade DE on Amazon, or locally at Tractor Supply or your feed store.
SLCG Pro Tip: When working with DE, be sure to wear protective gear over your face to avoid breathing in the dust.
Step #9 Add fresh bedding
Finally, you will want to add fresh bedding to the floor of your coop. This will help to absorb feces keeping your coop smelling fresh.
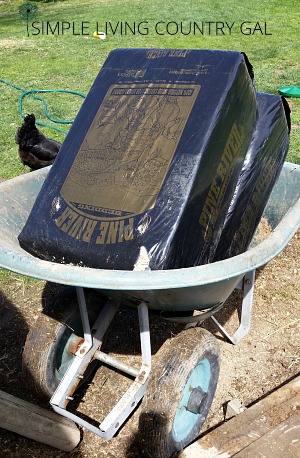
For our coop, I prefer to use pine shavings for our bedding because the pieces are larger than normal sawdust. I have tried sawdust before and even sand, but I have found both to be very difficult to keep clean and harder to clean the coop out at the end of the season as well.
SLCG Pro Tip: If you have a bad back as I do, it is important to remember that sand is heavy. I find the wood shavings are lighter and allow me to clean out our coop without much assistance.
Since wood shavings are larger, they do not make as much dust as sawdust does. Shavings are also still effective at absorbing liquid waste keeping things relatively dry.
We are able to purchase wood shavings from our local feed mill at about $9 for a 3.25 cubic foot compressed bag. Yes, a little pricey, but one or two bags will usually get me through the entire summer season.
Step #10 Put everything back
A small tip here, if you decide to rearrange your coop be prepared for a bit of chaos at first.
Chickens are a creature of habit, so when I rearranged the layout last year, it took a flock a few days to figure out where to lay their eggs. For the first few mornings I would find eggs scattered about the floor of our coop until, eventually, they realized where the nesting boxes had gone to.
Also, it took a little longer for them to find their water. This is important to keep in mind, especially if it is hot.
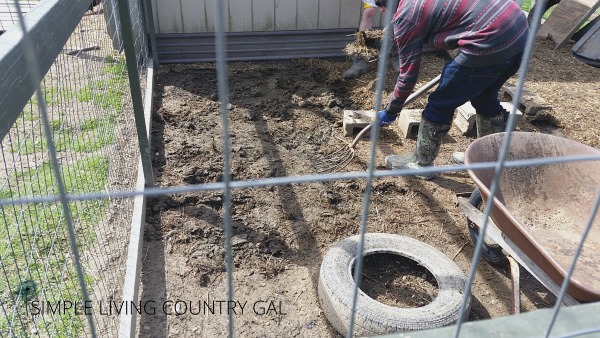
Step #11 clean out the chicken run
With our coop setup, we also have an outside run. Cleaning a run is a pretty big job and one I usually ask for help on from my boys. Since the soil outside can get compacted down over the winter, it can be quite difficult for me to remove it.
My boys will usually help me out with this project as my Mother’s Day gift. A great way to get a project done and enjoy my family at the same time!
How to Clean Out Your Chicken Run:
- Rake up loose leaves, hay, straw, or rocks left over from winter.
- Go in with a sturdy shovel and pitchfork to get the outer compacted layer. After a long winter, this layer can be quite thick.
- You may have to dig down quite a bit to ensure you are in fresh soil.
- This is important because things are usually so compacted down that drainage is nearly impossible. One heavy spring rain can cause a huge mess in minutes.
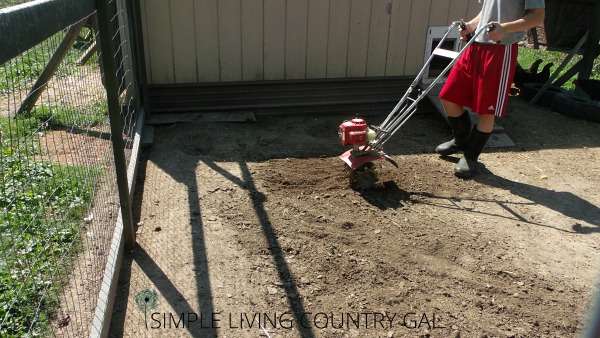
- Once that is done, you can then go in with a rototiller to loosen things up even more.
- This step also helps give the chickens a soft top layer to scratch on.
SLCG Pro Tip: If you find that you are removing more soil than you are comfortable with you may want to add some fresh topsoil. We like to do this every third year. The fresh soil helps to keep the coop in good condition and provides a healthy environment for the chickens.
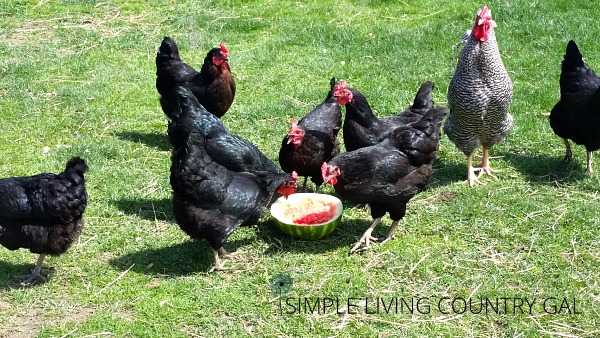
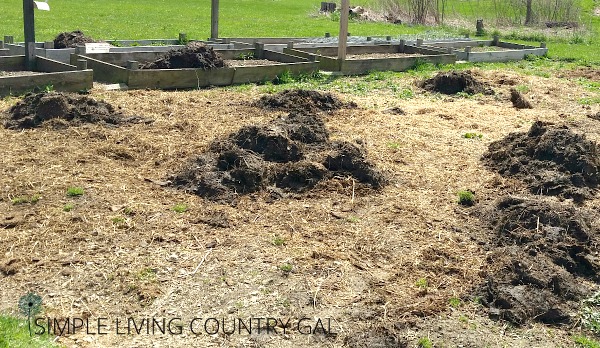
The best part of cleaning the coop and run is all the wonderful compost you will now have to use around your home.
Where to Use Compost:
- Around your flowers – add a few handfuls around the base of your plants and work into the ground with gloved hands near the roots.
- In your garden – dump in piles and work in with a shovel working the compost into the soil.
- My favorite way – dump in piles and let your chickens loose to work the compost in for you. This is our preferred way and one our chickens also look forward to.
More Chicken/Garden Resources:
I cannot tell you how wonderful my harvest has been since I started adding compost to my soil.
Remember never to add fresh chicken manure directly to your plants as it can burn or damage them. Allow the manure to rest before adding it to ensure your plants are safe.
It is best to allow the manure to sit in your compost bin for around 90 days before adding it to young plants in a garden.
Step #12 Clean and replace the dustbins
Chickens love to keep their feathers clean, and they do this by taking a dust bath. A dust bath is an area of loose ground and other additives that encourage your chickens to keep their feathers clean and free of parasites.
This can be an area in your chicken run or a container that you have inside or outside of your coop.
Dust baths should be cleaned regularly to ensure your chickens are using clean materials for bathing in.
How to Clean A Dust Bath:
- Empty out the dust bath mixture.
- Clean the container using soapy water and a brush.
- Rinse thoroughly.
- Allow to dry and disinfect in the sun.
- Refill with fresh ingredients.
Read: Chicken Dust Bath Recipe
If you keep your dust baths outside in the run, you may want to have a cover for the container. This will help to keep the materials inside dry from dew or rain.
READ: DIY DUST BATHS FOR YOUR CHICKENS
Step #13 Let the chickens back inside
The fun part of this project is letting your flock into the cleaned coop and run. They just love to explore and chatter up about how clean and tidy everything is.
It is really quite comical to watch actually. Nothing like a reward for all your hard work.
Being proactive in your livestock’s health is so much easier than waiting for sickness to hit and then rushing to treating it.
Nothing promotes health more than a clean environment for living, eating, and laying. Fresh housing means healthy chickens. Healthy chickens mean large and plentiful eggs.
MY TOP PICKS FOR CLEANING OUT THE CHICKEN COOP
Now that you have a guide for cleaning out the chicken coop and run, you have a game plan that you can follow each spring. Start the summer off on a clean and healthy foot and watch your chickens flourish all summer long.

We live on a military base now, so we can’t have a chicken coop but when my husband retires, it’s a dream of mine to buy a house where we can! Saving this for the future 🙂
I hope you are able to get your chickens some day Ashli! They definitely make life so much fun here. 🙂
Thanks for stopping by,
Tracy Lynn
Why do you till the run? Do you put a layer of something over the top? It was quite warm early in the year so I tossed my deep layer straw in the run. Glad I did as it’s been raining since but now it’s very smelly. Want to remove but do I replace it? They seemed to enjoy scratching thru it. Suggestions?
Hi, Angel,
Where I live it is very rainy in the spring. If I leave the bedding in there during the rainy season, that water gets trapped in the bedding and never really drains. The bedding then rots rather than composts and the smell is just awful. If I remove the bedding each spring this helps the draining tremendously.
The reason I till up the ground after I remove the top crusty layer is the ground tends to get very compacted down over the winter. If I till it up this not only loosens the ground so it is easier to scratch through but pulls up worms and bugs that my gals love to eat. If that ground remains compacted the water just runs over it and pools up rather than drains down through. Till also helps by keeping the ground healthy for the chickens.
Hope this helps!
Tracy Lynn
I have tired to have chic 2 years ago but, not knowing much I ordered a coop and boy, what a mistake all that was. I was clueless – now, after two years I am ready to try again! I have a shed that I will make into a coop and space I cleared for a run.
We have baby chics now (only 6 for now) that are currently 14 days old and getting cuter by the day My husband said I’m feeding the raccoons again. This time I will excel at this since I’m home all the time now.
Hello, Tralyn!
I am so excited you are giving chicken raising another try. If you have any questions at all just let me know. I hope you were able to read through all my posts. I have some great tips and tricks when it comes to raising chickens that may be helpful.
Tracy Lynn
We have 10 chickens for egg laying. This is our first spring with them; this time last year they were just babies! We have an indoor section with a couple boxes for eggs, their food/water and a few posts to rest on. There’s a section in the back that we can open up and I want to put their food/water in there because I think it’ll give them more room. Our outside pen is also just dirt and is severely compacted right now and doesn’t dry the best so it smells. I thought about putting sod down; should we keep it dirt? The inside also has dirt and I wanna change that too. We also need to setup dust baths for them. We bought the house from my husband’s cousin so the coop is how they used it. I’m an animal lover and these girls are hilarious! I want to make sure their environment is the best it can be.
Hello, Ashlee.
Yes, it is a bit tricky when you have all dirt in your run, however, if you keep I have a spade that I take out with me for morning chores and dig up a couple sections of the pen for them to scratch in. It takes just a few minutes and the girls do enjoy digging into the fresh ground. You can put the sod in, but it will only last just a short time. Depending on how big your run is, 10 chickens can tear that sod apart in short time. So take that as just a heads up.
I would definitely get the dust baths in, your gals will love it. Until you get a chance breaking up your run with a rake or shovel will give them some loose ground to dust bathe in. If you have not read it yet, I have a post on how to set up dust baths that you can check out here.
Good luck!
Newly here. I need to clean my run, is it ok to use sand for the run? I only have three top hats.
Hi, William.
I know other’s that have used sand with much success. I, however, am not a fan. I just don’t like how the sand works. It gets wet quickly, takes forever to dry out and it is heavy. Especially when cleaning it out. I would much rather use wood shavings that can be purchased at your my local feed store or even Amazon. It doesn’t take much for a small coop and it really keeps things clean.
If you do decide to use sand make sure you get contractors grade. It is not nearly as fine as sand box sand and does a bit better in the coop.
Tracy Lynn
Thanks for your post. It looks as though you have a wood floor in your coop… yes? We have a raised coop and I tried deep litter two years ago. I found it was really dusty and wound up being stinky as well. I heard that if you don’t have the bacteria in the dirt helping things along, it (DL) doesn’t really work. So last year I started just removing the poop in the morning and throwing on the compost pile. We only had 4 hens at that point, so it really wasn’t much work. Now we have 5 chicks so we made a much bigger (still raised) coop and I am wondering if I should rethink the deep litter method. Thoughts?
Hi Michelle,
Are you using saw dust or wood chips? I have found that the wood chips really cuts down on the dust. Yes I do have a wood floor which does help quite a bit. Whenever things got too stinky that is when I would toss another layer of wood chips down. It is really amazing how that one step removed most of the odor. I have over 2 dozen hens so cleaning our coop out daily is just not an option. I usually clean it out in April, July, September each year and I have not ever had a problem with worms or other ailments. With all our animals I have a rather large compost pile. 🙂 I keep things sorted by year. So I know when it’s time to get the garden set up to use the oldest pile first. That ground is simply amazing! When it has had time to sit it really turns into the perfect compost that is a wonderful addition to my garden.
Hope this helps!
Tracy Lynn
Thanks for the post! I have a dirt run, too, but the trouble I’m having is keeping the dust down when it is dry out. It blows from the run onto m6 porch and covers everything in black dirt (probably with a healthy dose of dried poo!). Do you have any advice or ideas? So far all I can think of is planting some sort of living screen, but if I plant anything thick enough to block the dust, I can’t see my girls and am probably creating a hiding spot for predators. Thank you!
Hi, Kate!
If you are having a problem with dust in your run you can add something to it to help. Contractor’s sand (do not use sandbox sand it is too fine), mulch, old leaves, or even grass clippings. You can just toss it in the run in small piles and let the chickens scratch it around to spread it. That should help with the dust and keep things a bit cleaner for you. I love the idea of the living screen, but I do think it is more important to keep a clear line of site to your gals so you do not have to go out and check them as often. I am doing a living trellace and will be writing a post on it very soon. That may be another option for you as well. Hope this helps!
Tracy Lynn
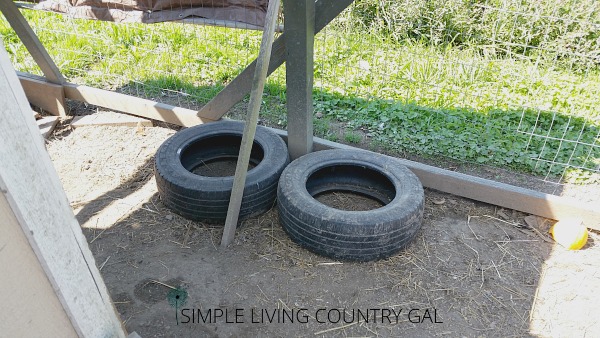
What purpose do the tires serve in the coop? Just interested to see if it’s something I should do
Emily
Hi, Emily,
The tires are for dust baths for the chickens. I have tried different setups and this by far works the best. They still take a dust bath in the loose dirt of coop, but the tires just provide a more contained space where I am able to add things like wood ash, DE, and sand to make it more beneficial. You can see how I do it in my post, How to build a dust bath for your chicken.
Hope this helps!
Tracy Lynn
I used to have a turtle sandbox w/lid that I would cover up when it rained. Now…new home, new husband, new coop (in process) & new birds. Just might find another Turtle sandbox. I’ll drill holes in it this time!
I have never owned chickens and would love know how often do you do this?
Hi, Bridget!
I clean my coop every spring and fall this way. I may have to do another clean out if something comes up, but more often than not where we live twice a year is good. Now, this will depend on a few things for you.
1. Where you live. If you live in a wet area, then your hens will track in “wet” more often.
2. If you have more hens than room, they will mess things up inside much quicker.
So, I use this rule of thumb. If it smells I either add more bedding or clean it out completely if too much bedding has already piled up.
Hope this helps!
Tracy Lynn
We have has chickens for about 7 years and the ground in the run was always fine. This year we have had so much rain and it is so boggy and squishy and smelly I do t know what to do! We put some wood chips down but it it didn’t help. The mushy stinky area is mainly in the center. HELP!!
Hello Tracy!
We ran into this same exact problem a few years ago and yes our run was a complete mess. Nothing was going to remedy the problem other than a week of sunshine. To get us through I put in a path of cinderblocks. This way the chickens could still get out in the fresh air, yet say out of the mucky mud if they wished too. This worked so well that the eggs and coop stayed much cleaner once I put the cinderblock path in.
Sorry, you have such a mess on your hands, one of the joys of homesteading is being at the will of Mother Nature…grrrr.
Tracy Lynn
Oh my gosh Hello!
I’ve just discovered you … And happy that I have. I am a new homesteader, my husband and I moved on to 5 acres in Central Oregon 3 years ago… Last summer I got my 4 ducks and my 3 chickens… And this Fall I purchased two 4 month old dwarf Nigerian goats! I am brand spanking new to all of this!!
I would love to see a picture of your chicken coop and run we threw ours up quickly and plan on revamping this late spring…. I also will be picking your brain about training my goats but for now I’ve got to get outside and take care of my critters
Hello, Sara!
Welcome, I am so excited you have started your homesteading journey. I have a video tour I did a few weeks ago of our coop, you see it in this post here. How to keep Chickens Warm in the Winter.
Taking care of chickens is hard work, but I love chickens that give me joy when raising chickens. Thank you for sharing some of the things that worked for you.
Everytime I try to churn up the ground of my run, the smell is horrendous for a day or two! Part of it is covered so it doesn’t get a whole lot of direct sun. I always feel that it can’t be real healthy for my chickens so I don’t do it as often as I feel it should be done. It’s a large run (10×30) that is shared by my 3 ducks (I have 17 chickens). Also, this winter has been so wet (NW PA) it’s been a big mucky bog. Any suggestions? I do put straw down from the coop when I change it out. Any advice would be appreciated!
Hello, Diane!
Yes, it is an absolute mess here too. When it gets really I will actually put cinderblocks in for them to walk on and even a few logs as well. I just want them to have a dry spot to get too.
In the spring I remove the top layer of our outside run and put that goodness right in my garden. Yes, that means my run is depleted a bit and every year or so I will need to add fresh soil to keep it from becoming a pond.
I hope that helps!
Come-on spring!!
Tracy Lynn
My name is also Tracy Lynn,
Just found your info. Im looking at buying a 4X6 metal shed. Thinking this would be best for washing it out. I plan on putting a chicken coop door in the front that goes into my large run, This shed is vented. Do you think I would need to put in windows? I also worry if it would be warm enough?
Thanks, Love your site!
Hello, Tracy!
I only have a vent in my shed and the chickens do just fine. With that being said, if the weather is mild I always have the main doors open to really increase the airflow. That is why I have chicken wire and a second door to allow me to do that without exposing the chickens to critters coming in and doing harm.
A metal shed does not give much protection in the very cold. Do you live in a snow area? If you do you may want to add boards inside to give a bit more insulation.
I hope this helps!@
Tracy Lynn