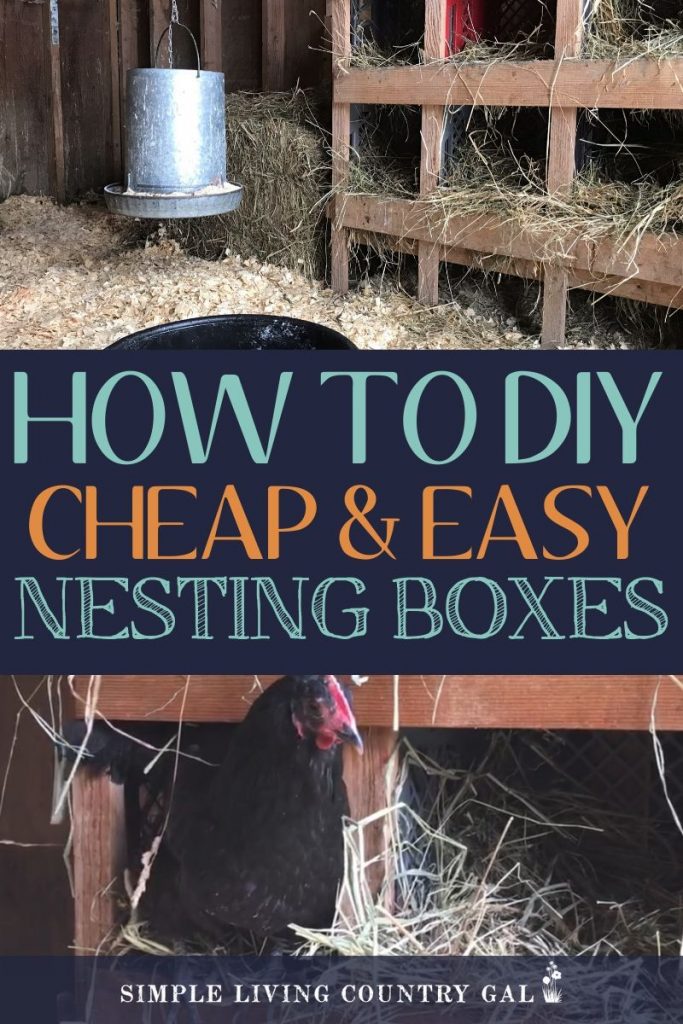
Building Milk Crate Chicken Nesting Boxes
A super simple DIY that will walk you through how to build milk crate nesting boxes for your backyard chickens. A project you can build using tools you might just have around your homestead and begin using today.
Before getting started raising chickens be sure you know all the parts of a safe chicken coop.
If you are brand new to raising chickens you may not realize all the things you need to have ready to go before you bring chicks home. Nesting boxes are not needed right in the beginning but getting them ready before your gals start laying will save you headaches later on.
What are chicken nesting boxes?
Nesting boxes, also known as chicken egg laying boxes, are contained areas where hens, AKA female chickens, can lay their eggs. Most chickens prefer to lay their eggs in a protected area and that is what these boxes are.
Be sure to grab the FREE Chicken Nesting Boxes Checklist below!
Nesting boxes also do a good job of keeping eggs warm, dry, and safe until we are able to go out to the coop and collect them.
Nesting box design can range from fancy to practical and the style you choose is up to you. Use this checklist to help narrow down the best choice.
- Does it have enough room for your hens to lay?
- Is it easy for them to get in and out of?
- Are there enough boxes for the size of your flock?
- Will it keep the eggs protected?
- Is it easy to clean?
Get our chicken coop layout plan here, and grab the FREE Nesting boxes checklist below!
What Materials Can you Use for Your DIY Nesting Boxes?
You can use just about anything to make your chicken nesting boxes. Wood, plastic, and even metal. I have seen buckets, totes, wood boxes, and kitty litter containers, and each one of these options works amazingly well.
The trick is to find something sturdy, a setup that is easy to clean so you can do it without needing help, a layout that is easy for the hens to get in and out of, and something that is durable so it will last the beating your flock will naturally give it.
When we first started raising chickens, we had a small coop with just a few nesting boxes for our hens. And for a while, that was fine, after just one year I quickly learned just how much I loved having those chickens and soon we had doubled the size of our flock.
If you are currently raising chickens, then I am sure you understand.
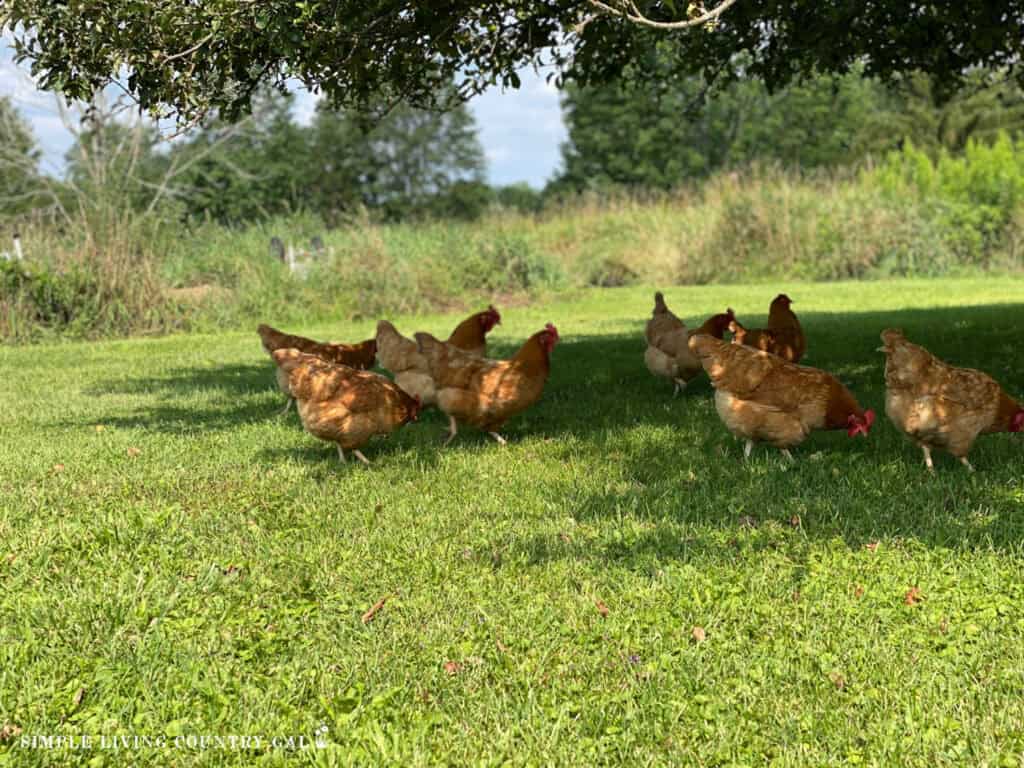
Once we doubled the number of hens, we realized we needed a bigger chicken coop—one that would have enough room both inside and out for the size of the flock we had grown to. Instead of buying a new and expensive prebuilt option we took a look at what outbuildings we had on our property.
What we found was an old shed, one we housed pigs in for eight years and we decided to move it and convert it into the chicken coop we have today.
Read HOW TO CONVERT A SHED INTO A CHICKEN COOP to see how we did that.
SLCG PRO TIP: Take your time on this step. If you do not have a henhouse now, or maybe the one you have is just not a good match for your chickens, take the time to make it right. Our animals depend on us to keep them fed, healthy, and above all, safe.
Whether that be safe from predators or safe from inclement weather. Work from day one to create a home for your livestock and animals that will do just that.
What do you need inside of a good chicken coop?
The main things you will need inside of your chicken coop are Chicken roosts, nesting boxes, a feeder and waterer, ventilation, and a sturdy chicken run that will protect your flock from any predators.

When setting up your coop, you will want to be sure you have enough room for each area that will safely accommodate your flock.
A crowded coop can cause stress in a flock and that can lead to issues. Anytime you are short on room, whether that be for housing, eating, nesting, or even drinking, you run the risk of henpecking within your flock.
How many milk crate nesting boxes do you need for a flock of chickens?
A good rule of thumb here is to have one nesting box for every 4 to 5 chickens in your flock. If you have a flock of 20 hens, you will need about five nesting boxes. This will give enough options for multiple hens to lay at once. If you do not have enough room, you risk chickens fighting for space and those precious eggs getting broken.
DIY Milk Crate Nesting Boxes
Before I began building our own nesting boxes, I wanted to do some research to see what options were out there. I did my research on Pinterest and found quite a few unique ideas, but there weren’t any options to help me utilize the supplies I already had.
I finally saw a set of chicken nesting boxes that used plastic crates that resembled milk crates from my childhood.
I showed the pictures to Hubby, and since I had quite a few of those empty milk crates lying around, we decided that was the best option.
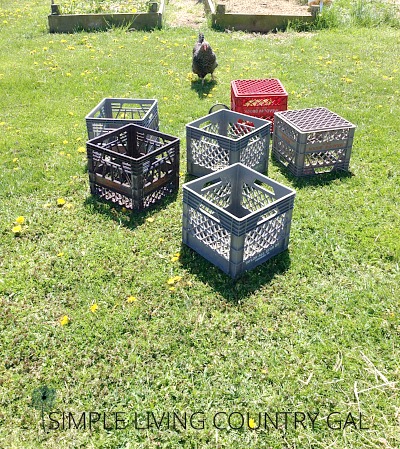
Step #1. Decide on the Number Needed
Remember, a good rule of thumb is one nesting box for every 4 to 5 hens. Since we had 25 hens, we chose to use 6 crates—more than what is suggested, but it is easier to build this design with an even number of crates.
If you are new to chickens, there is one rule to keep in mind. Whatever number of chickens you start out with, plan on doubling that before you are done. Build for the size you plan to have in a year or two so you are not forced to redo projects later. I think just about every new chicken owner learns this lesson firsthand.

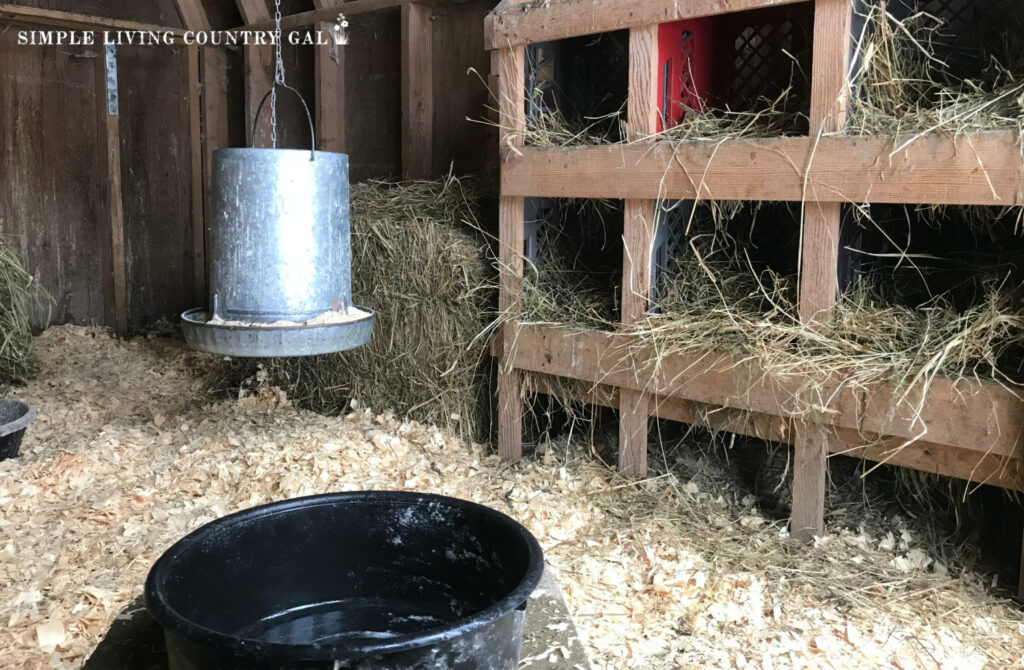
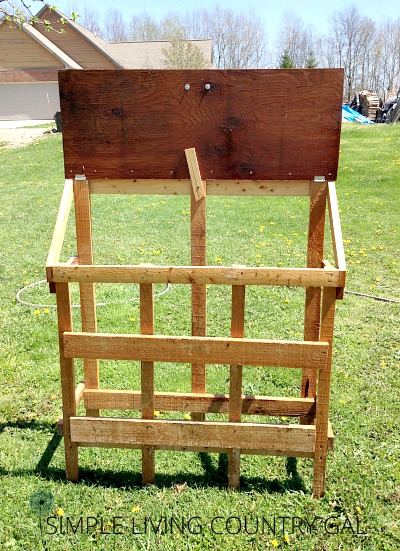
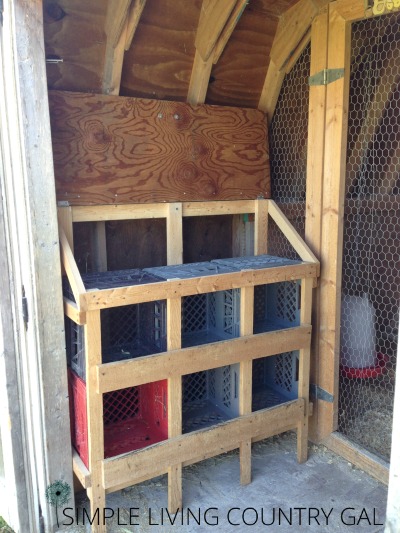
Step #2. Build a Frame
Before hitting the stores to purchase wood, take a look around your property and see if you have any supplies you can use. You will need to construct a wooden frame to hold the milk crates that will keep the crates from moving as the chickens go in and out to lay their eggs.
Most homesteaders have at least one pile of scrap wood that you can use and this is true for us as well.
We had a large pile of scrap hemlock left from a barn addition we had just completed. Hemlock is great for a project like this because it is very lightweight, making this setup easy to carry out of the coop when I need to clean it.
Use the dimensions of the individual crates to build the frame. Your goal is to have a setup where crates sit on top of each other in the framework. This will make it easier to slide them out when cleaning them and keep things sturdy.
Chickens are a bit clumsy and eggs can easily topple out of a nesting box as they leave. To help prevent eggs from breaking place a board in your frame that will sit in front of each box. Just a small “lip” of sorts so the eggs stay put as the chickens leave the box.
We used the boards in the front of our framework so they would double as the lip we needed to keep our eggs inside of each box while adding additional support to the structure.
SLCG PRO TIP: Chickens will often prefer one nesting box over another, and that box will change every week or so. Don’t be surprised if your chickens all lay their eggs in one box, ignoring the other boxes.
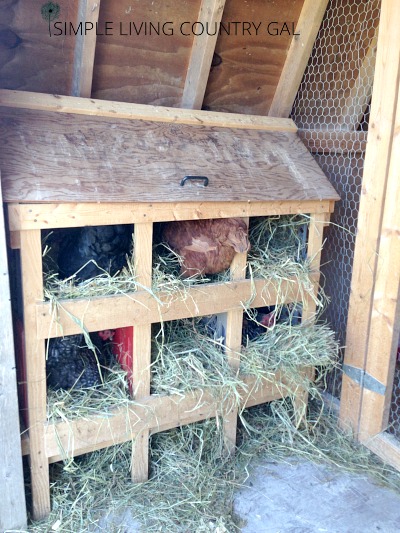
Step #3. Make it Easy to Clean
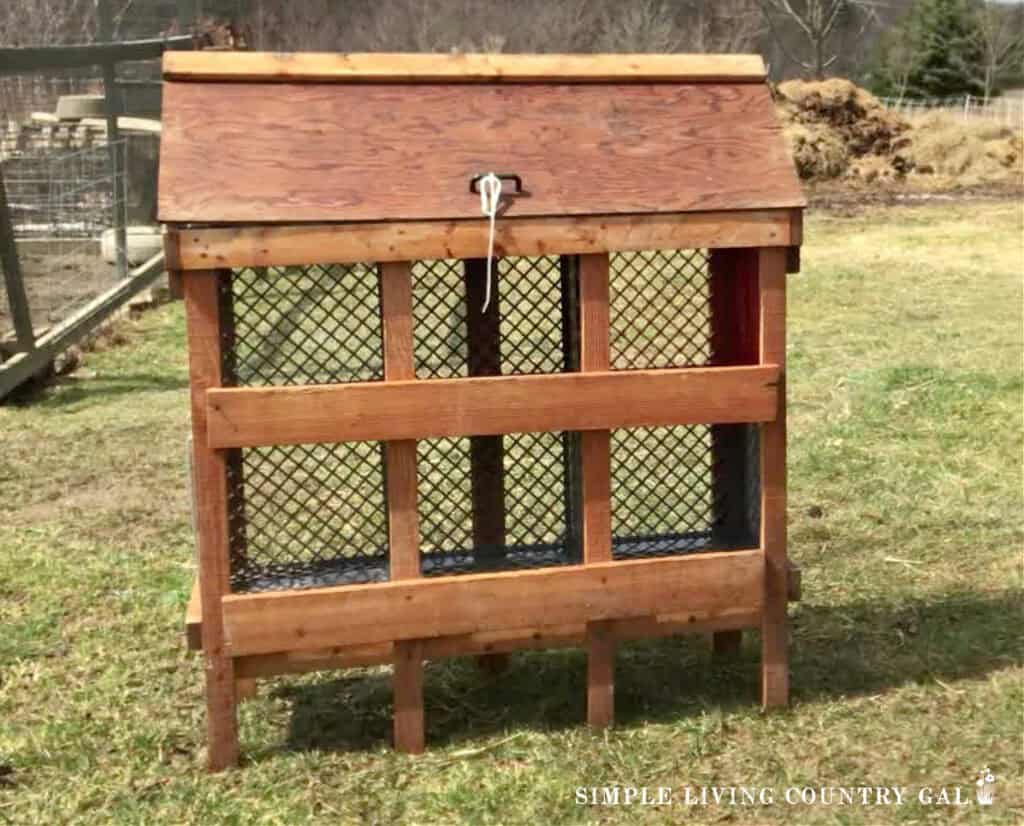
I know I mentioned this earlier, but it is important that you make your setup easy to clean. For our DIY egg laying boxes, we built a hinged lid that props open so I can easily slide the crates in and out.
When closed, the lid is set at an angle to discourage the chickens from roosting on top of the nesting boxes at night. The angle of the roof makes it impossible for the chickens to rest there. This, in turn, keeps your nesting boxes free from chicken debris.
Chickens are very messy sleepers and poo throughout the night. For this reason, you will want to keep your nesting boxes difficult to roost on at night, and an angled top works great. Your chickens will not roost inside the nesting boxes at night. They prefer to be up and out where they feel safe.
Because this setup is made of lightweight hemlock, it is easy for me to carry it outside for cleaning. All I need is a hose, brush, and soapy water. I can then open the hinged lid and slide the crates out, giving each a good scrub.
Our setup holds six large milk-style plastic crates, which is plenty of space for our flock. If you have ducks, however, you may find they prefer to lay on the ground. By giving room under the nesting boxes, you can provide plenty of space for your ducks to lay their eggs.
As I mentioned before, our hens have a crate they prefer over all the others. I will often find 5-6 eggs in one or more crates with no eggs at all in another. If you find this happening to you as well you will want to ensure you have plenty of bedding inside of at least that one crate to keep the eggs from getting damaged from other hens laying.
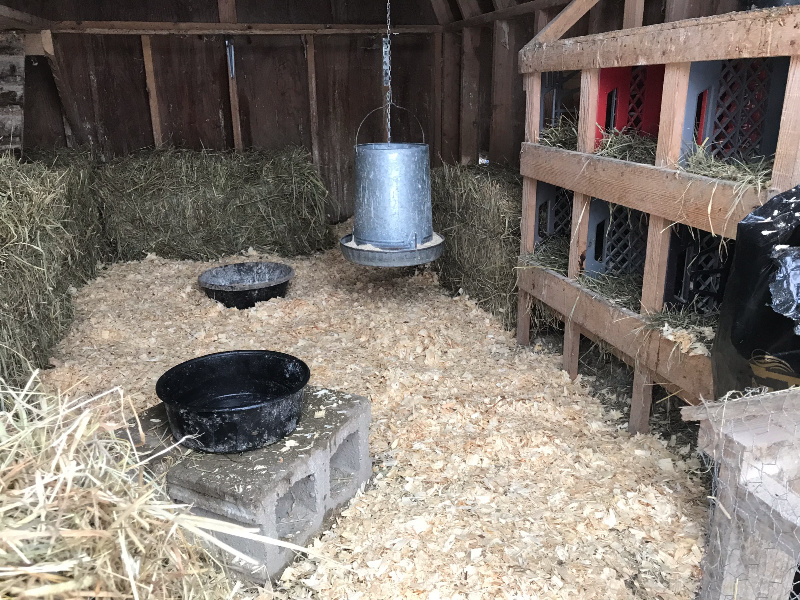
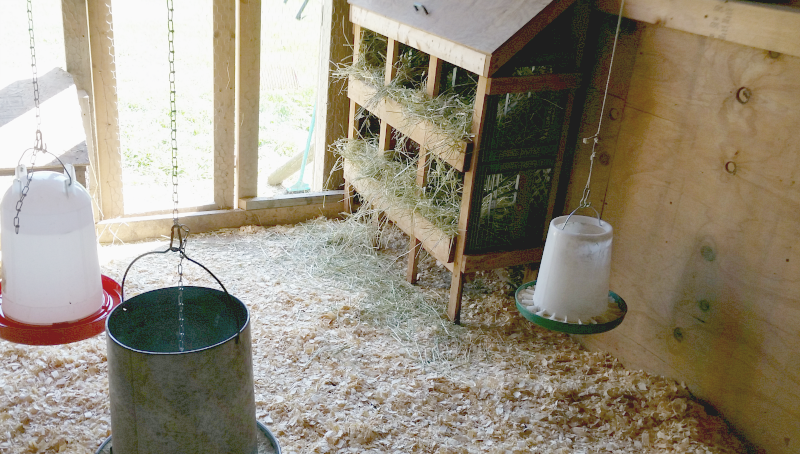
Step #4. Place Chicken Nesting Boxes in a Good Location
You will want to place your chicken nesting boxes where the weather will not be a factor. Since our coop has double doors at one end and a doggie door access to the outside chicken run at the other, this was tricky to do. Where we live, the wind tends to blow West to East and since our door is open to the East there was protection on the North and South sides.
This allows us to keep our boxes next to the main doorway making egg collecting a quick and easy chore.
In the winter, the location of your nesting boxes is particularly important. Chickens like to be warm, so have your boxes in the warmest area.
The location is also important in the summer. Chickens like to be cool, so have your boxes in the coolest area.
Another perk of a lightweight system is how easy it is to move. One person can easily move this setup, and that I think is an important factor on a homestead.
Try out one location in your coop and see how it holds up. If the weather affects your hens while they lay, you will want to rearrange things a bit to better protect them.
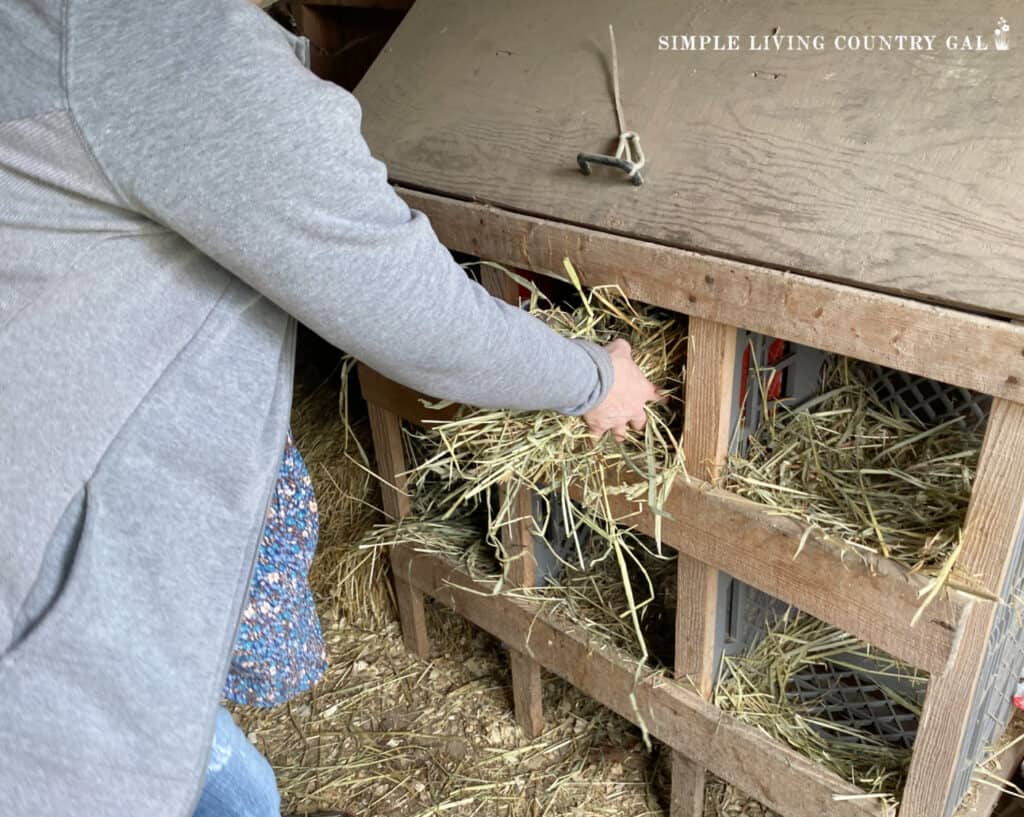
Step #5. Fill Milk Crate Nesting Boxes With Bedding
Be sure to have some sort of bedding inside each nesting box, such as straw or hay. This will protect the eggs from the hard plastic and keep the inside of the crates cleaner. In the winter, you will want to really fill those boxes up to add some additional warmth.
Eggs can freeze rather quickly, so it is best to add more bedding when there are frigid temperatures.
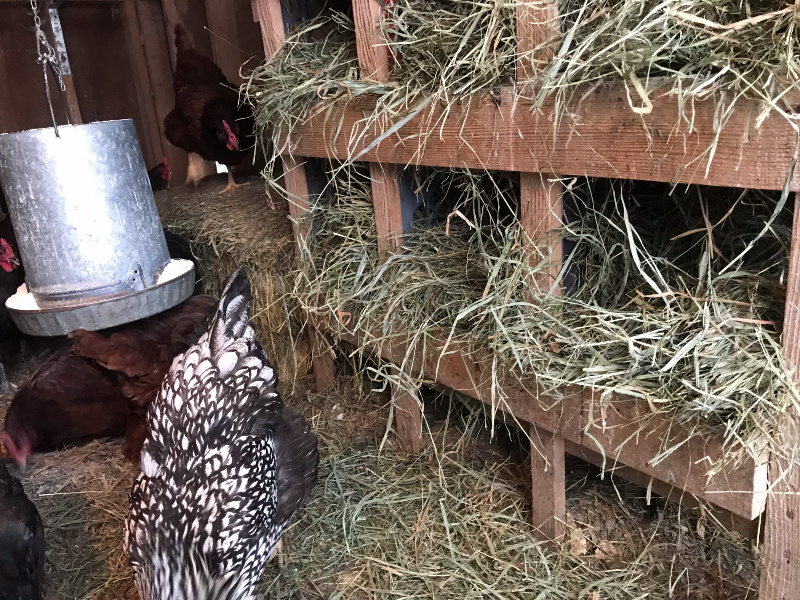
We have used this design for over 10 years now, raising our own chickens, and it is working wonderfully. The plastic crates are very easy to clean, and the frame is extremely lightweight, so I can move the full setup in and out by myself.
From day one the hens took to this setup and we really have had no problems with them refusing to use it.
Do not worry if whether or not your hens will use the boxes. They are naturally drawn to a private and protected space when they feel the urge to lay an egg. It may take a day or two for them to get the hang of it, but they will eventually use the nesting boxes.
If you have a chicken that will not lay in the boxes, you can put a few golf balls or plastic eggs inside to encourage them to lay there. Be sure to give them plenty of time to catch on; they will eventually. The good news is that most animals learn by example. Once you have one of your chickens using the new chicken nesting boxes, it is just a matter of time before they all do.
This setup also works well for ducks since the lower milk crates are very close to the ground. Our ducks have no problem getting inside to lay, but again, if you keep bedding on the ground under the lowest level, you will have more areas for either your chickens or your ducks to use.
I have had a few questions about the size of the boxes and how they work with my large breed hens. Our chickens have never had a problem getting in or out of the crates, and I have even found, on occasion, more than one chicken inside of one nesting box.
If you are concerned about one or two bully hens in your flock, you can also make this system with a larger container such as an empty kitty litter bucket or plastic washtubs.
And there you have it, one DIY chicken nesting area made mostly from supplies on hand and scrap pieces of wood.
The total cost $4 since I did need to purchase two more (imitation) milk crates. Luckily I found them at a yard sale for $2 each.
SUPPLY LIST FOR DIY MILK CRATE NESTING BOXES
- Plastic Milk Crates – You will need 1 crate for 4-5 hens.
- Spare wood for the frame – Build to the size of crates you hope to hold.
- Hinges for the lid
- Handle for the lid
- Straw or Sawdust – Use inside of the boxes to protect the eggs.
- Basket – To safely collect eggs.
When homesteading it is important to think outside of the box when starting a new project. Use it up, make do, or do without is a motto of mine and I just love the challenge of solutions without necessary trips to the store.
Not too shabby if I do say so myself! Do you have DIY milk crate nesting boxes on your homestead? If so, how are they working for you? Leave a comment below, I would love to hear from you.
More Chicken Coop Resources:
Where did you find the crates for sale?
Hi Brianna,
I found mine at a yard sale (of course!), but if you google them you can find them as well. Amazon has them but they are uber expensive. I think I paid $1-$2 each for mine.
A warning about milk crates. Some have a civil penalty on them if you have them. They are so handy for everything that people were stealing them and using them or selling them. The dairy started putting fines and other civil actions to curb their loses (the good ones are not cheap) I’m told it doesn’t matter if they are from a yard sale or from Amazon, if they are used milk crates make sure it isn’t stamped on them a warning about taking them. The one I found in a barn I was helping clean out says, “$1,500 fine if taken”. A couple years later I noticed it and called the dairy and made arrangements to return it.
https://www.milkcratesdirect.com/blog/everything-you-need-to-know-about-us-milk-crate-law.html
https://modernfarmer.com/2013/08/illegal-use-milk-crates-anything-besides-milk/
Yes, this is true, I think I should be more clear. I am talking about crates that look like milk crates but are NOT officially stamped milk crates.
Sorry for the confusion and thank you for that valuable information!
I see them time to time at Walmart.
that’s complete narc garbage.
who does that?
who CARES?
Get.A.Life.
Tractor supply sells non-dairy ones
Those boxes don’t seem large enough for those chickens.
Yes, they are plenty large enough. So much so that 2 girls will often use the same spot together. I have a larger area for laying but the girls never use it.
Tracy Lynn
Is there a reason you elevated the nesting boxes off the floor? Have you ever had a problem with snakes getting the eggs? Thank you.
Great question, Andrea.
I elevated them so it would be easy to take outside and hose it down to clean it. We do have snakes here, but no issues as of yet. Mainly mice but they just mess up the coop and do not touch the eggs.
I never would have thought of using milk crates, till I stumbled upon this jem. Thank you for your great idear. I also love your motto and may use it as well aha.
Glad you liked it!
I LOVE this idea! Thank you so much for posting. Just curious, do you have list of lengths your husband used for cuts? I’m going to try & piecemeal this together while my hubs is out of town & would appreciate a cut list so I can get it done quickly. If not, no biggie, just thought I would ask. Thank you!
Oh goodness, no I am afraid I do not have cut lengths. I can measure things when I am out there next time and get back to you!
Tracy lynn