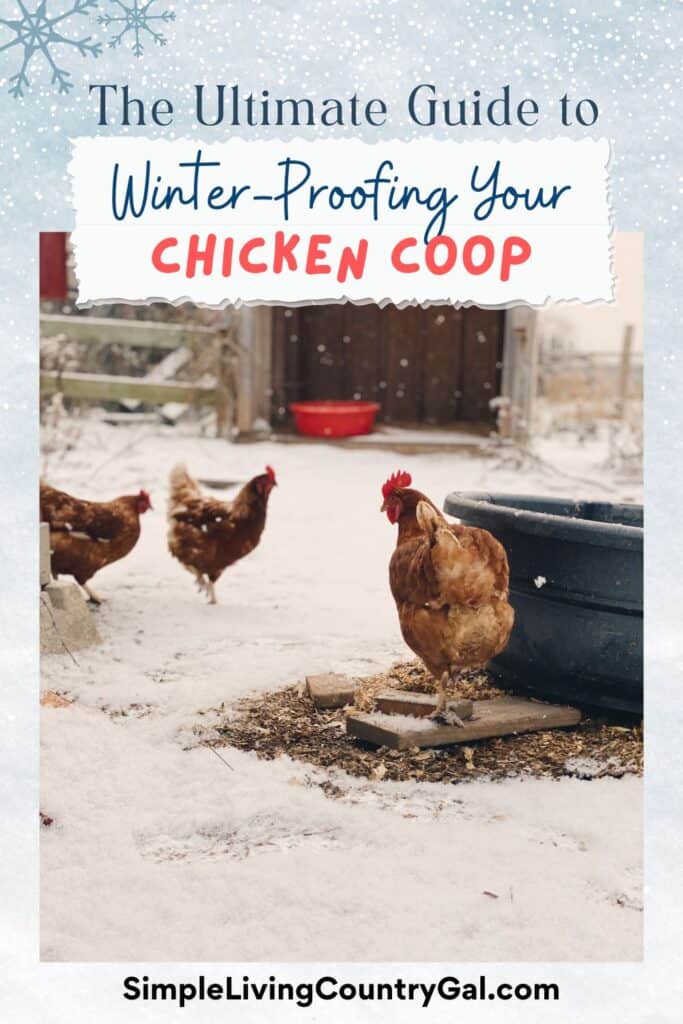
How To Prepare Your Chicken Coop For Winter
Whether you live in the North where winters can get pretty brutal or in the South where things are more mild, these tips on how to prepare your chicken coop for winter will get your entire flock winter ready.
Preppy for winter is a chore that is probably on everyone’s to-do list, but knowing just what you should do before the cold weather arrives can be a bit tricky.
Fall is a busy time for a homesteader, and raising chickens comes with a long to-do list. The last thing we need to do is pile unnecessary work on ourselves.
Today, I will break it down into a list that I hope you find easy to do and one that will keep your chickens laying eggs even in winter.
Having an annual winter prep checklist is a good thing, even if you do not need to prepare for -25° wind chills. Working to get the coop cleaned out and cleaned up is an important part of raising a healthy flock of chickens.
A winter prep list also helps to keep us more aware of our animals’ living conditions on a regular basis. Routine maintenance is key in all areas of our homesteads.
By checking our property, buildings, and homes, we will more easily find issues before they become full-blown problems.
This habit is even more important if you raise any animals.
Having a seasonal Project checklist will allow you to routinely check housing and shelters so you can address issues before they become problems.
If you are new to raising hens, this list will give you a good overview of what needs to be done. As you gain more experience, you will learn what tasks to add for where you live and which ones you can skip over. It all depends on the weather and the type of shelter or coop setup that you have.
Why do I need to prepare my chicken coop for winter?
Preparing your chicken coop for winter is just like preparing your home. You are looking for any issues that need your attention as well as what improvements you would like to make.
Above all, making sure your animals have a clean and comfortable place to live in that will keep them protected and safe.
And trust me, fixing any issues now while the weather is still good is much easier than fixing them later in a blizzard.
The first step is to perform routine checks on shelters looking for any cracks or openings along the floor and walls. This will alert you to any weak areas where predators may be able to access the coop.
Next is to check waterers, and food setups and how your flock behaves at feed time. If you see any aggression, you will know you have a bully issue within the flock that needs to be addressed.
Not all issues are easy to see when you are simply feeding your backyard chickens, but they will stand out if you are “looking” for them or when the coop is emptied out and a walkthrough is performed.
Start your winter out with a clean and secure coop, and you will save yourself from headaches come winter.
10 Steps to Prepare Your Chicken Coop for Winter
I love lists, and I find it a much easier way to approach a project of this size.
When you can break things down into quick tasks, you can focus on each one as you work your way through completing the entire project.
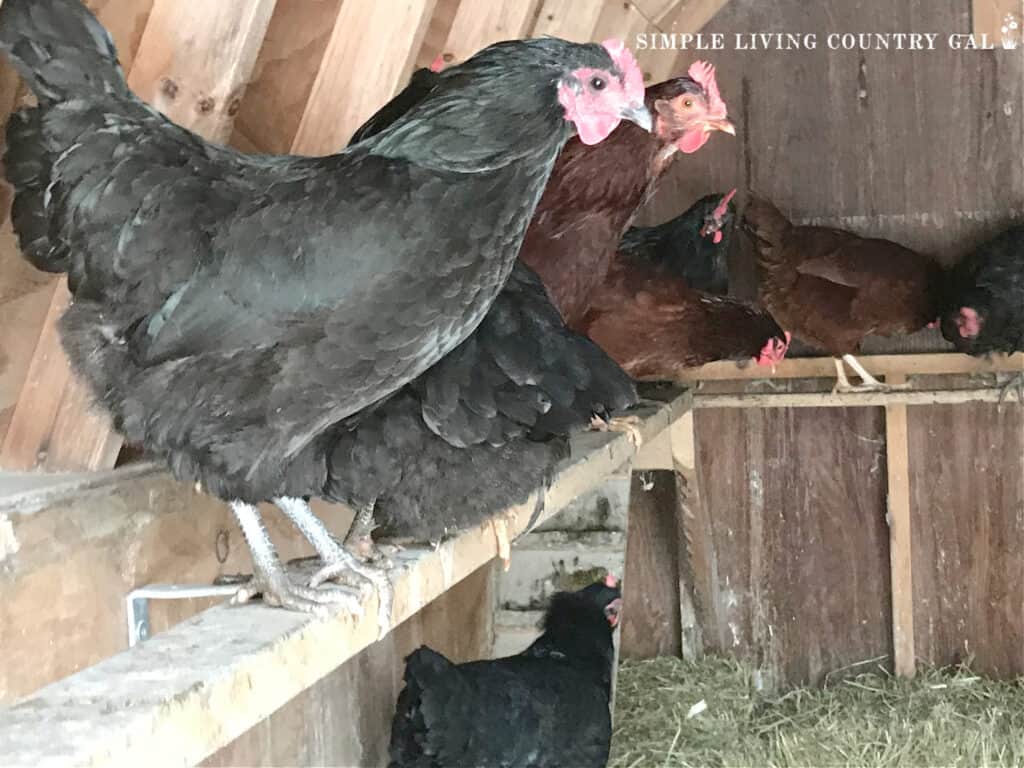
Step #1. Empty out your chicken coop
The first step to preparing your chicken coop for winter is to clean the coop out from floor to ceailing.
Nothing is worse than dealing with parasites in the winter, so take the time now to clean and debug things.
Action List:
- Remove everything that is not nailed down, and that means if it’s not attached to the coop, it is coming out. This includes the chicken roost and nesting boxes (if you can), bedding, chicken waterer, and feeder—all of it.
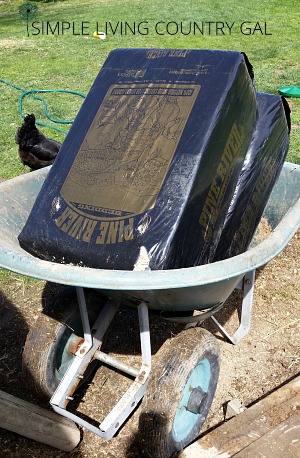
- Using a good large shovel like this one remove all the bedding. If you have kids at home, now is a good time to call in the troops. This part can be a bit hard on the back. 🙂 Shovel the dirty bedding into a wheelbarrow to take it to your compost area.
- Once the chicken coop is emptied, get a good broom, and sweep everything down. This includes the floor, the walls, and even the ceiling. You want to remove any cobwebs that can trap dust and debris.
- Use a paint scraper to get anything off the floor or walls that a broom or shovel can’t get. This tool can be quite helpful in removing dried mud, muck, or even manure. Keep a paint scraper inside of your coop and every week use it to scrape down your chicken roosts. This will keep things from getting built up, making it difficult for the hens to roost comfortably.
SLCG PRO TIP: Cleaning out a coop can be dusty and pretty tough on the lungs, so a face mask like this one or even a bandanna will help you from breathing in the dust and debris.
Coop Cleaning Tools:
Esmorah Chicken Poop Scooper, 3 in 1 Adjustable Sifting Shovel for Chicken Coop(22 Landrol Heavy Duty Metal Square Point Shovel with 30Vulcan Wheelbarrow 6 Cu-Ft Steel 2 Wheels


More Chicken Coop Reads:
- Turn an Old Shed Into a New Coop
- CHICKEN ROOSTS 101 – EVERYTHING YOU NEED TO KNOW
- DIY Chicken Nesting Boxes
What can you do with soiled bedding?
If you have a garden, this is a great place to toss your bedding any time of year but especially in the fall.
Soiled bedding is an excellent compost and will do wonders for your veggies come spring. You can add it to the soil and work it into the ground or put a scoop of compost in the hole before planting your seedlings.
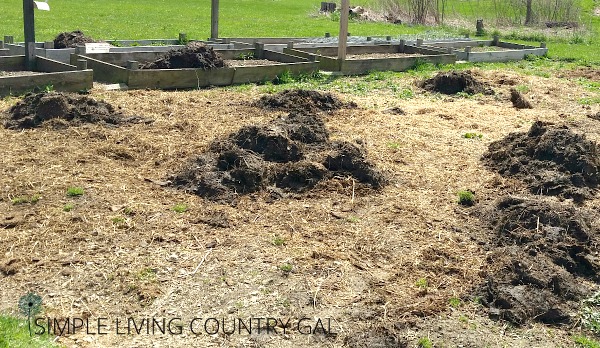
Remember to never add fresh chicken manure directly to plants, as this will do more harm than good.
Raw manure will burn and may even kill a plant, so you will want to let things compost down for a few weeks or over the winter before using it in your garden.
If you do not have a compost area, you can read out tips on how to set one up a compost bin/area in your yard.
F2C Compost Bin Outdoor Dual Chamber Tumbling Composter 43 Gallon BPA Free Large Tumbler Composters Tumbling or Rotating w/Sliding Doors & Solid Steel Frame Garden Yard (Black)Redmon 65 Gallon Outdoor Compost Bin with Snapping Lift Off Lid, 4 Door Access, and Multiple Vent Holes for Garden and Landscaping, BlackHourleey Compost Bin Outdoor, 43 Gallon Dual Chamber Tumbling Composting Bin with Sliding Doors, Tumbler Rotating Batch Composter Bin for Garden Kitchen Yard


If you do not have a garden, find a spot out of the way to dump your bedding for now.
Come spring; if you let your neighbors know you have chicken manure, they will gladly get rid of it for you. You can even sell this manure to help generate income for your homestead.
Many people are more than willing to pay you for fresh manure or composted manure. Post an ad on Facebook or on the bulletin board in your local feed mill.
Step #2 Hose down the inside of the coop
Hopefully, you are near a water source because having a hose nearby will make this job 10 times easier.
I find that a pressure washer is an efficient way to clean the inside of most if not all, livestock housing.
It does a great job removing any caked-on debris. If you are not near a water source, you can try tossing buckets of water up onto the walls.
This is not the best approach, but it will at least get most of the dust and cobwebs you may have missed with the broom.
When cleaning your coop, ensure you get the walls, corners, and ceiling. Chickens are dusty (incredibly dusty!), and you will be amazed at how quickly things can get dirty in a coop.
After hosing, go back in with the broom and sweep things one more time to remove any remaining dirt you may have missed the first time around.
Again starting with the ceiling, then the walls, down to the floor using gravity in your favor.
Step #3 Clean and disinfect
I like to use a mixture of white distilled vinegar and water mixed at about ½ and ½ in a spray bottle. This is a great cleaner and does a surprisingly good job in a coop.
If you have a problem with parasites or mold, adding bleach will help to remedy these issues.
In some cases, you may need to do more, such as a commercial disinfectant, but more often than not, this will be enough to clean and disinfect.
Try this DIY Chicken Coop All-Purpose Cleaner—it’s natural, safe, and works wonders.
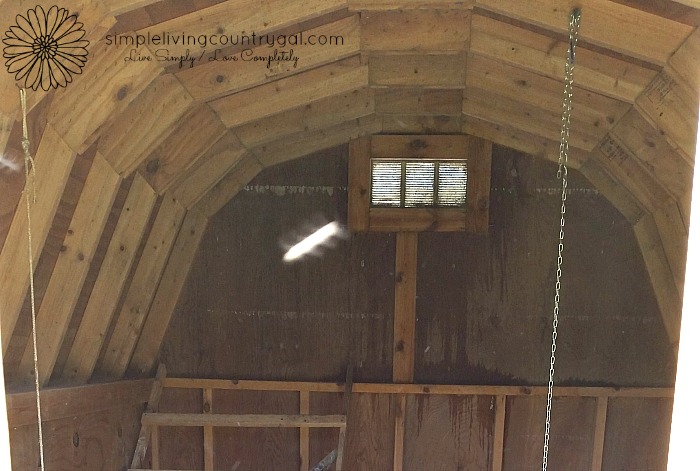
Step #4 Scrub down vents and windows
It is extremely important to make sure the vents and windows inside of your chicken coop are completely clean of all dust and cobwebs.
Even in the frigid winter, good airflow will help keep your bird’s lungs clear and healthy.
When cleaning, be sure to use a soft-bristled brush so you do not damage the vent openings.
Step #5. Give a final rinse
Once you have the inside of your chicken coop scrubbed and disinfected, grab your hose and spray things down to thoroughly rinse all the loose debris anbd cleaner out.
Use gravity in your favor, start high and work your way down to the floor rinsing the corners, ceiling, walls, vents, and door frames.
At this point, you should notice a big improvement in the smell—a good sign you are doing a thorough job.
If you do not have drains inside your chicken coop to help with the excess water, then you can use the broom to push the excess water out the door.
Step #6 Let it all dry
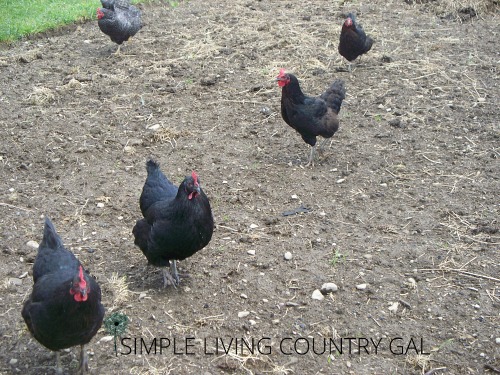
Hopefully, you have a place for your flock to hang out until things inside the coop. I just let ours roam in the garden while we cleaning. This can be helpful especially if you put soiled bedding int your garden.
Your chickens will love to scratch through the piles it working it into the ground. This is a great way to jump-start composting of the bedding that will help your garden soil improve before spring planting.
Step #7. Check for damage, cracks, or leaks.
You will want to ensure the entire coop is in good enough shape to handle the upcoming winter.
Drafts are a big no-no in the North. Sure, you want airflow, but not drafts. Why?
Because drafts can cause lung issues in your animals, such as Pneumonia or flu, which can kill your chickens quickly. Because of this, it is important to ensure your coop can withstand winter winds.
Also, a small crack in the dead of winter can let in a surprisingly large amount of snow. Trust me…I know.
Another reason we want to watch for cracks or holes is to keep predators out. Your chickens may not be the only ones looking for a warm place in the cold of winter.
We had a weasel break into our coop using the smallest of holes to get in. He was able to kill my best hen, and we learned a tough lesson that day.
I am now careful to look for any cracks, no matter how small, and seal them up right away.
To do so, you can just find a scrap piece of wood and use nails to attach it securely over the hole or crack.
Go over your coop with a fine tooth comb to, not only, protect your hens not only from the snow but also from other animals.
Worried about predators near your chicken coop? Learn How to Keep Predators Out of the Chicken Coop.
Step #8. Check over other areas
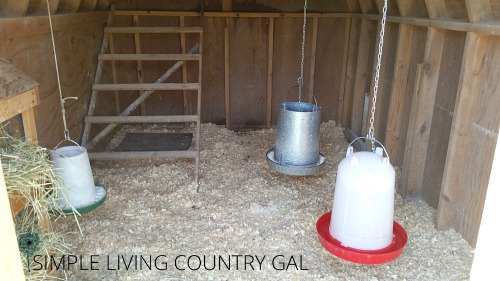
Take this time to give your nesting boxes, feeders, waters, and roosts a good cleaning. Scrub things down with your vinegar and water mixture and let them all dry in the sun.
The sun is a natural sterilizer and works great on all surfaces. Remember to add bleach, but only if needed.
Add a layer of protection
Before I add the bedding, I like to put down a light layer of food-grade Diatomaceous Earth. This extra step just ensures that I am doing all that I can to deter pests and parasites.
What is Diatomaceous Earth?
Diatomaceous earth is a powder made from grinding down fossilized algae and other aquatic organisms called diatoms.
It is a deterrent for lice, mites, and other small parasites. Be sure to purchase food grade, so it is safe to use around your livestock.
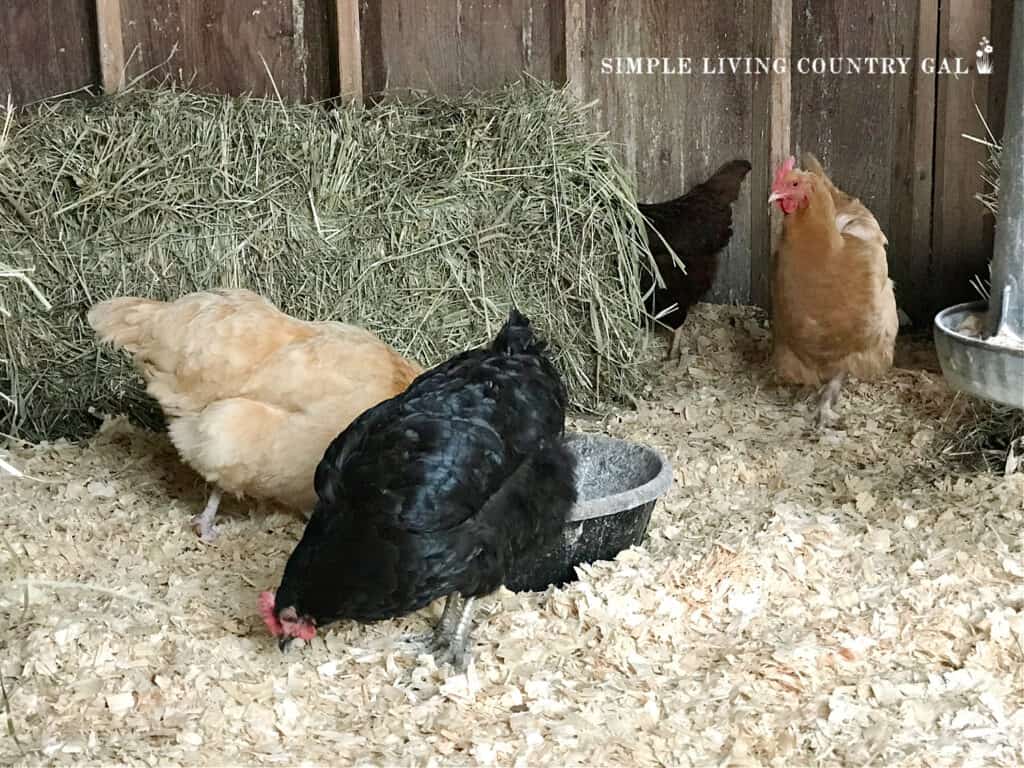
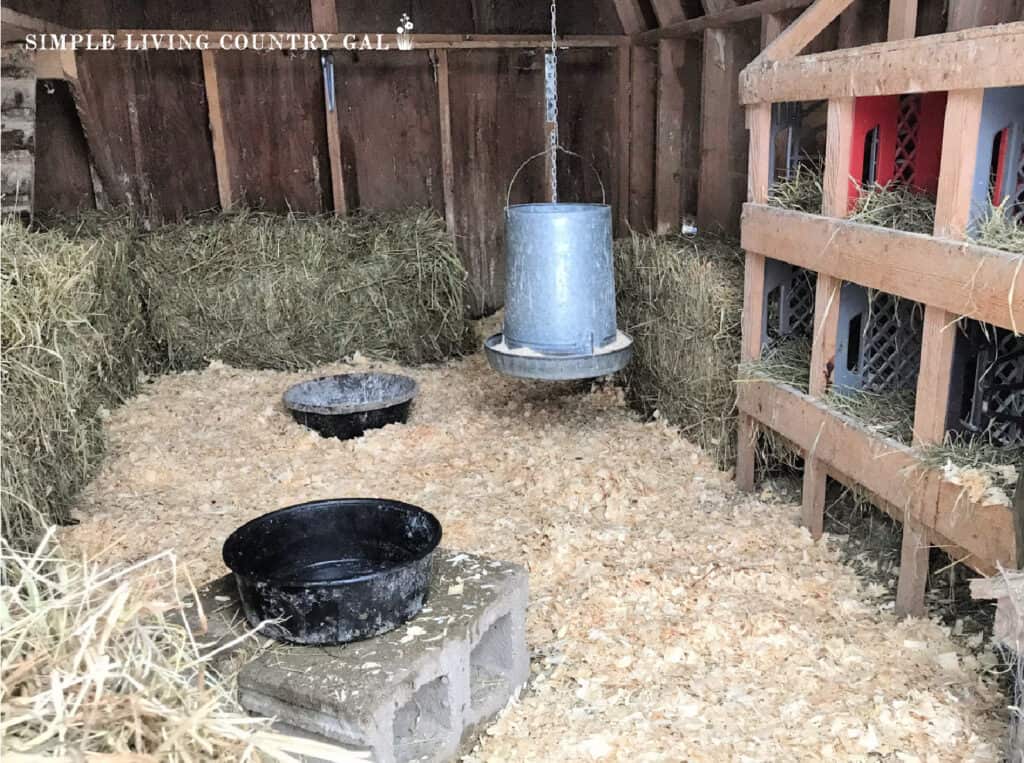
Step #9. Put down a thick layer of fresh bedding
Put a generous layer of bedding. This can be sand, sawdust, or wood shavings. (Do not use cedar). The bedding does a few things in a coop that will keep your flock healthier.
- It will help soak up the moisture from the manure keeping the coop dryer and cleaner.
- It will add a layer of insulation making the ground warmer for your birds to walk on.
Cleaning out a coop in the winter is a big job so you may want to instead use the deep litter method throughout the winter months.
What is the Deep Litter Method?
The deep litter method is leaving the bedding in place all winter long. Every few days you will sprinkle a fresh layer of bedding to keep things dry and smelling fresh.
With our brutal winters, I prefer to use the deep litter method in our chicken coop because it gives a nice warm barrier between my hens and the cold frozen ground.
I have tried out different types of bedding in my coop. Sand, sawdust, and wood shavings are the three I have tested, and I find wood shavings work best for us.
The pros of wood shavings are they are lightweight, work well to soak up urine, and are low in dust which is important to keeping your flock healthy, especially in the winter.
SLCG PRO TIP: If you are older like me, and you choose to use sand, be sure to get a long handle litter scoop to keep things clean. This will eliminate the need to remove sand by shovel which can be very heavy.
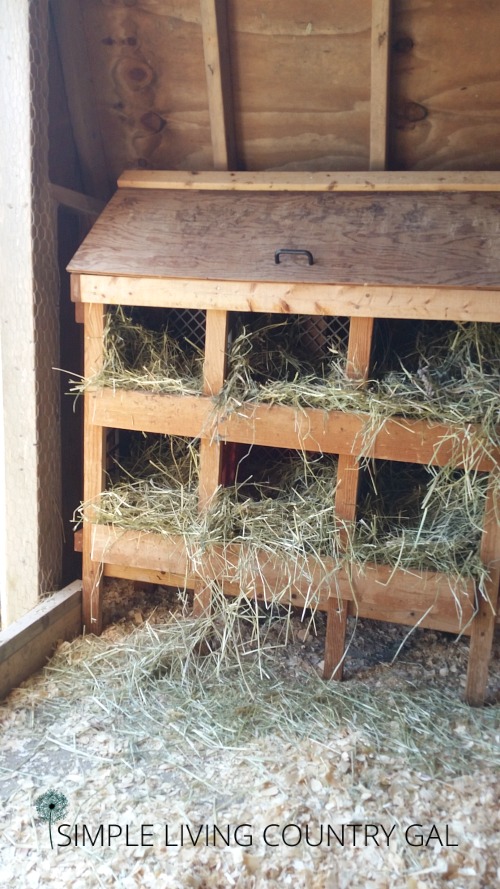
Step #10. Insulate the nesting boxes
Since I use plastic crates for our hens, they are easy to clean and do not hold the smell of the coop.
Still, a nice layer of straw makes it more comfortable for my gals during laying time and keeps any freshly laid eggs in a soft insulated area until I can gather them up and take them indoors.
I also started adding in fresh herbs, and our chickens really seem to enjoy that as well.
Chicken Nesting Herbs – 14 Oz Natural Nesting Box Herbs in 6 Dried Flower & Herbs for Fresh The Coop Make The Box Smelling Nice and Create Comfortable Environment for Chickens (14oz)HoazHoald 35 Oz Chicken Nesting Herbs Flowers 2.2lb Premixed 8 Dried Herbs Natural Nesting Box Herbs for Chicken Coop Freshness Promote Egg Laying Help Coop Smell Box Packaging20 Oz Nesting Herbs for Chicken Coop – Natural Vacuum-Packed Nesting Box Herbs in 6 Dried Flowers & Herbs, for Freshening Coop Chicken Dust Bath Increase Egg Production


If you like these nesting boxes, you can see how to make your own Chicken Nesting Boxes!
Do I need to add a heat lamp when I prepare my chicken coop for winter?
I have raised chickens for going on 10 years, and I used a heat lamp for the first 3. I live in a very cold climate in the middle of the snow belt.
And that means we get cold temperatures along with dangerous wind chills and a crazy amount of snow.
I have found that my girls do better WITHOUT the heat lamp.
Trust your animals to adapt to the cold, especially if you have chosen winter-hardy hens. As long as you have adequate housing free from snow and drafts with ample bedding inside, your hens will do just fine.
Protect your chickens from the cold this winter. Read this blog post on How to Keep Chickens Warm Without Electricity.
WARNING: The number one cause of fires in a coop/barn is a heat lamp or other artificial heat source. Make sure to use every single precaution if you feel you must have a heat lamp in your chicken coop.
If, however, you feel you need something to help them cope with the cold weather, there are a few things you can do to help.
What can you add to your chicken coop to keep hens warm in the winter?
- Try giving them warm water 1-2 times a day. The chickens will love it, and it will warm them up nicely.
- You can even mix in some of their grain into the water to encourage them to drink it. This is something I do on crazy cold days, and it helps them cope better. Do not do this if you feed crumble or pellets.
- Put extra straw inside of the nesting boxes to keep any eggs from freezing.
- Put straw bales around the interior walls to act as a type of insulation.
If egg production slows way down for you, you may want to add a light to extend the day. I have found this DOES work, although I do not use it.
A farmer told me once, that when a chick is born she already has a set number of eggs she will lay in her lifetime. And if you speed up the laying of those eggs, she will slow down quicker.
I prefer to let nature take its course with my hens.
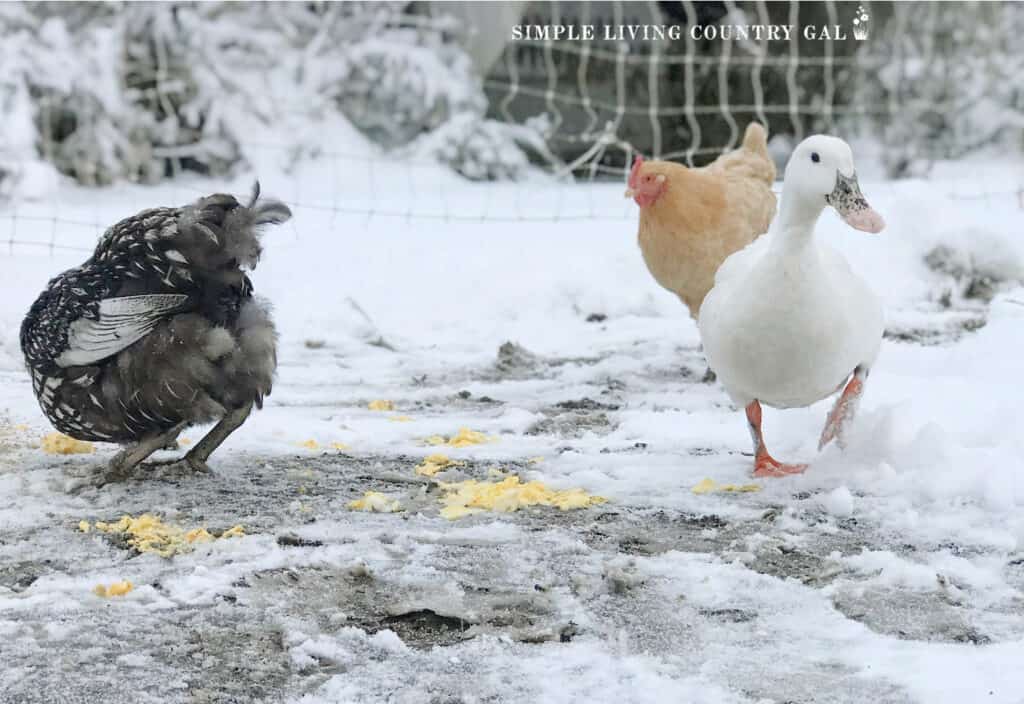
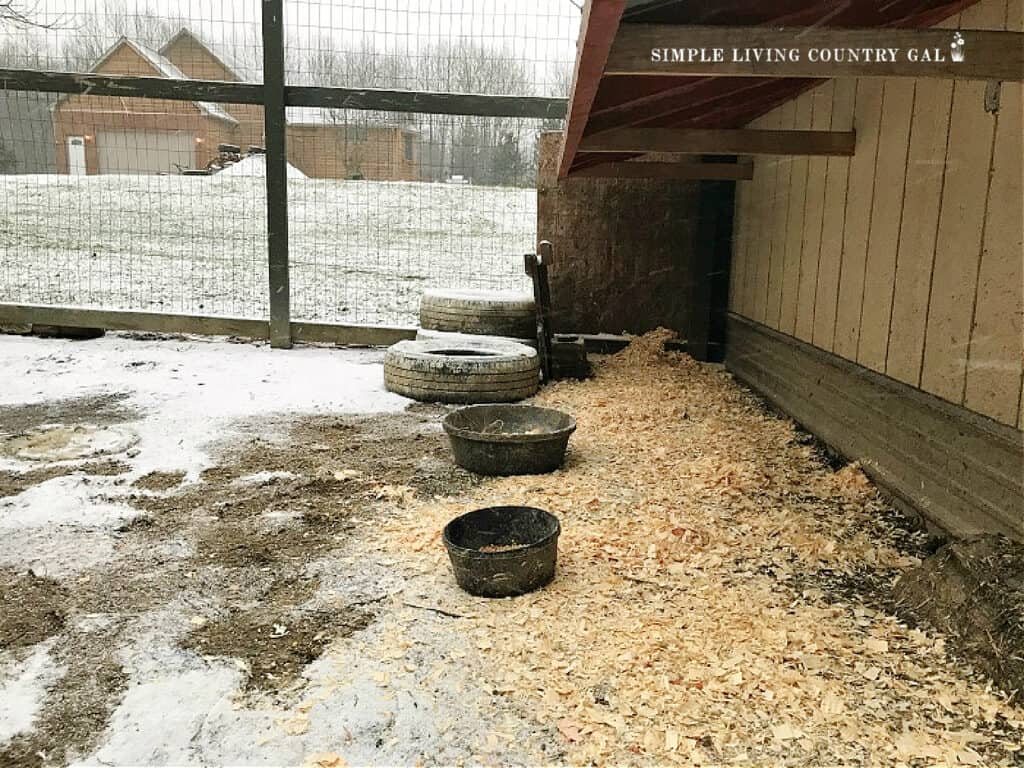
Bonus Step #1. – Don’t forget to check the run
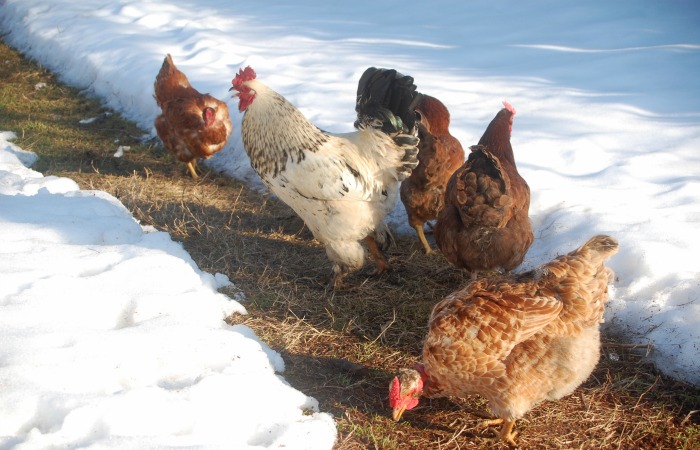
When the winter hits, you need to make sure your run can withstand the snow and wind. If you have an open run as I do, be prepared to shovel some snow.
Chickens will come out in the snow, but sometimes they will not come in for a while….even if their feet get cold.
Because of this, they can get frostbite quickly not only on their feet but on their wattles and combs as well. Because of this, you will want to make sure you have the snow cleared each day so they can easily get in and out of the coop.
I shovel a small circular path inside of their run each morning at chore time. To make things easier on myself, I have my snow shovel hanging right inside of the run so I can just grab and go.
You can also sprinkle a bit of straw or hay or wood shavings to help keep their feet warm while out in the chicken run. You can even use a few tires and/or logs for them to perch on out of the wet, cold snow.
Bonus Step #2. – Add a tarp to stop winds
Though not pretty, adding a tarp is an effective way to deter some of the snow.
By hanging a heavy-duty tarp over a portion of the run, you will give a nice dry area for your hens to be in.
I like to have bedding down in this area as well and will even sprinkle some scratch in the morning to encourage the girls to stay out in the fresh air a bit longer.
SLCG PRO TIP: Make sure to clean off your tarp after heavy snowfalls to it does not tear or stretch from the weight of the snow.
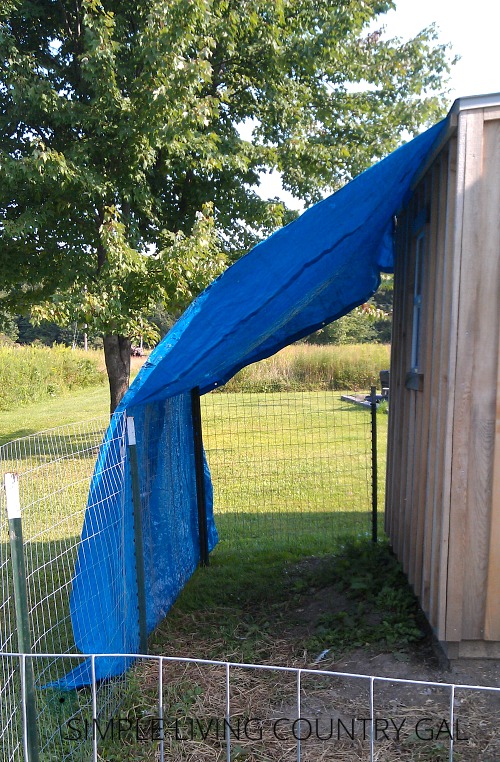
Another tip is to use the tarp as a wall of sorts. If you have a high fence for your run, you can attach a tarp to one side to keep drifting down.
This tip is more for you than the chickens, as it keeps extra snow out of the run, meaning less shoveling needs to be done on my end. Trust me; I can use all the help I can get!
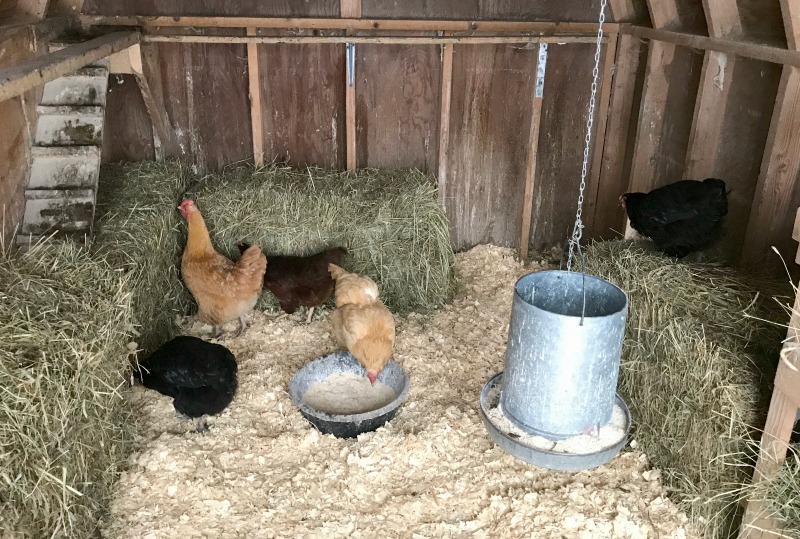
Bonus Step #3. – Add straw bales around the perimeter of the coop.
This is a new method that I just started using in the last few years, and it has made a big difference in our coop.
Adding hay or straw bales around the inside perimeter of the coop really helps to not only create a barrier to those cold winds but also gives our hens a place to perch off of the cold ground.
An added benefit of using straw bales is that come spring, I have composted bales I can use for my straw bale garden.
These bales are already prepped organically and ready for planting. The inside of the bales have been naturally composted down with the chicken’s poo and is now the perfect environment for growing any type of plant.
Straw bale gardening is an easy, low-maintenance option perfect for beginners. Check out this Straw Bale Gardening Beginners Guide.
Bonus Tip #4. Stop Boredom
Bored checks are also at risk of health concerns, and for that reason, I like to have things to help keep my chickens from getting bored in the winter.
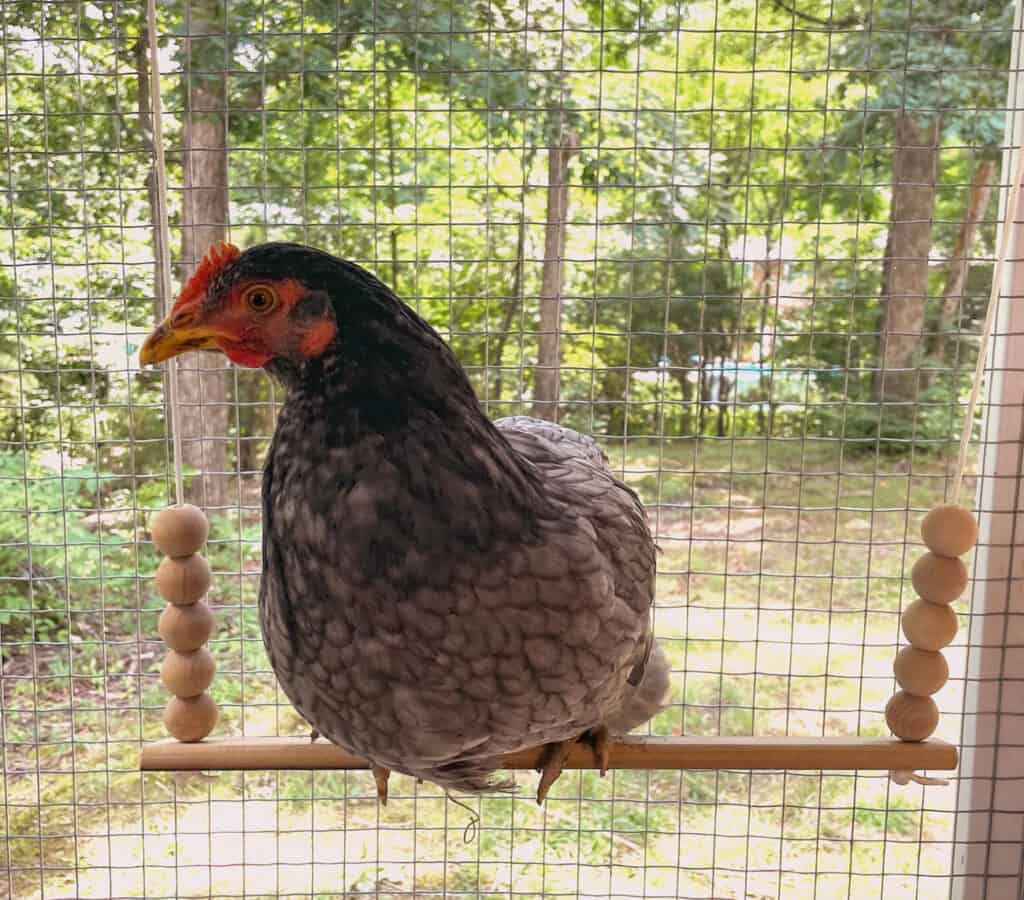
You can tie up heads of cabbage for them to munch on, poke holes in an empty water bottle and fill it with chicken scratch that they can toss around, or hang a chicken swing inside your coop.
I love watching the hens in a freshly cleaned coop. They love to check things out and chat with each other, commenting here and there on the sparkle and shine. 🙂
Keeping a clean coop is the easiest way to ensure the health of your birds and large healthy eggs to enjoy all winter.
All in all, how to prepare your chicken coop for winter takes just about one afternoon. And remember that sunny day are best since you can use the disinfecting effects of the sun to help.
More Chicken Resources:
- How to Keep Chickens Warm Without Electricity
- How to Free Range Your Chickens Safely
- What to do if You Have a Sick Chicken
Thank you for creating this post, it’s easy to forget the coop needs a thorough clean before the winter hits to keep the pests down and reduce the potential for disease.
I’m glad to see you also put your bedding on your garden; this is my first time doing it, have you noticed any problems using a large quantity of wood shavings, even if they are soiled from the chickens?
Emma
Hi Emma!
I have a pretty large garden 40′ x 80′ and I fill it up with bedding from both the coop and the barn. I dump it in piles and kick it around a bit to spread it out (it is a very technical process you see!) Then I let the snow do the rest. In the north, we get quite a bit of snow and it really helps to compost things down by spring. In the spring Hubby uses the rototiller to work it all into the soil and we then let it sit for about a month. We then use the rototiller to work it in again. That usually is enough to incorporate all the wood and hay in the ground that did not compost down over winter. I had nothing but problems for the longest time, once I started doing this method my garden has really thrived.
I hope you have success with this!
Tracy Lynn
Hi Tracy Lynn,
Thank you for the information, I’m excited to see how it works on my gardens next year!
Our small city allows us to have up to four (4) hens in our backyard. There are lots of cats roaming around all the time, so I’m wondering if it’s necessary to somehow put chicken wire, etc, over the top of the chicken yard/run,, so keep cats and large predatory birds out. I love chickens and want to have some, but at 82 with a terrible back problem I’m wondering if I could keep up with all the work that goes into keeping them safe, healthy and happy.
Hi, Sue!
That is a great question. If you live alone, then 2-3 chickens is plenty to give you eggs throughout the year. Luckily keeping chickens once they are grown is relatively easy. You only need to check on them once a day and they can even go 2 days if you have enough water and feed to cover that time frame.
I would put a “lid” on the run to keep the cats out. I do not think they will hurt them but getting inside out of curiosity can cause undue stress to the birds.
Finally, the hardest part of chickens is when they are chickens as they need to be kept inside and protected for about 6 weeks or so.
I hope this helps!
Tracy Lynn
I agree about the heat lamp. Our first chicken house, and most of the chickens burned up because of the heat lamp, and bedding dust.
We did not use one after that, but lost many combs and wattles to freezing. It was too cold, up that far north, to let the chickens out any time in the winter, they would have frozen stiff. I used to dream about trying to find ways to insulate the chicken house, that would work better, after we left that place and I began my (divorced) city living work years, which brought me now to your site. I still miss my chickens, though I am old now and probably won’t ever find a rental on a farm. So, I read about chickens, grow veg in pots, and dream.
Oh, Jean,
I am so sorry for your loss and I can only imagine the heart break that caused. There are so many barn fires here in the winter and most if not all of them are caused by heat lamps.
If you are on Instagram you can follow me and get a daily dose of chickens, goats, and other animal shenanigans!
Tracy Lynn
Thank you so much! This is our first winter with 21 new chicks, so I am really still learning what to do. Appreciate all the tips!
Hello!!
Welcome to the wonderful world of chickens! Your life will never be the same again, haha!
Tracy Lynn
Would this apply to a duck house? I have one drake that found his way to my house and besides feeding and watering him, I don’t know the first thing about caring for him, particularly in the winter. I’m in Virginia and it does get cold here in Jan and Feb. Any advice is appreciated! Thank you!
As long as you have a safe, warm place for him to be at night you should be fine. When the snow comes you will want to give a bit more shelter for him. We just have 2 ducks and they hang out with our chickens as if they are one of them. Goofy birds!
A large dog kennel will be perfect for him with plenty of bedding inside and duck feed and water.
I hope this helps!
Tracy Lynn
I live in central Miss. I have a bought coop that has 6 banham hen, 4 roosters and it been down to 21 and some died I covered with plywood and tarp how do I save the rest?
Lots and lots of hay. A super thick barrier on the ground will help. Block the wind and fill their nesting boxes full of hay as well. Don’t worry, they will still fit to lay eggs.
Good luck!
Tracy Lynn