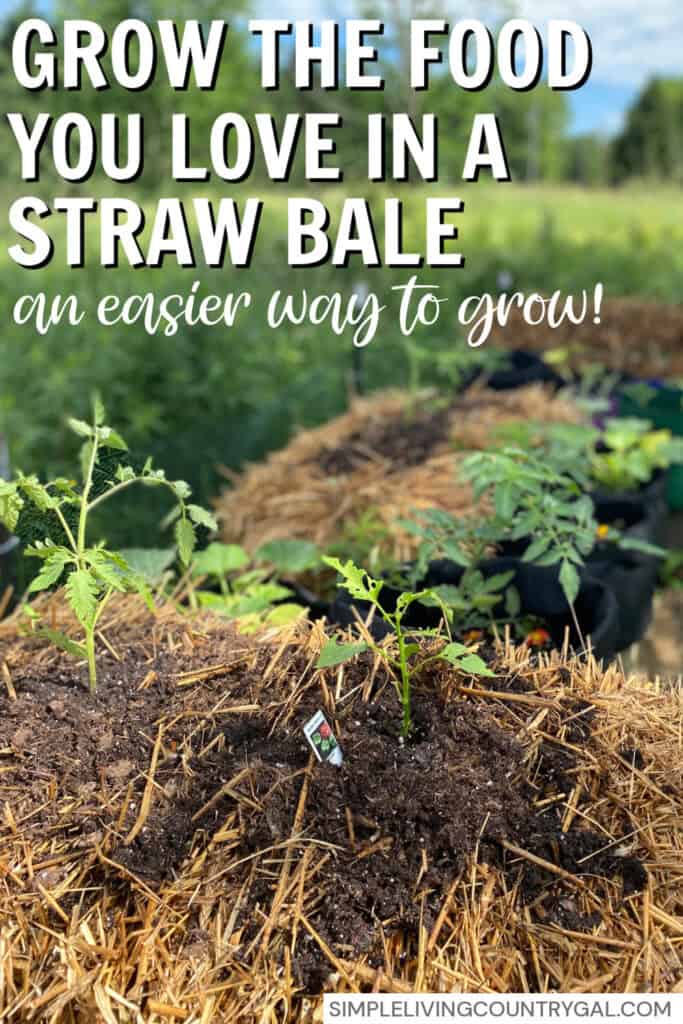
Straw Bale Gardening for Beginners
This guide on how to Grow a Straw Bale Garden will help you to prep, plant, and grow the vegetables you love from start to harvest. This unique gardening method offers a hassle-free alternative to traditional setups—saving you time, effort, and strain on your back and knees. It’s my favorite way to create a thriving garden without the heavy lifting.
How to start a backyard garden on your own terms that helps you to grow the food you love in an easier way.
A couple of summers ago, I was driving to the store when I noticed something unusual—a row of about eight straw bales neatly lined up in a neighbor’s yard. At first, I thought they were planning some kind of quirky picnic.
But a week later, I drove by again and noticed something surprising—plants were actually growing out of those straw bales! Intrigued, I rushed home and started researching. That’s when I discovered straw bale gardening, and I’ve been hooked ever since.
Benefits of Straw Bale Gardening
Straw bale gardening is a unique method where the straw bale itself becomes your garden bed. You plant directly into the bale, using it as a container for your plants’ roots to grow and thrive.
This versatile approach is perfect for those dealing with poor soil, limited space, or challenging conditions. It eliminates the need for heavy tasks like tilling and works wonderfully as a solution when traditional gardening isn’t an option.
#1. Grow Anywhere
The best part? You can set up a straw bale garden almost anywhere! All you need is plenty of sunlight, and you’re ready to grow.
#2. Easier Way to Grow
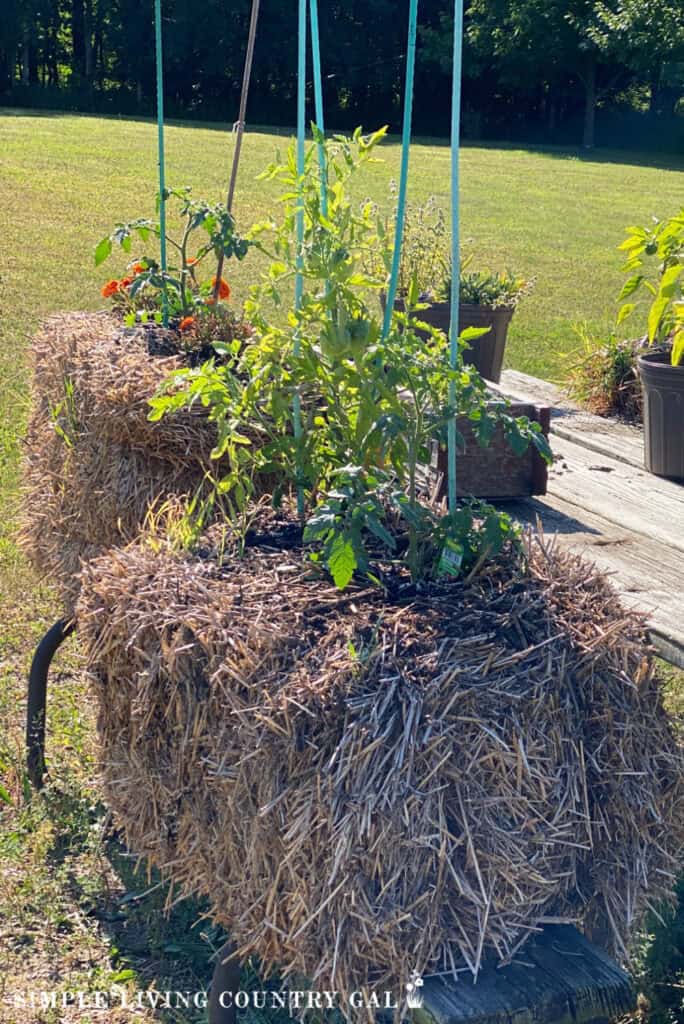
Straw bale gardening is a game-changer for those with physical limitations. By raising the bales to eye level, it lets you tend to your plants comfortably—no more painful bending or strain. Gardening just got a whole lot easier and more enjoyable!
#3. Easy Clean Up
When finished, you can add the entire bale to your compost bin at the end of the growing season. (Minus the twine) It is important to make sure you only use straw bales and not hay when gardening this way.
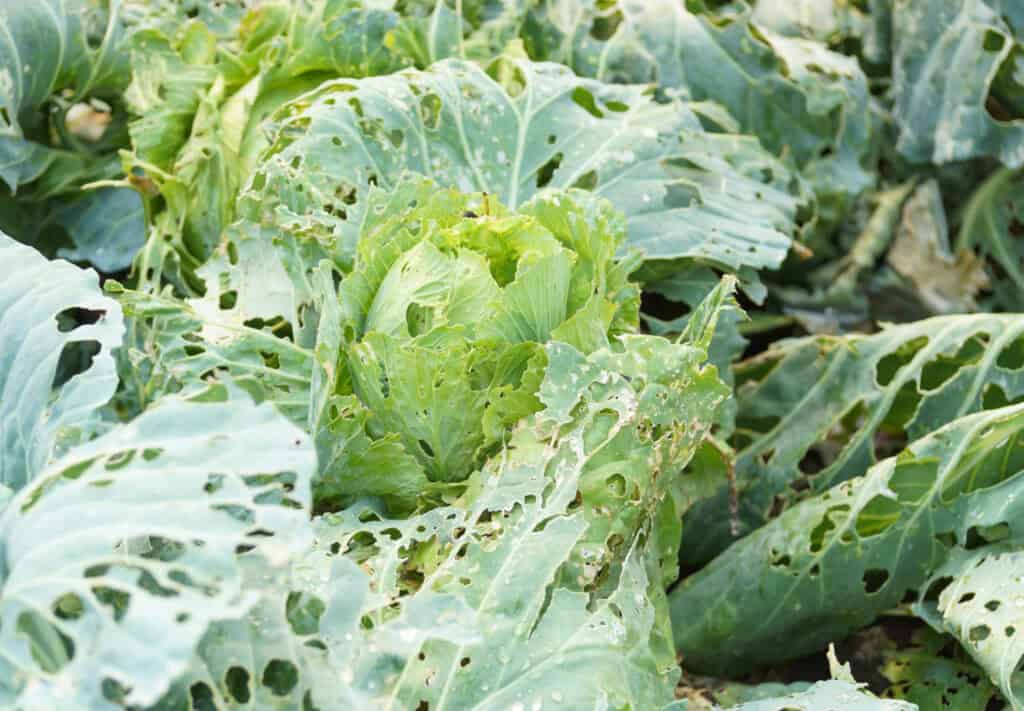
#4. Fewer Pests and Diseases
By containing where you grow you will cut down on damage from pests or disease giving you healthy plants year after year.
The Bale is Your Container
A straw bale doubles as both garden bed and container for your plants. With some prep, you can take a bale of straw and turn into a nutrient-rich haven for your plants’ roots to thrive.
The twine wrapped around the bale keeps everything intact, turning it into a natural planter ready for growth.
The twine holding the bale together is not meant for a water-soaked bale so always move when dry to prevent breaking your twine and losing your bale altogether.
How Much Can You Grow in a bale?
A bale of straw will equal approximately 40 gallons of space. So if a tomato plant requires 5-10 gallons of space you can safely expect to grow 4-8 tomato plants in 1 straw bale.
SLCG PRO TIP: Please know a rain-soaked bale of straw is a HEAVY and moving one at that point is not recommended.
Prepping the Bales for Growing
The center of the bale acts as the ground where the roots will grow. Yes, just about everything you need is all right there in your straw bale.
The drainage of the bale is another plus since this helps to prevent conditions such as root rot and other soil-born diseases.
All we need to do is a little prep work on our part to get that bale ready to house and grow our plants all season long.
More Straw Bale Gardening Resources:
- What is Straw Bale Gardening
- Best Plants for Straw Bale Gardening
- How to Prepare Straw Bales for Planting
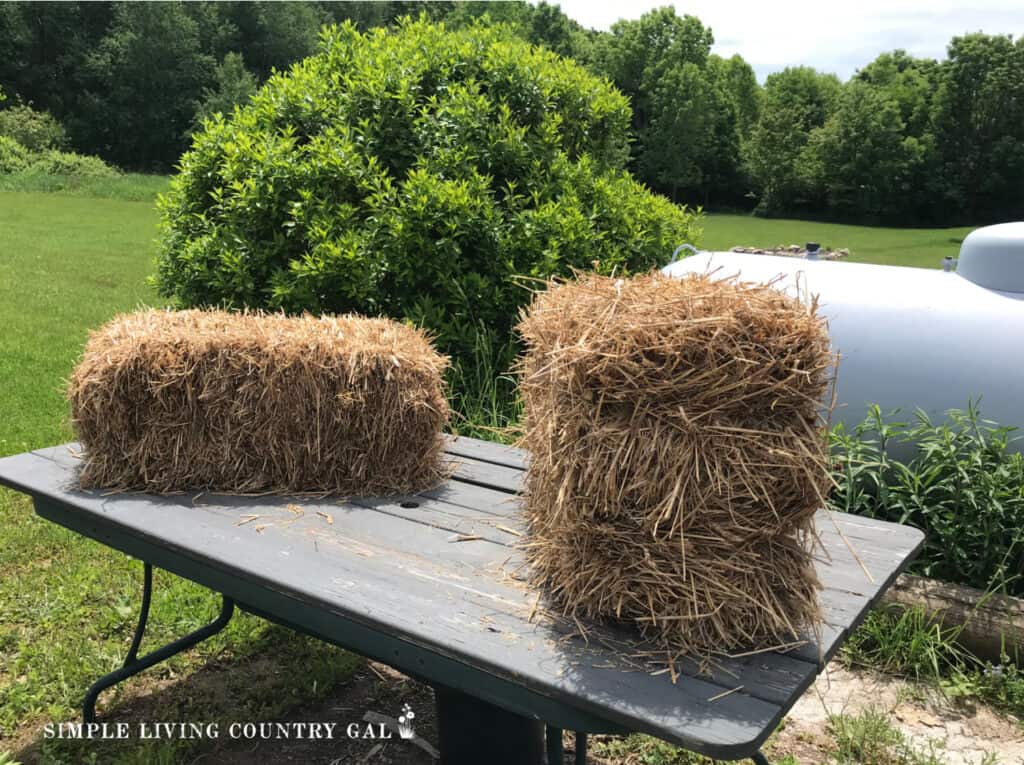
What is the Difference Between Using Straw and Hay for Gardening?
When it comes to gardening, straw vs hay is an important factor that must be determined before diving in. Most folks use the term interchangeably not truly knowing the difference and that can be a pretty big problem.
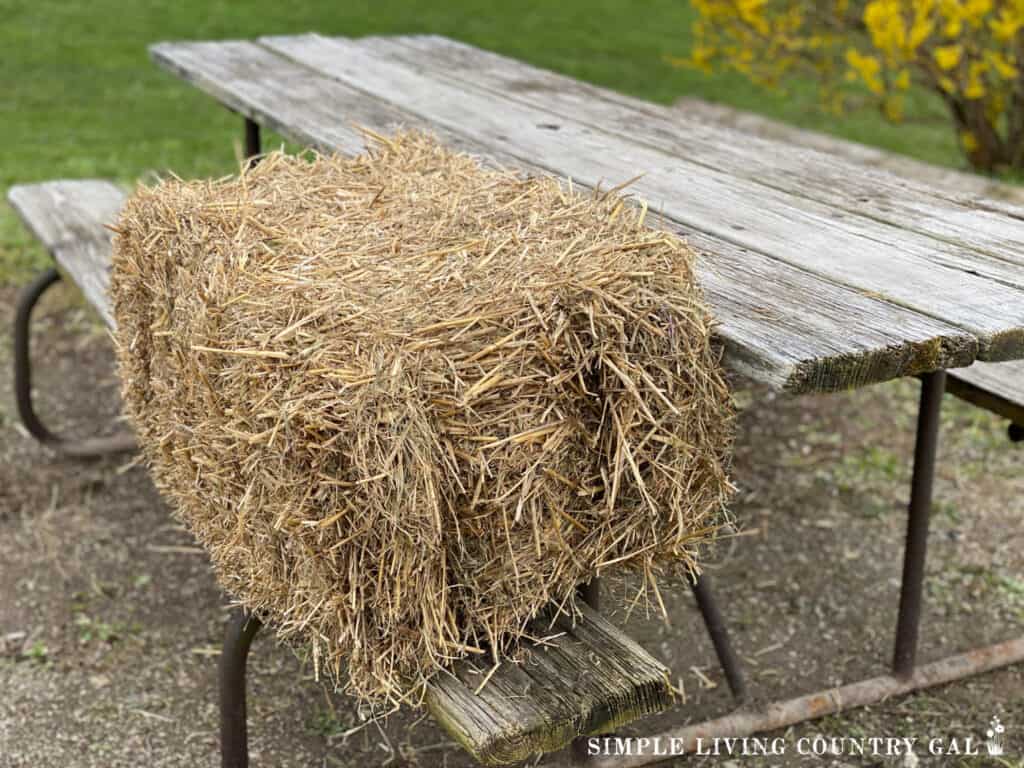
A straw bale is made of up stalks which is the waste product of wheat. This type of bale is most commonly used as bedding for livestock. It contains no seed heads or seeds so it can be safely used in gardens as a mulch or a winter cover.
A hay bale is cut grass or alfalfa and is used to feed livestock. It contains every part of the plant including the seeds. If you use this type of bale in your garden beds you will be adding a load of seeds to your beds including weed seeds as well.
Hay in a garden is a no-no and will only cause you to have to weed more than you ever imagined.
Final word to remember: always want to make sure you are using straw bales when growing anything and hay bales when feeding anything.
Since you will be using straw bales to grow your plants, when you have finished the growing season the entire bale can be then added (be sure to remove the baling twine first) to your compost bin or even to your garden without the risk of adding any additional seeds.
Be sure to only purchase straw bales from reliable sources. You can read more on the importance of this below.
20 20 20 Fertilizer – All Purpose Liquid Plant Food – Lawn, Flowers, Herbs, Vegetables – Best Way to Grow Healthy Plants – Garden-Growing Miracle Nutrients – 1 Qt / 32 fl oz / 946 mL Michigan Peat 20 Pound Bag of Garden Magic General Purpose Moisture Retaining Potting Soil Mix for Indoor and Outdoor PlantingCompost Thermometer – Cate’s Garden Premium Stainless Steel Bimetal Thermometer for Backyard Composting – 2 Inch Diameter Fahrenheit/Celsius Dial, 20 Inch Temperature Probe


Which Plants Grow Best in a Straw Bale?
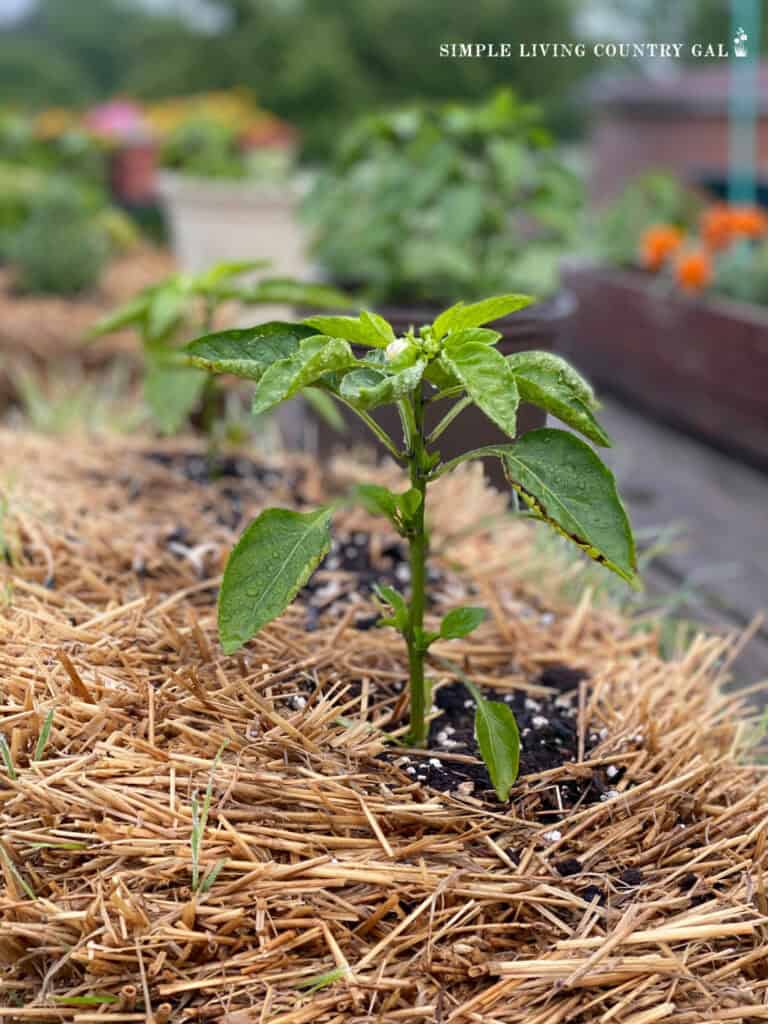
Straw bale gardening can be used to grow just about anything. Tomatoes, peppers, squash, and cucumbers are my top list to try out this year but that is not all you can grow.
Your rule of thumb here is this: if you can grow it in a single season in your garden, then you can grow it in a straw bale. Get our full list of the Best Plants for Straw Bale Gardening here!
Yes, that even includes herbs!
When setting up your DIY straw bale garden you will want to make sure you have plenty of sunshine, at least 8 hours a day.
Setting up a Straw Bale Garden
This guide will walk you through each step, from planting to harvesting.
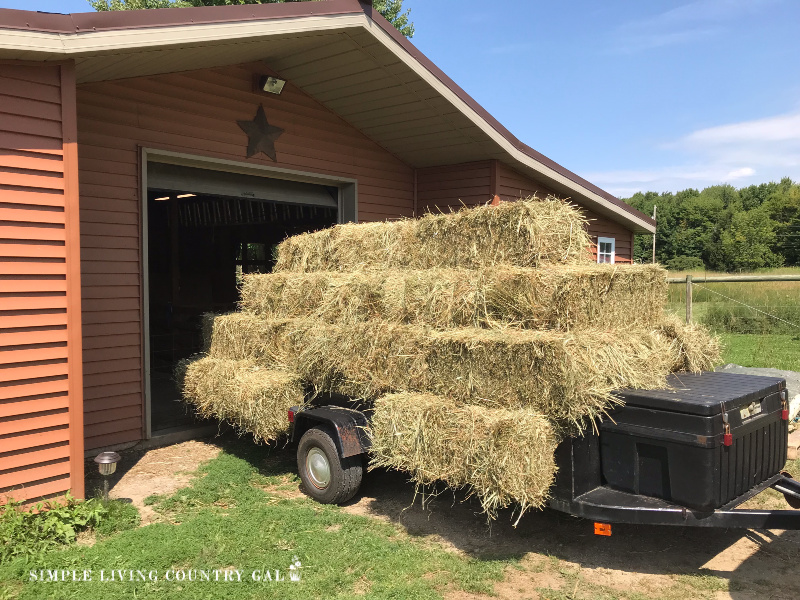
Step #1 Purchase your straw bales
I would suggest you find your bales at a local farm. You can just call and ask if they have any straw bales to sell and most, if not all of them, will.
If not, your local feed mill, garden supply store, or a chain such as Tractor Supply will have them as well. (Use caution when purchasing from an unknown source. Read final comments below.)
They can cost anywhere from $2.50 – $5.00 a bale depending on where you live. I prefer to purchase mine from a local farmer so I am sure to get a good quality organic straw bale that I know the history of.
Step #2 Find the best layout for your straw bale garden
As I mentioned above, you want a spot that is close to water and has plenty of sunshine. Depending on the area you have to work with you can either set your bales up into rows or another formation that works well in the space that you have.
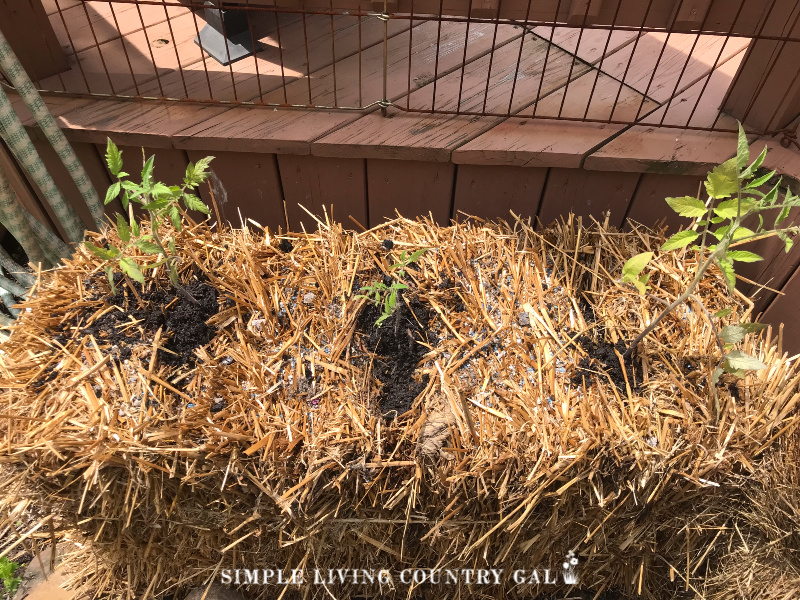
I have chosen to keep mine in our flower bed next to our back deck. This way I can water easily when I am watering my planters and they will have a bit of shelter from the crazy high winds that we are accustomed to here.
SLCG PRO TIP: Place your bales on a tarp or feed bag to deter weeds from growing up into the bale. This also helps a bit if you do have to move once planted.
You can use the tarp to “drag” your bale from one location to the next. Remember once a bale is wet do not use the twine to move or you may run the risk of snapping the strings and causing your bale to fall apart.
Position options:
- Straight rows
- U pattern
- Stand alone, randomly tucked into the spaces you have available.
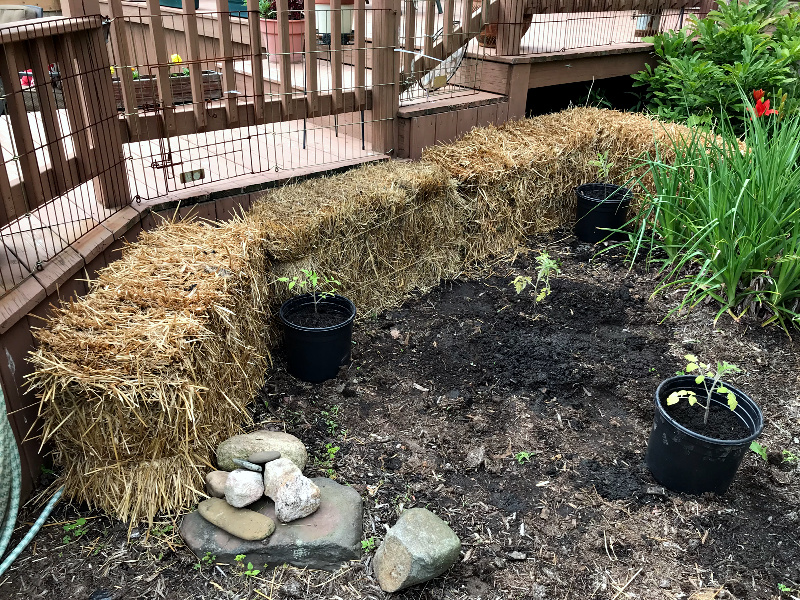
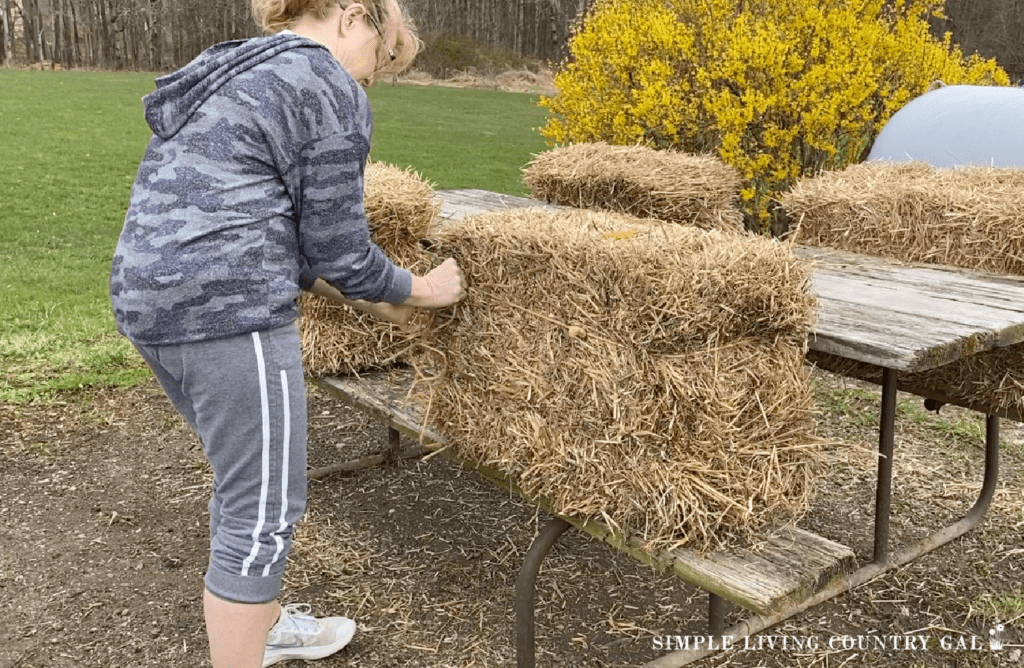
Be sure you lay your straw bales with the cut side up or sideways. You know your bale is sideways because you will have your twine around the OUTSIDE of the bale, holding it all together. The reason we want it sideways is for easier composting and planting.
Step #3 How to condition a straw bale for gardening
I learn best when I know WHY I am doing things so that is how I am going to explain this part to you.
As I mentioned above, we need to prepare each bale by jump-starting that center and encouraging it to compost down for the roots of our plants.
Our goal is to turn the inside straw into the ground where our roots will grow.
Right now it is just straw and we need to transform it into soil using the interior heat, water, and a few additives to move things along quickly.
To do this you will need Nitrogen and lots of it.
The best way to do this is with some good old lawn fertilizer with an NPK of 29-0-4.
NPK stands for Nitrogen/Phosphorus/Potassium and each one plays a role in fertilizing.
Let’s go over them quickly:
- Nitrogen works well for developing leaves and stems.
- Phosphorus works on your flowers and fruits
- Potassium promotes healthy roots and prevents diseases.
To prep your bale you will need to do things in a certain order.
Approximately 2 weeks before you begin planting in your bale you will need to condition the inside to get things composting and cooking. We are going to do this by wetting and adding fertilizer and wetting some more. This combined with the warmth of the sun will jumpstart the inside of the bale in a magical, yet scientific way.
SLCG PRO TIP: If you have children, you will want them to get involved here. This is a great learning experience and really shows us how the science behind composting works!
1. Gather up all your supplies to condition your straw bales.
- Organic Fertilizer with an NPK of 29-0-4. I highly recommend you purchase this locally so you can thoroughly read the label on the bag. You want to NPK to be as close to 29-0-4 as possible. You need large amounts of Nitrogen to jumpstart the composting process and that is why 29 is recommended. Also, be sure to verify that it does not contain any weed protectant or pesticides as this will harm your plants.
- Bone/Fish Meal
- Wood ash – mix with the Bone/Fish Meal to jump up the level of Potassium.
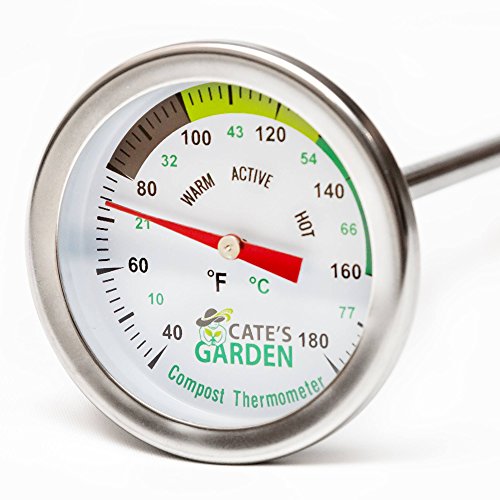
- Compost thermometer – not necessary but a great way to check the internal temperatures of the bales.
2. Follow this process to condition each of your straw bales for your garden.
SLCG PRO TIP: Check the temperature as you go along. As things are composting, internal temps can reach 125 degrees. This is too hot to plant in.
After about 2 weeks the internal temp should be about 75-80 degrees, Fahrenheit meaning you are ready to plant. If you do not have a thermometer just use your finger to test. It should be warm but not hot.
There are many ways to condition your straw bales in preparation for gardening, this is the one that I used and it worked very well.
Straw Bale Garden Conditioning Schedule
- Day 1 – Sprinkle 2 cups of fertilizer over your bale and water thoroughly to push that fertilizer down into the bale.
- Day 2 – Water your straw bale.
- Day 3 – Sprinkle 2 cups of fertilizer over your bale and water thoroughly to push that fertilizer down into the bale.
- Day 4 – Water your straw bale.
- Day 5 -Sprinkle 2 cups of fertilizer over your bale and water thoroughly to push that fertilizer down into the bale.
- Day 6 – Water your straw bale.
- Days 7-13 – 1/2 cup of fertilizer each day followed by a thorough watering to push the fertilizer down into the bale.
- Day 14 – Add 3 cups of Bone/Fish meal + wood ash.
After day 14, your straw bales are ready to plant.

Step #5 Planting vegetables in your straw bale gardens
Once you have conditioned all of your bales, you are ready to plant.
As I said before, just about anything can be grown in a straw bale. Let’s go over a few of the most common ones.
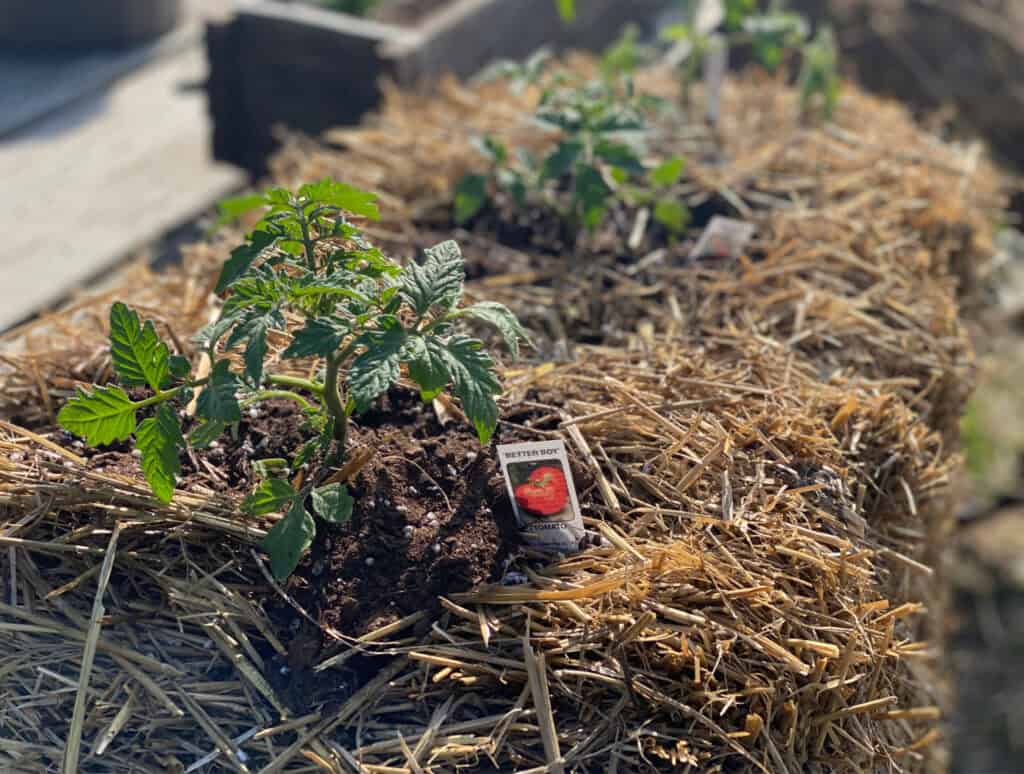
Planting Seedlings
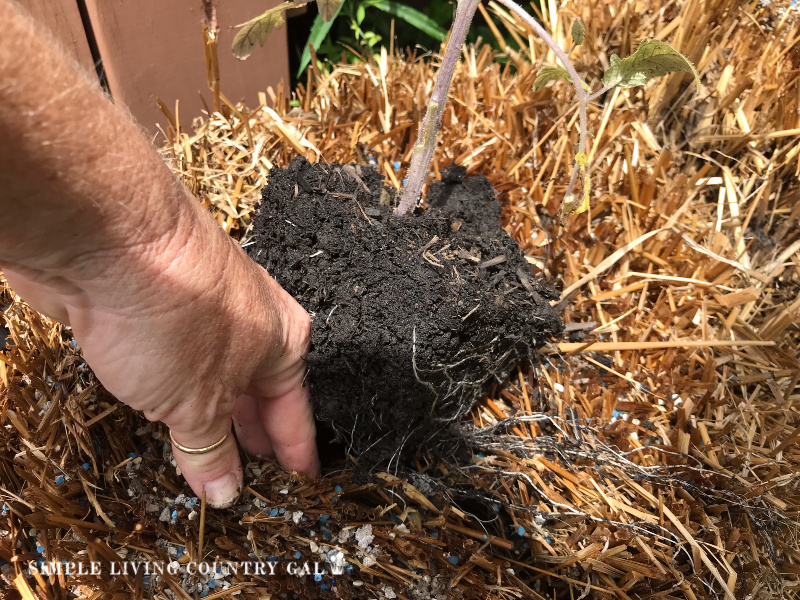
To plant seedlings in a straw bale, start by making a small hole with your hand and adding a bit of soil. Gently loosen the roots of your seedling to promote healthy growth, then place it into the hole.
Add more soil around the base of the plant and gently press it down to hold the plant in place. Insert a support stake next to the base of the plant for stability. Finish by watering each seedling.
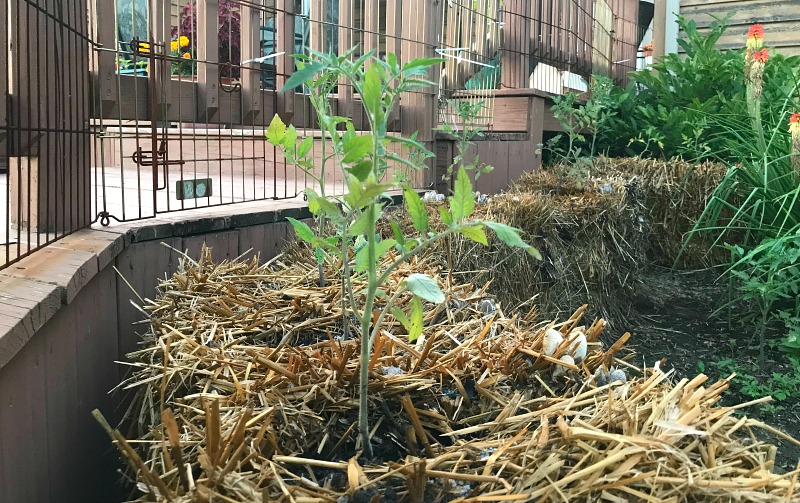
With an average-sized bale, you can comfortably plant 2–4 seedlings.
Planting seeds
Start by spreading a layer of peat-based soil across the top of the bale to secure your seeds. Use your hand to gently pat the soil down, then lightly water it to hold it in place. Once ready, plant your seeds following the recommended spacing and depth for optimal growth.
Planting Potatoes
In a straw bale garden, you can plant your potatoes deeper because the matter in the bale is loose, and easy for the plant to travel and reach the surface.
Open a space in the bale and place your potato cutting about 16–18 inches deep. Each straw bale can accommodate up to three potato plants comfortably. You’ll know it’s harvest time when the leaves start to die or turn brown.
SLCG Pro Tip: Make the most of your bale by double planting a shallow plant with a deep-growing one. For example, radishes can be planted on the surface of the bale while potatoes are growing deeper below. This way, you can enjoy a quick radish harvest while waiting for your potatoes to finish growing!
Planting Onions
To plant onions in a straw bale, start by opening up a space for your onion set and add a bit of soil before added the onion. If your bail is tight, you can remove a bit of the interior to give your bulb room to grow and mature.
Follow the usual depth and spacing guidelines for your onion variety—typically 2–4 inches apart and a few inches deep.
As your onions grow, they might lift out of the bale. If this happens, gently push them back into the straw to keep them stable. Harvest your onions when the green stalks start to yellow.
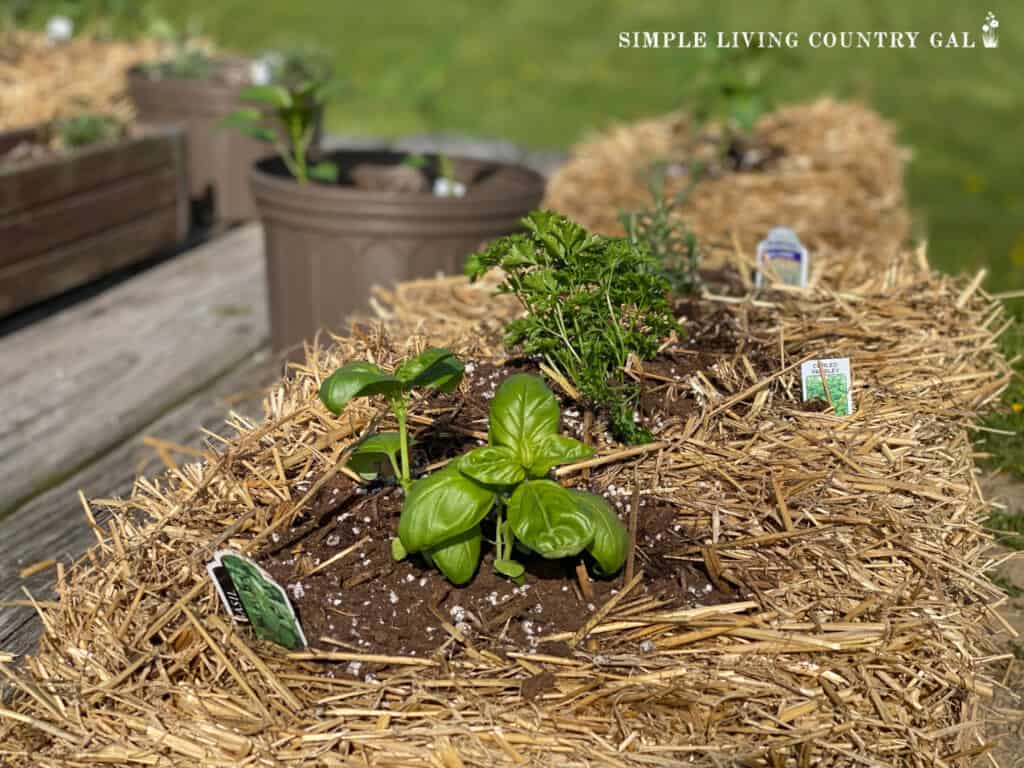
Planting herbs
Growing herbs is easy and a great way to really utilize the space you have to work within a bale. Since herb plants stay relatively small and lightweight, you can plant them on the SIDES of the bale.
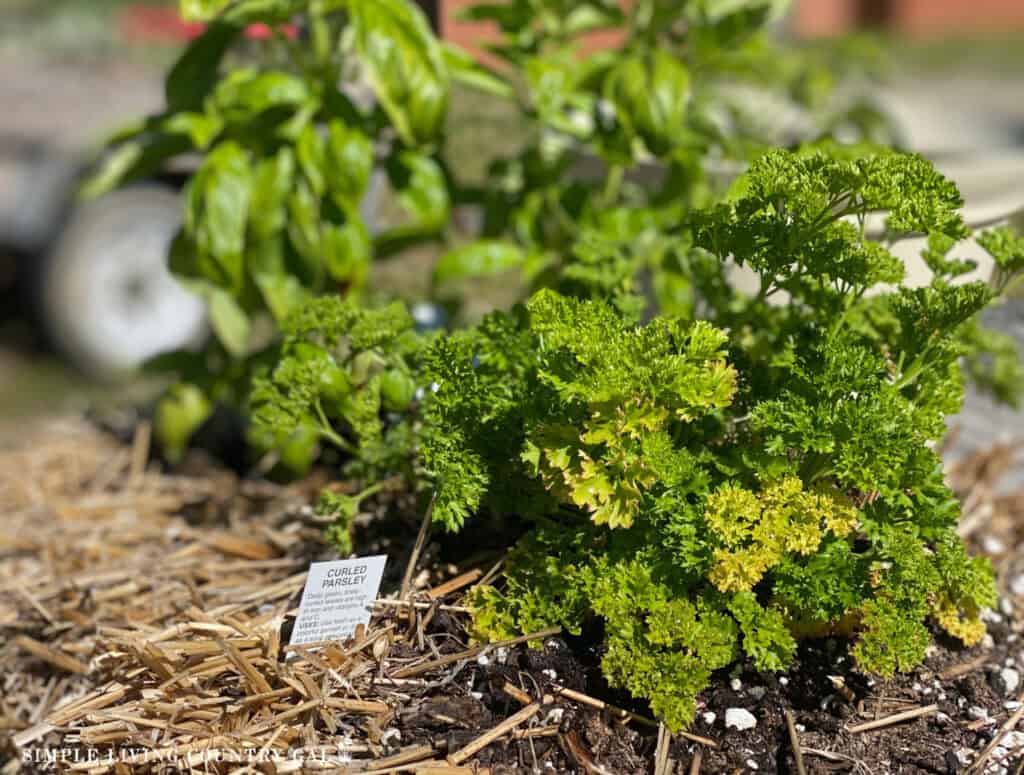
Open up a small opening in the sides of the bale at either the halfway point or higher. Place your herb plant inside, along with any soil from the transplant pot, keeping it at an angle.
When you water the bale you will be watering all the plants including the side plantings of your herbs.
Excited to learn How to Grow Herbs in Straw Bales? You’ll love having fresh flavors right outside your door.
More Herb Resources:
Possible Problems with Straw Bale Gardening
There are a few downsides to growing in bales, and they are important to go over so you can decide if this approach is best for you.
#1. More frequent watering
A straw bale garden acts like a sponge, so it will require more monitoring of water levels than a normal garden. Keep this in mind when choosing a location that is somewhat close to your water source.
#2. Planted Bales are Heavy
If you have ever tried to move a water-soaked bale let me just tell you it is easier to move a sleeping cow. A wet bale is HEAVY and with only the twine holding it together, it is very hard to move.
#3. Not best for City Growing
If you live in the city, then I would suggest that you stick to containers especially if you are a rooftop gardener. (Jump back up above to read my container gardening posts for some great tips on how best to do this.)
Also, a straw bale may not be the best option for wooden porches or decks. Again, those bales get and stay pretty wet on the bottom, risking staining or even rotting of the wooden floors they are on.
I would suggest an open area such as a garden, vacant flower bed, or another patch of yard that is in full sun throughout most of the day. If your only option is a deck or patio, you can set your bales on pallets to give some air circulation underneath.
#4. You must condition before you can plant
You will need to prep your bales for a full 2 weeks before you can plant them so please keep this in mind when setting up your timeline.
I suggest using a garden planner or journal to keep track of your timeline. These notes will be incredibly helpful for next year when you set your bales up again.
#5. Unhealthy Bales
Some farmers use pesticides when growing straw giving a less than optimal bale to grow food in.
Know where your materials come from and what their practices are. Don’t be afraid to ask plenty of questions, and only purchase from reputable sources.
With all the gardening options out there today, you have all the tools you need to grow a garden of your own. Whether it be flowerpots, buckets, grow bags, or even straw bales, you can now grow as much as you want without the work that most traditional gardens bring.
Straw bale gardening for beginners will get you started with this easier way to start a backyard garden giving you all the vegetables you need this summer.
More Easy Gardening Resources:
- 10 Successful Tips for Beginner Gardeners
- How to Harden Seeds For Your Garden
- Transform Your Crappy Soil into a Lush Garden

A friend has used straw bales to garden, maybe a decade, and he swears by them. Fewer weeds, less hassle. My only caution is with bone meal…it’s a by-product of slaughter houses…ground bones and waste…it’s been discontinued as human supplement. About 30 years ago, Mad Cow Disease was associated with bone meal; people and dogs became ill. As with most of life, it’s safe until it isn’t but I’ve stopped using bone meal…it’s chancy with both humans and my dogs, cats. Liquid seaweed is a good alternative as is adding magnesium (Epsom Salts), especially for tomatoes.
Great tips, Sandra!
Why do you start the bales with the cut sides up? Is it easier for plant’s roots to grow that way? Or is it to save more space?
I have done them both ways, and find it is just as easy. But on the side they seem to be more “sturdy” as they compost down.
Tracy Lynn
Can you please share what exact fertilizer you used? I can’t seem to find the 29-0-4 at my local store. Thanks!
Just try to get as close as you can. Sometimes it can be hard to find the exact ratios, as long as you are close and you follow the steps for dosage your bales should compost down just fine.
Tracy Lynn