How To Harden Your Seedlings For A Successful Garden
How To Harden Your Seedlings to better withstand the spring weather for a successful garden in your own backyard. I learned this the first year I started my tomato seedlings indoors and I am glad I did. This one tip helped my plants become stronger to withstand the spring winds in our area.
Use this tip to start a backyard garden with plants that are strong from day one and grow a bigger and better garden.
Growing starter plants for your home vegetable garden is a great way to make sure your plants have a strong organic start from day one. Whether you live in the north where the length of your summertime is limited or in the south where summers reign most of the year, starting plants early can be both easy and a more frugal way to garden.
But starting your plants indoors is only part of growing a successful batch of seedlings, you also need to prepare those plants for the weather in your area.
This post will show you how to harden your seedlings for a more successful garden. Exactly what to do and why you need to do it.
When I first began growing my own plants from seed, I truly thought once the plants were big enough and the weather was warm enough, those plants were ready to go into the ground.
Unfortunately, I soon found out there was more to it.
That first year I lost quite a few plants because of an unexpected cold snap. Not so cold there was a frost, but much much cooler than my fragile seedlings could handle.
Little did I know I could have prevented all of this by doing one simple thing.
SLCG PRO TIP: This is important to take note of. It’s not just a frost you need to be wary of, but any large dip in your temperatures. If you are not a weather watcher now, once you start gardening…you will be. By making it a habit of watching the temperatures you will be able to save your garden and your plant from any significant changes.
Another tip is to track normal weather in your garden planner. This will help you to know when things start to warm up in your area allowing you to plan more efficiently your planting times.
What is hardening mean?
Hardening means to acclimate a plant to the change in weather in a slow methodical way.
Plants that are grown indoors in a controlled environment need time to adjust to the sun, rain, wind and fluctuating temperatures.
The time it takes to harden seedlings will depend on where you live.
How long should you leave your plants out to harden?
The answer to this is always to start out slow and work your way up. Your goal is to get your delicate seedlings acclimated to your weather. I find it is best to start at just a few hours a day and work your way up to full days while incorporating some evening times as well.
When should you start seeds indoors?
When you are starting plants indoors the time will depend on where you live and the weather in your area.
All of this information, daylight averages, sun exposure, temperatures, and risk of frost will be listed out for each zone in the United States.
Here is a more technical defintion: A zone, also known as a hardiness zone is a geographic area defined to encompass a certain range of climatic conditions relevant to plant growth and survival. ~Source Wiki
Once you know your zone you will have the information needed to determine the best time to plant any plant in your area. This is a great thing to keep in your garden planner. You can refer to this Zone Hardiness Map to find your specific zone.
The zone averages are a good rule of thumb to use for most items you plant in your backyard garden with a few exceptions. Onions are one of them. Since onions do most of their growing below the ground, they can go in just as soon as the ground is able to be worked. Find out more about growing onions HERE.
In Northwestern Pennsylvania I have a shorter growing season and by starting my plants indoors it allows me to get a head start. For our zone, it is best to start peppers in February and tomatoes in March. I also start any vine plants like watermelon or cantaloupe in April.
Yes, it’s true you can purchased seedlings to transplant in your vegetable garden but starting seeds is not only a cheaper way but it also allows you to know from day one that your plants are fully organic.
Starting seeds indoors can be done very inexpensively using items you have on hand.
Tools Needed to DIY a Seed Starting Area:
• Grow Lights – This is the most expensive part of a set up. You can also use florescent lights as well and we have found they work quite well.
• Planting Trays – You can reuse trays from past purchases, just be sure to wash them thoroughly first.
• Heated Grow Mats – If you choose to grow your delicate seedlings in a cooler area, such as a basement, you can invest in mats like these to set your plants on.
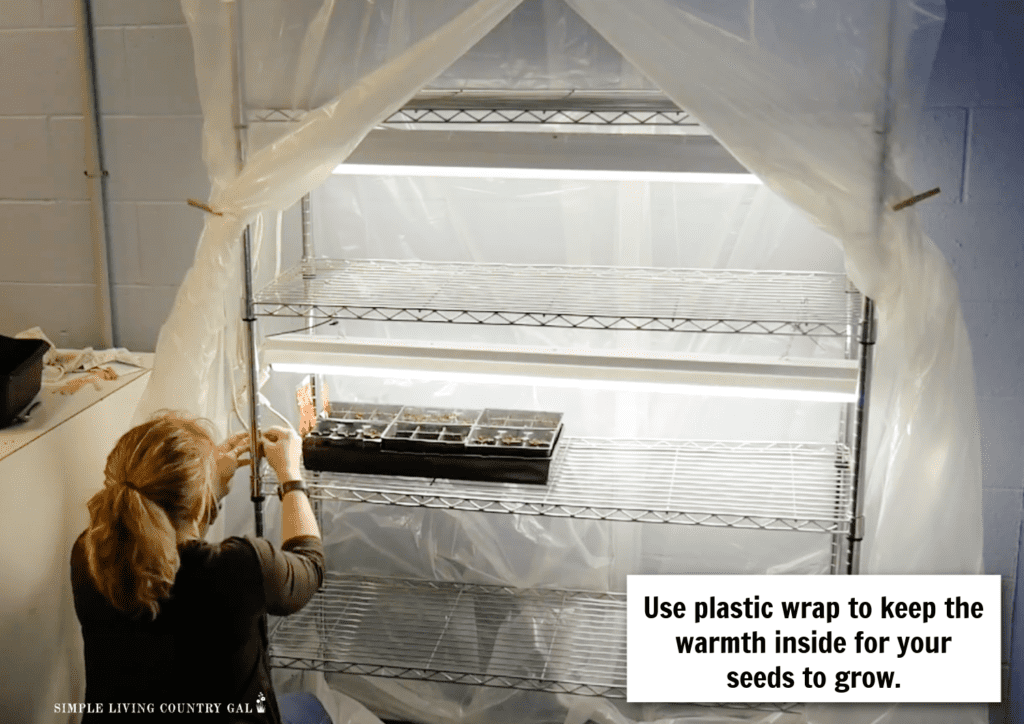
SLCG Pro Tip: Heated grow mats are a costly investment, you can instead use plastic wrap and enclose your grow area to keep as much heat in as you can. A small thermometer with a humidity reader included will help you keep track of the conditions you have in your setup.
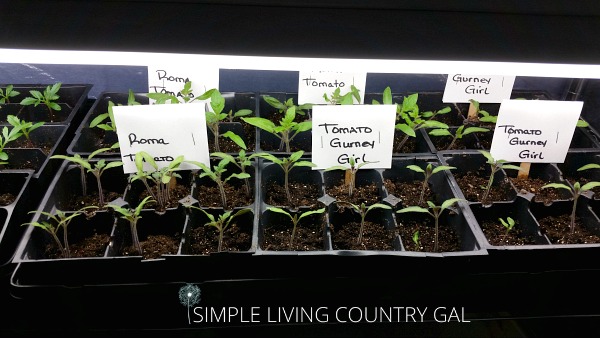
By starting your seedlings based on your specific zone, you will ensure that your plants will be a good size come spring when you plant them in the ground.
Over the years I worked to pinpoint the best plant times for our seeds. I started with the suggested plant times found for my zone and kept thorough notes in my gardening journal each year.
I made a note of when I started my seeds and how big my seedling plants were when I was ready to transplant them in our month as per to our zone, which is May.
If the seed planting date needed to be adjusted I would make a note of my new planting schedule for the following year and put a note in my calendar file.
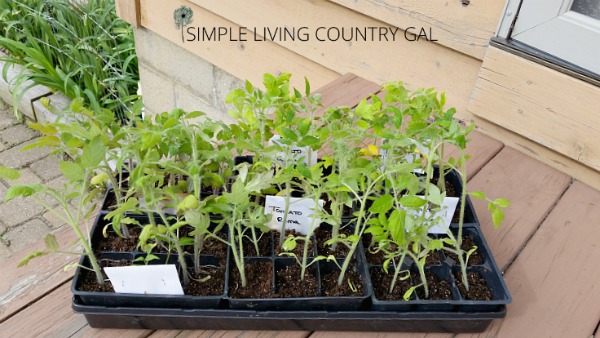
SLCG PRO TIP: To know if your plants are strong enough for transplanting, inspect the main stem and height. You want plants that are sturdy in the middle with good healthy leaves throughout.
Long bendy week plants may not do well in winds or heavy rains.
I also like to have a gardening prep and planting schedule written up that I can refer to each spring. From that schedule, I know my plants need to be in the ground sometime between the last week of May and the 2nd week of June to make sure they have plenty of time to grow and produce a healthy harvest.
You will also need to factor in time to harden your seedlings prior to planting. Let’s talk about that next.
Tips for harden your seedlings
When hardening seedlings your main goal is to acclimate them to the outside winds, sun, and temperatures. This sounds relatively easy, but those seedlings are more fragile than you may realize. Over the years I learned a few tips that will help you to be more successful.
Tip #1. Choose a safe place.
To harden your seedlings, you want to put them in a place that is protected. Things you will want to consider are pets or young children that may dig in the plants.

Tip #2. Choose a spot with good sunshine.
A sunny place is best it’s true but too much sun can quickly dry out your plants. I like to put seedlings in an area that gets some sun but not direct for an extended period of time.
Tip #3. Water frequently as needed.
As mentioned in tip #2, the sun can quickly dry out your plants and for that reason you will need to water several times or more throughout the day.
I suggest setting a timer for every hour or so to ensure you catch things before they dry out too much.
Tip #4. Watch for winds.
We live in a very windy area so this is always a step I need to include with any of my plants. Whether you live in a high wind area or not, you will still want to watch for windy days so you can keep your seedlings protected.
Here is a tip I use quite often.
If you have a windy day you can still put your plants outside, just keep them close to your house for extra protection.
Here are a few ideas:
- A corner on a patio or porch. Winds tend to be less in the corners.
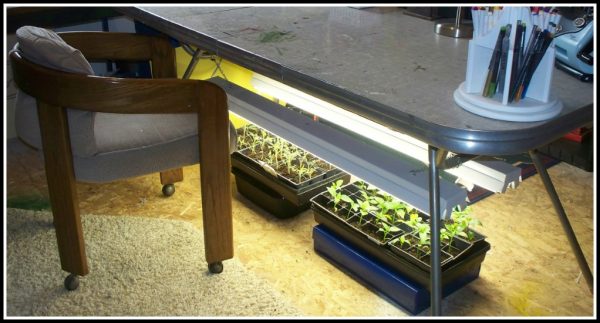
- Under a glass table or under a woven deck chair. This will allow your seedlings to still get some sun but the winds cannot hurt them.
Tip #5. Make it easy.
If you have quite a few plants to harden up, taking them in and out each day can be quite a task. To help, I like to put my flats on a gardening cart or wagon that I can easily wheel in and out of our barn or garage.
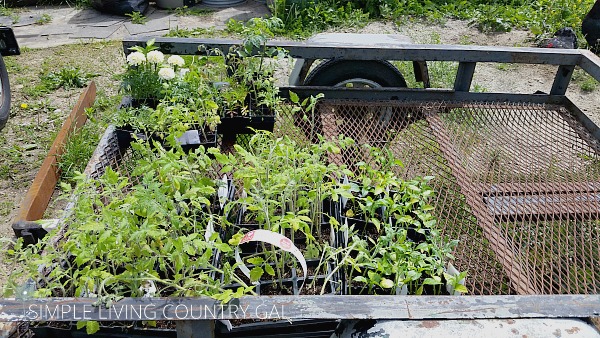
This utility wagon works well too.
You can either allow them to sit out in the sun right on the cart or move them to a safer location if needed.
Tip #6. Start Out Slow.
To start, place all of your seedlings outside in a protected area for a few hours the first day working your way up to full days. Be sure to watch the soil as seedlings in containers can dry out quickly in the warm sunshine.
After a few days if find your plants are tolerating the weather well you can let them stay out after dusk. This will help your seedlings become used to the drop in temperatures and the dew that will coat and water their leaves.
Tip #7. Bring them in at night.
Each evening bring the plants back inside. Either into the house, a barn, a garden shed, or garage. This will ensure they are protected from the cold damp air until they become more used to the changes.
At this point, your plants should large enough to no longer need the grow lights. Remember to use a cart or wagon if you need to make this part a bit easier.
Tip #8. Be consistent for best results.
Continue to harden your seedlings for up to a week increasing the time spent outside with each day. Eventually, your plants will become stronger allowing them to better handle those chilly nights.
At this point, you will begin to see a noticeable change in your seedlings as they begin to grow into strong plants ready for your garden. Remember to keep thorough notes of how you did your hardens and how your plants progressed. These notes will be a crucial part of your growing plan next season.
Once your plants are accustomed to your weather, you are ready to transplant them into your garden without the risk of damage from normal weather.
Remember, if you get an unexpected frost, all of your plants will need to be covered. No matter how sturdy and strong your plants are a frost can and will do some pretty significant damage if any of our plants are left out unprotected.
A good rule of thumb is to always watch the weather so you are prepared for anything that may happen. This includes heavy rains, strong winds, hail, and yes, frost.
You can use this row cover to help protect any of your plants if there is a risk of frost threatening your area. You can use sheets in a pinch, but sheets can be a bit heavy especially for young and delicate plants so please keep that in mind.
There is nothing better than fresh organic vegetables straight from the garden. Start your plants indoors with organic seeds, take the time to harden your seedlings, prepare your soil, and mulch your garden and you will have a bountiful harvest. One you can use to fill your winter pantry with.
Have a question on how to harden up your seedlings? Ask in the comment below!
More Gardening Resources:
- Stop Weeds with This One Tip
- 10 Tips for Beginner Gardeners
- Turn Crappy Clay Soil into a Lush Garden