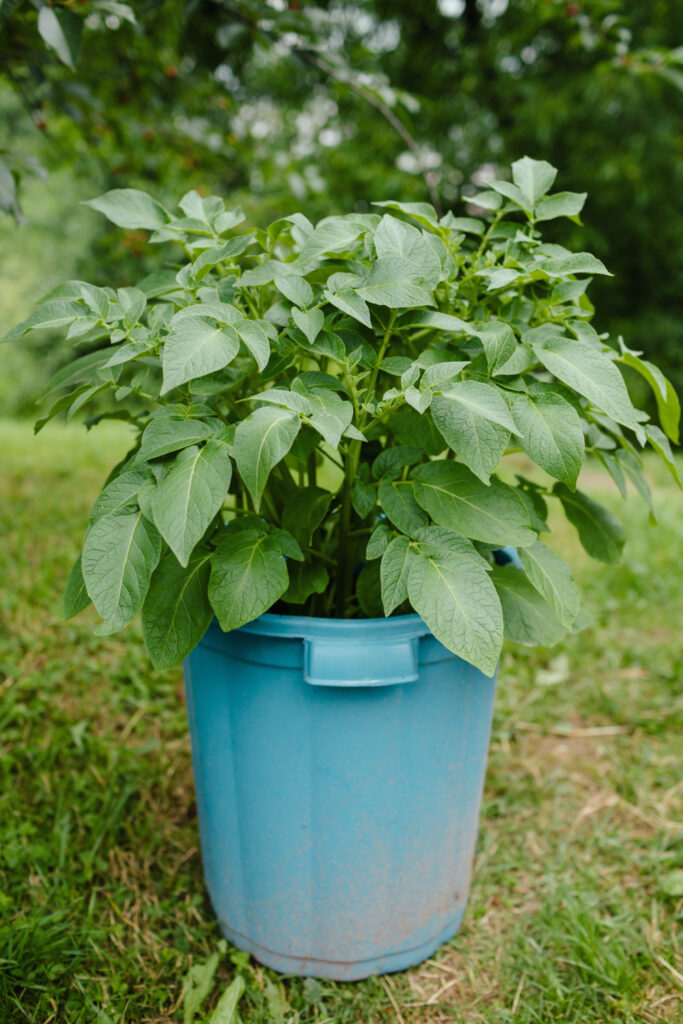
How to Grow Potatoes in Containers
If you are looking for an easier way to garden, this article on how to grow potatoes in containers is the perfect solution. You might be surprised to know that almost any plant you usually see in a backyard garden will do almost as well in a container. And containers mean you can grow your entire garden right outside your back door.
Easy tips for container gardening to help your potatoes thrive, giving you a good supply of spuds to fill your kitchen with.
A few years ago, I relocated my garden closer to my home to set up an easier way to grow our food. One of the things they don’t tell you as you get older is that your back and legs don’t want to do all the things they once did when you were in your 30s. Who knew?
To help prevent my body from aching, I moved my entire gardening operation outside my kitchen door. Yes, all of it.
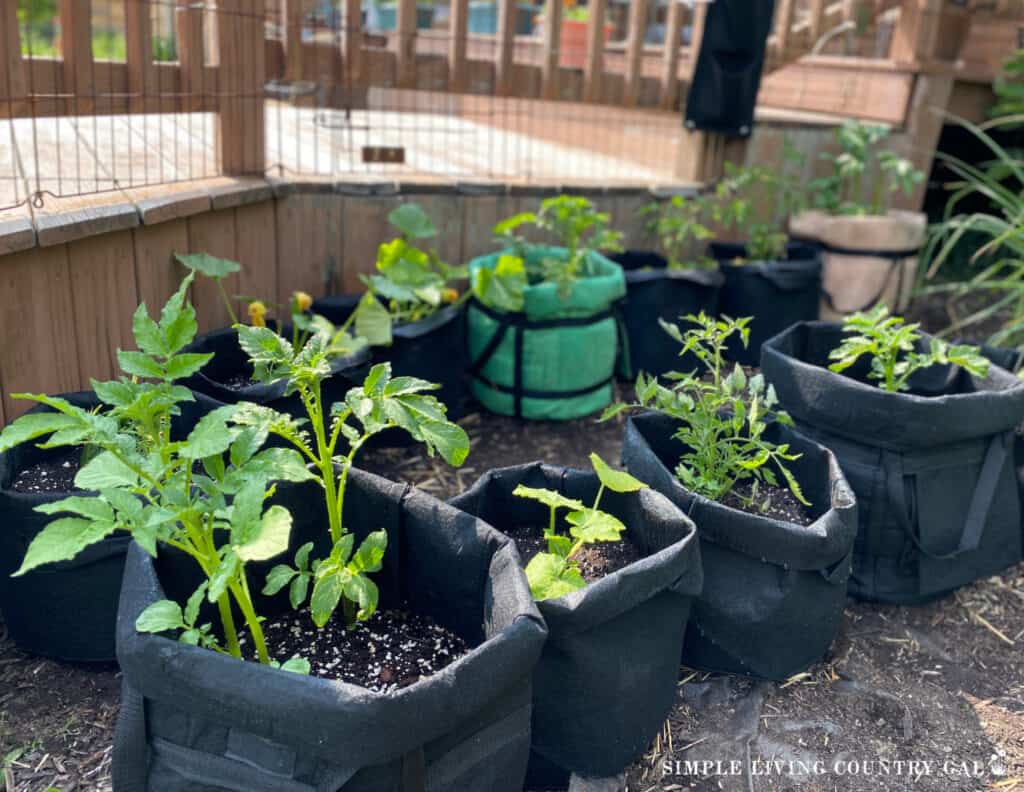
My tomatoes, peppers, peas, zucchini, and garden veggies are now all growing in containers and bags on my patio. I even have more bags in my flower beds nearby, along with a few growing in straw bales.
The one thing I had yet to try was growing potatoes in containers, until now.
Container gardens are quickly gaining popularity, and for good reason, this way of gardening gives another great and helpful option for people who don’t have a lot of space yet still want a hearty crop of homegrown vegetables.
You can grow more than you might realize in very little space, allowing you to set up a mini garden almost anywhere.
If you live in the city, you can grow potatoes outside on your balcony or porch.
Not a fan of tearing up your suburban yard? Put a few grow bags of potatoes on your back deck or even scattered around in your flower beds.
Luckily for us, potatoes are not picky as to where you plant them and grow quite nicely in various containers. Now, before heading out to the store to go potato container shopping (try saying that three times), take a look at what you have first.
You may find a few perfect options around your home and property. Things like rash cans, washtubs, buckets, and plastic totes can be used as a DIY potato container garden. If you are not sure you have what you need, see our full list of possible containers below.
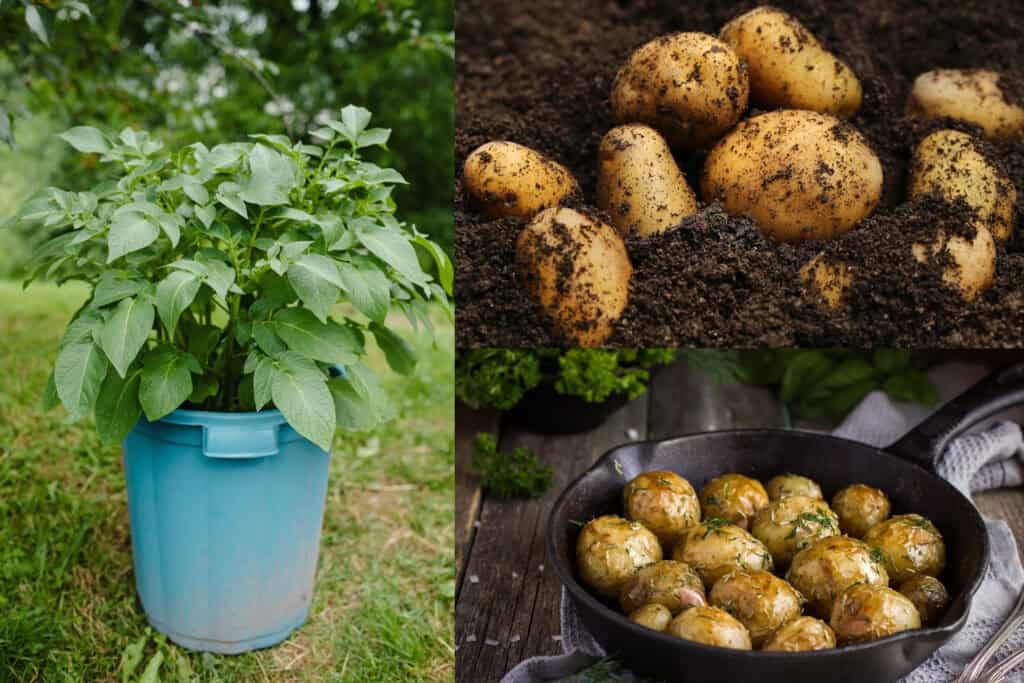
Why we love to grow potatoes
The main reason why potatoes are popular in summer gardens is they are versital and can be made into side dishes, main dishes, even desserts.
Not only are Potatoes delicious, but they are also rich in vitamins, minerals, and antioxidants. They help control blood sugar, reduce your risk of heart disease, and boost your immunity.
Be sure to grab the FREE Potato Growing Checklist Below!!
What Are the Benefits of Growing Potatoes in Containers?
Growing potatoes in containers offers many benefits, making it a popular choice among gardeners.
1. You can place your DIY potato containers just about anywhere you have space. On your porch, tucked into a flowerbed, off the back end of your garage or carport.
2. They are easy to move. If the area you started out with is not working, you can move it to a better location.
3. Containers make harvesting potatoes easy, and you’ll have less chance of damaging the tubers with gardening tools. Instead of digging, you can dump out the pot and remove your harvest in just minutes.
4. The soil is less likely to be contaminated since you’ll be using good organic soil or potting mix. You won’t have to worry about soil-borne diseases or pests that may still be around from the previous year’s crop.
5. No need to worry about rodents because the containers protect the potatoes from common pests like moles, gophers, and chipmunks simply because they can’t tunnel through the ground and eat your tubers. The containers also protect from other pests like grubs and wireworms.
How Many Potato Plants Do I Need?
You may be thinking, “How many potatoes do I really need to grow?” And I instantly want to reply, “How many potatoes do you need?”
With so many ways to cook and enjoy potatoes, I say as many as you have room for. Potatoes are so versatile that they make meal planning simple and inexpensive. The options are endless, from baked potatoes to roasted potatoes, homemade French fries and baked chips to creamy soup, stews, and potato salad.
If you are looking for a more specific answer, it will depend on how many people you’re feeding and how often you plan to put potatoes on the menu. On average, you’ll need 10 potato plants per person if you want a potato-based meal served up to 2-3 times per week. If you plan to eat potatoes less often or have people in your household who eat smaller portions, you can scale down from there.
SLCG PRO TIP: Now is the time to break out that garden planner. Keep track of what you grow and how much each plant yields.
You will also want to make notes on whether you had enough produce to last your family and, if not, any suggestions on how to do better the following year.
When you have a garden, notes are the key to always improving from year to year.

More Container Gardening Resources:
How Deep of a Potato Container Do I Need?
When choosing your container, you will want one at least 18 inches deep. One of the biggest issues when growing in containers is overcrowding. If there is not enough room, and you will have very small potatoes at harvest time.
To ensure a large harvest, always lean towards more room than you feel you will need.
What Kind of Containers Can I Use?
There is no rule of thumb here, and that is great news. This will allow you to use up some of the items lying around your property. Remember that whatever containers you choose, it needs to be deep enough and somewhat wide to give enough space.
Since potatoes grow underground, they’ll need plenty of depth to do so. they also need to have a bit of space width-wise. Aim for 12 inches and more if you are able. Be sure to use the space you have in the best way. For example, a round container can hold about 3-4 plants when planted in a triangular or square pattern.
Another thing to remember is to be sure whatever container you use has enough drainage at the bottom. This one tip alone will determine how well your harvest is and how good your potatoes are.
SLCG PRO TIP: If you choose a container without any drainage, you can easily add your own. Either use a drill to make holes or a hammer and nail.
Good options for containers:
- Large trash cans
- Buckets
- Grow Bags – 15 gallon
- Wash tubs
- Plastic totes
- Straw bales
- Deep planter boxes
- Burlap bags or old feed bags
- Any barrel that you have lying around.
- Grow bags – This is my top pick for growing potatoes.
- Fabric pots
Don’t make my mistake: As I mentioned above, the key when choosing a container is to ensure there is ample drainage. The first year I used containers for our potatoes, I neglected to add enough drainage, and as a result, most of our crop rotted because it sat in sopping wet soil.’
Unfortunately, I had no idea until I went to harvest, and instead of dozens of potatoes, I walked away with only a couple.
I learned an important lesson that year, drainage is important when growing potatoes.
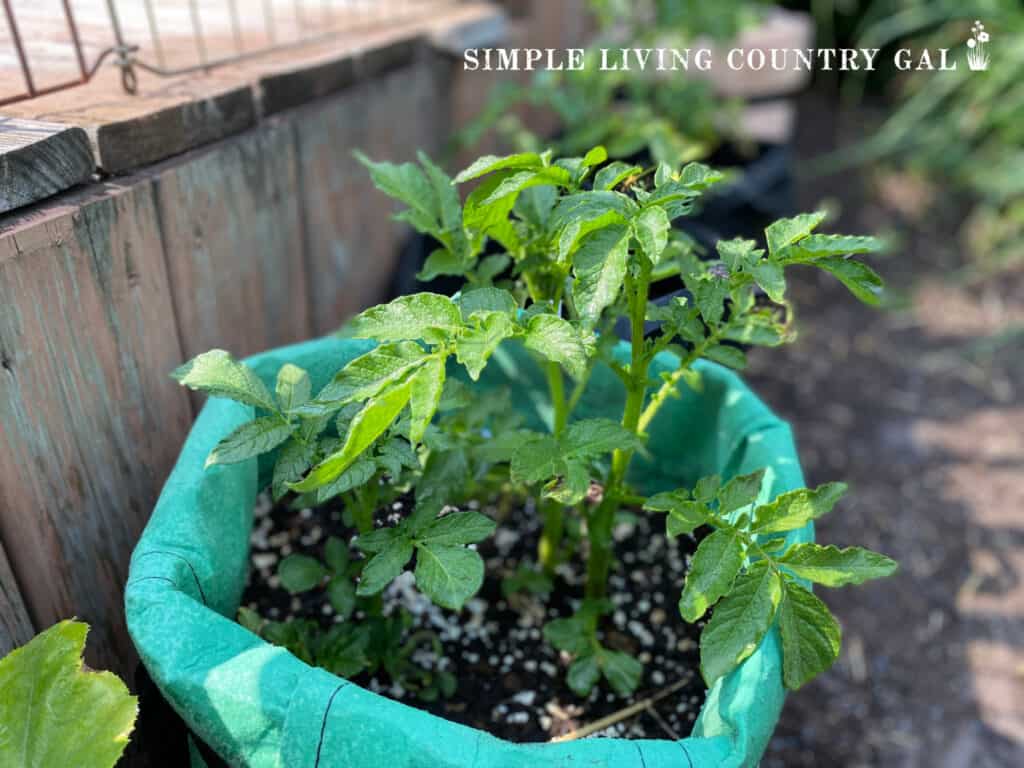
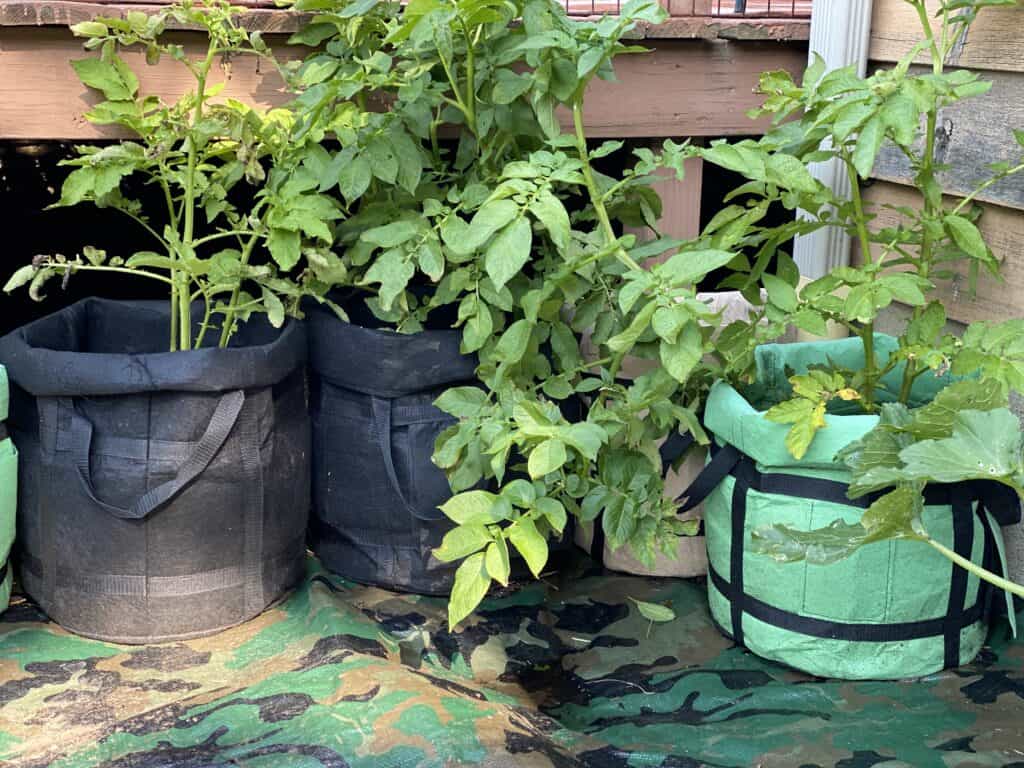
What containers are best for growing potatoes?
Because drainage is so important, I prefer to use grow bags for our potatoes. Since the material is porous, I know the excess water will drain out, creating the best growing area. No more soggy spuds, no matter how much it rains!
Delxo 5 Pack 7 Gallon Potato Growing Bags, Planter Garden Grow Bags with Flap, Double Layer Breathable Nonwoven Cloth for Planting/Vegetable/Tomato/Aeration Fabric Pots with Handles Green SORANGEUN 2-Pack 15-Gallon Grow Bags with 2 flaps and Reinforced Handles,Non-woven Potato Grow Bags, Heavy-Duty Thickened Aeration Fabric Pots for Potatoes, Tomatoes, Flowers, and VegetablesJJGoo 4 Pack Potato Grow Bags 10 Gallon with Flap, Heavy Duty Fabric with Handle and Harvest Window, Non-Woven Planter Pot Plant Garden Bags to Grow Vegetables Tomato, Black


Best Potatoes to Grow in Containers
Early potato varieties, such as Irish Cobbler, are best for containers because they mature quickly and produce their entire crop at one time. In most cases, they mature within 65-80 days, allowing you to harvest in about 6-7 weeks from the time you planted.
Early potato varieties include Dark Red Norland, Irish Cobbler, Chieftain, Sangre, Red Gold, and Yukon Gold.
5 Lbs Yukon Gold Seed Potatoes – USA Non-GMO Certified Potato TUBERS SPUDSIrish Cobbler Seed Potatoes, 5 lbs. (Certified)Sprouted Red Seed Potatoes for Planting, Potato Seeds, 2 Pound Potato Seeds for Planting, Heirloom Yukon Gold Seed Potatoes, Seed Potatoes for Planting, Sprouted Potatoes


Fingerling Potatoes are also a good option for containers. Fingerlings are small potatoes, about 2-4 inches long, and narrow, oblong-shaped. They come in a variety of colors, including red, purple, orange, and white. They have a mild, earthy and nutty flavor with a firm but moist texture.
A few varieties of fingerlings include Banana, French Fingerling, Pinto, AmaRosa, and Rose Finn Apple.

How to Grow Potatoes in Containers
When you’re ready to start your DIY potato container garden, here are some tips that help you grow a plentiful harvest.
1. Know what kind of potato you want to grow.
If you’re not sure, you can find a wide variety at most grocery stores. Try a few to see what you might like.
Once you’ve decided on a variety, you’ll need to purchase potatoes that are meant for planting. These are called seed potatoes and can be purchased at most farm and garden stores, online, or at your local feed mill.
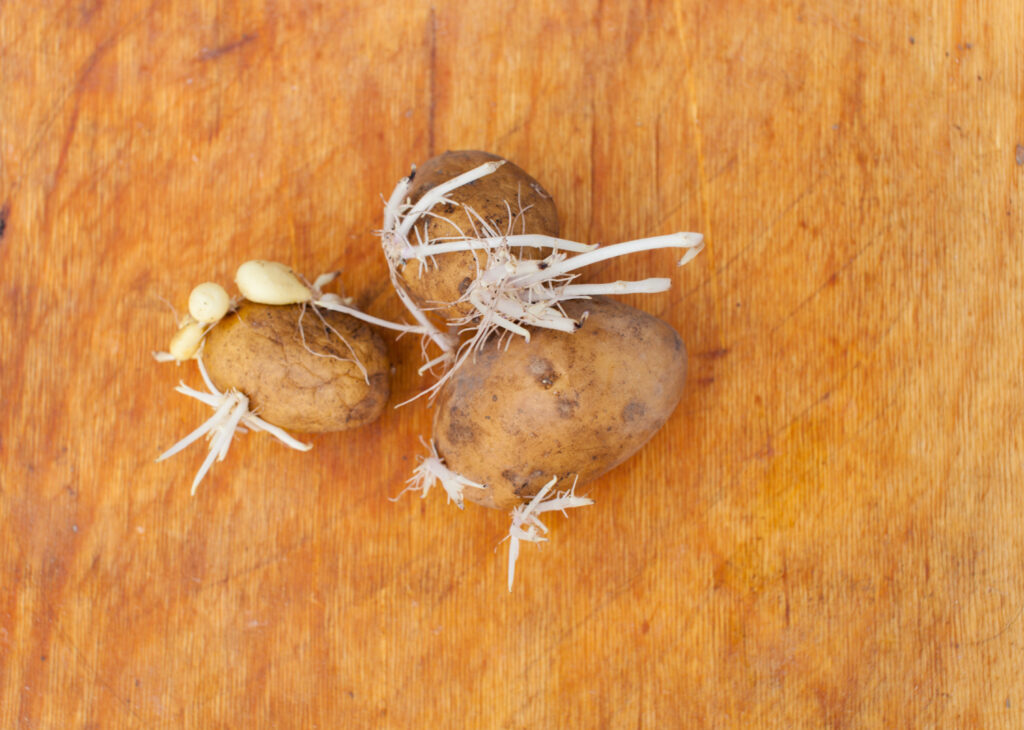
For the best planting, allow the potatoes to grow a few eyes, then cut them into pieces, with each piece containing at least two eyes.
Wait for the cut sides to harden and grow thick by leaving them to sit out for a few days before planting.
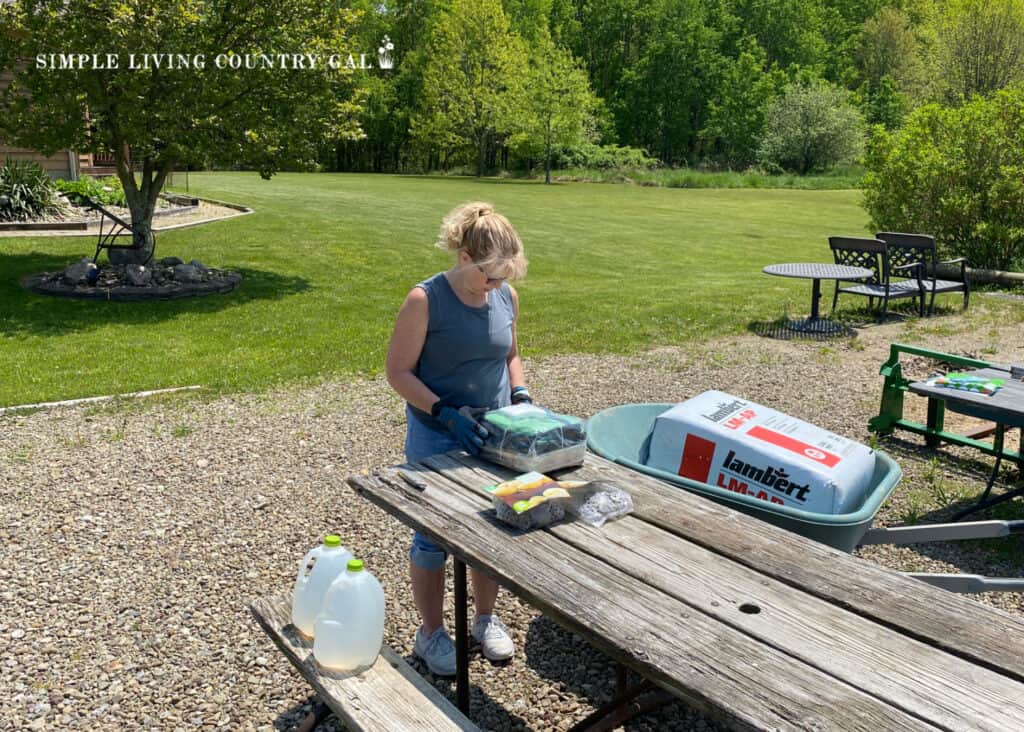
2. Use a lightweight soil mix.
Potting soil mixes made specifically for containers will work well for growing. The best part is that the mix is very light weight allowing you to move things around later if needed.
When purchasing, make sure it’s fast-draining, especially if your container is made of plastic.
If you decide to mix your own, your mixture should contain 1/3 good-quality compost, 1/3 coconut coir or peat moss, and 1/3 vermiculite or perlite.
3. Add fertilizer.
Mix in organic, slow-release fertilizer to provide plenty of nutrients for your potatoes. You’ll also want to consider adding a diluted liquid fertilizer, like fish emulsion, every couple of weeks.
SLCG PRO TIP: Organic fertilizer is much more forgiving, which is helpful if you add too much. Conventional fertilizer can burn your plants if you add more than you need, so keep this in mind when choosing what option works best for you.
Muriate of Potash 0-0-60 Fertilizer Made in USA – MOP Potassium Plant Food for Indoor/Outdoor Plants & Flower Gardens – Promotes Big Blooms! Fruit, Vegetables, Holistic Herbs, TreesEspoma Organic Potting Soil Mix – All Natural Potting Mix For All Indoor & Outdoor Containers Including Herbs & Vegetables. For Organic Gardening, 4qt. bag. Pack of 1Garden Tutor Soil pH Test Kit (3.5-9 Range) | 100 Soil pH Tester Strips – Test Soil Acidity and Alkalinity of Garden Lawn Grass Flower Vegetable Compost Indoor and Outdoor Plants

4. Position your seed potatoes for proper growth.
Fill your container with about 4-6 inches of soil that has been mixed with compost and fertilizer. Place the seed potatoes in the soil with eye buds facing up. Give them plenty of room to grow and breathe by spacing them a few inches apart.
For instance, a 20-inch round container should hold no more than 4 small seed potatoes. To utilize the space of your container most efficiently, plant your potatoes in a triangular shape.
5. Cover.
After properly placing your seed potatoes, cover them with a couple of inches of prepared potting soil. Be sure to only use about 1-4 inches of soil.
Too much, and you will affect the growth of your potatoes. Note: If you live in a cooler climate, use only 1-2 inches of soil to cover.
6. Water your potatoes well.
Potato plants grown above the ground require more water than plants grown in the ground. Since the soil in the containers isn’t insulated as well as the ground, any water will evaporate more quickly. If you do not have enough water, your potatoes will stop growing, especially if they get dry and overheated.
SLCG PRO TIP: Potatoes that are grown in containers need plenty of water, which can leach the nutrients out of the soil. For that reason, it is important to ensure you are keeping your soil healthy and fertilized.
To know how much and how often to water, stick your finger into the soil. If the top two inches of the soil feels dry, you need to water. Water until it begins to drain out of the bottom holes of your container.
This will ensure that water has had the chance to reach the roots in the bottom.

7. Keep your potatoes in full sun.
Potatoes need 6-8 hours of direct sunlight every day to flourish, but it is important to know they don’t like the heat. If there is too much heat, your plants may stop growing. What is too much heat? Any temperatures above 80°.
If you live in warmer temperatures, you will want to place your containers in an area that receives morning sun with partial shade in the afternoon. This is one of the biggest benefits of growing in containers. You can easily move plants around to get the very best of the weather.
8. Keep the tubers covered.
If potatoes are exposed in any way to direct sunlight during growth, they’ll develop green skin. The green areas are toxic and need to be trimmed away before eating. To avoid this, always make sure your potatoes are well covered with soil or add a layer of mulch to prevent the sunlight from doing any damage.
SLCG PRO TIP: Each time you water, inspect the soil to confirm that everything is covered and protected. If you see things getting a bit thin, keep a small can of extra soil with a shovel nearby that you can access.
How to Care for Your DIY Potato Container Garden
When growing potatoes in containers, their care will be different than if you are growing in a traditional setup.
Watering Potatoes
Water and sunlight are the two most important things your potatoes will need. Make sure your containers are in an area that receives 6-8 hours of sunlight a day. The nice thing about container gardening is that you can move your containers if need be to follow the sun or if you need to protect them from too much heat.
After planting, make sure your potatoes receive plenty of water. The soil should be moist but not wet. Too much water can cause rot, so be sure your containers have plenty of drainage to prevent overwatering issues.
Water the containers with a good garden nozzle set to shower. Water your potatoes until you see water draining out of the container’s drainage holes. This will ensure that the water reaches the root system.
Remember, to test if your potatoes need watering, stick your finger into the soil. The top two inches should be moist. If they’re not, it’s time to water. Check your containers daily for moisture, especially if the temperatures are very hot, as you may need to water more than once a day.
Hilling Potatoes
Once your potatoes start to grow and reach about 6 inches, you’ll need to “hill” them. This means adding a few inches of soil or soil mix around the plant.
Your goal is to bury about a third of the plant, covering the lower leaves. The buried stem will produce more potatoes, giving you a bigger harvest.
Continue the hilling process while the plants grow or until the soil reaches the top of your container. Since potato plants grow quickly, keep an eye on them and do this as much as necessary.
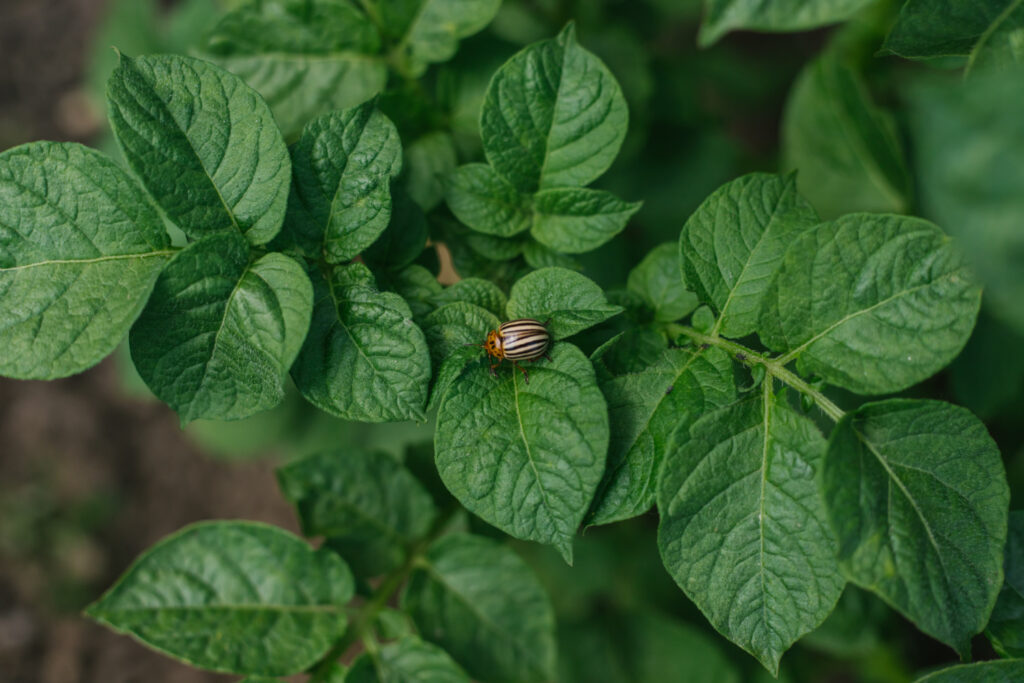
Potato Issues
You’ll want to watch out for disease and pests, but luckily they are less prevalent in plants grown in containers. Insects, including the Colorado Potato Beetle and the Flea Beetle are common, as are Wireworms.
When inspecting for pests, look for larvae and eggs planted on the leaves of your plant.
Mulching Potatoes
Mulching your containers can help to reduce pests and diseases as well as keep the soil moist and cool. Add 2-3 layers of mulch to the top layer of soil when planting. You can use dried leaves, cut grass, straw, or other healthy matter. A
s the plants grow and you need to hill them, you can add the soil directly over the top of the mulch.
SLCG PRO TIP: Since the mulch will become part of the soil, it is always best that you use healthy, disease-free, and organic. The nutrients from the mulch will affect the potatoes so when in doubt, go organic.
How to Harvest Potatoes in Containers
You can harvest your potatoes anytime after the plants that are above the soil have flowered.
There are two very simple methods for harvesting your potatoes. For the first, you’ll need some garden gloves and a small trowel. Carefully reach down into the soil and remove a few potatoes at a time.
This is the best method if you still have potato plants in the container that are in the growth process.

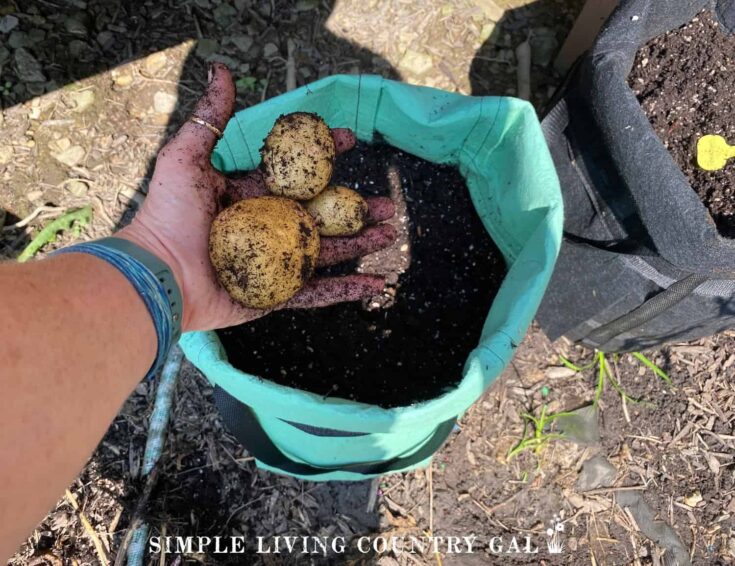
If it’s late in the season, the plants will turn yellow and start to die back. This means that any potatoes left in the container are ready for harvesting.
At this point, you can simply dump the container over on a tarp or in a wheelbarrow and start digging around for any potatoes. You may even find a few small potatoes. Don’t throw these away; they can be delicious and sweet, perfect for a soup or stew.
You should discard any potatoes with a large majority of green skin, though. They contain a bitter chemical known as solanine, which is mildly toxic and can cause digestive issues. If just a portion of the potato is green, you can cut that part away before cooking and use the rest of the potato.
Storing Potatoes
Potatoes can be stored quite easily in a root cellar for later use. Simply brush off the dirt and let them dry for a day or two, then store them in baskets or paper bags to allow for ventilation and keep them in a cool, dry place. Storing this way, you can expect your potatoes to last up to 2 months.
If you do not have a root cellar, as mentioned above, you can also store them in the refrigerator for up to 2 months. Wrap them in plastic or in a storage bag to keep them firm and fresh. Just make sure they’re dry before putting them in the fridge.
If you plan to store your container potatoes over the winter, do not wash them. Instead, brush off the excess soil and let the potatoes dry indoors, out of the sun. This is known as curing. You will also want to be sure you choose larger potatoes as these tend to store better. Pack your potatoes in boxes that have plenty of holes for airflow.
You can use recycled paper to pack the potatoes in single layers so they are not touching each other. Keep the boxes in a cool, dry, and dark place. You are looking for 45-50F and 80-90% humidity. When stored this way, most potatoes can last up to 8 months.
SLCG PRO TIP: When storing over winter, you will want to check your potatoes routinely to ensure they are in good shape. One spoiled potato can quickly turn the others. To avoid this, check your supply and remove any that are questionable. Never eat a potato that is in bad or spoiled condition.
Potato Growing FAQ
1. What size container do I need to grow potatoes?
To grow healthy potatoes, you’ll need a container that is at least 15 to 20 gallons in size. A large bucket, grow bag, or even a plastic trash bin can work well. The container should be at least 12 inches deep as potatoes grow best when they have plenty of room for root development. Ensure it has proper drainage holes to prevent waterlogging, which can lead to rotting.
Tip: If you’re tight on space, you can stack soil as the potato plants grow, allowing more potatoes to form vertically. This method works especially well in tall grow bags or barrels.
2. What type of soil is best for growing potatoes in containers?
Potatoes thrive in loose, well-draining soil that’s rich in organic matter. A good mix includes equal parts of potting soil, compost, and sand. Avoid heavy clay soils as they can compact easily, making it harder for tubers to expand and grow.
Tip: Adding compost or a slow-release fertilizer to the soil ensures that the potatoes get all the nutrients they need throughout the growing season.
3. How often should I water potatoes grown in containers?
Potatoes in containers need consistent moisture, but it’s essential to avoid overwatering. Water regularly so the soil stays slightly damp but never soggy. Check the top inch of soil; if it feels dry, it’s time to water. Containers can dry out more quickly than garden beds, especially in hot weather, so keep an eye on them.
Tip: Mulching with straw or shredded leaves can help retain moisture and regulate soil temperature, giving your potatoes the perfect environment to grow.
Gardening 101 is all about making a backyard garden easy, especially when all you need is a container and some great, healthy soil. Keep this guide on growing potatoes in containers handy so you can refer to each spring at planting time.
More Gardening Resources:
- Cleaning up the Garden Fall Checklist
- Use Chickens to Heal Your Garden
- How to Compost in Your Own Backyard
How to Grow Potatoes in Containers
Get the steps you need to grow a beautiful, thriving plant of delicious potatoes using containers. This easier approach to gardening will allow you to grow the food you love on your back porch without needing to do the hard work of setting up and growing a traditional garden.
Materials
- • Container for growing the plant in.
- • Potting soil
- • Potato seedling
- • Fertilizer
Tools
- • Gardening gloves
- • Trowel
- • Watering can
- • Garden label
Instructions
- Choose a potato variety
- Choose a lightweight soil mix
- Add fertilizer if needed
- Fill your container with about 4-6 inches of soil.
- Place the seed potatoes in the soil with eye buds facing up.
- Be sure to space them a few inches apart to give them room to grow in a triangular shape.
- Cover with 1-4 inches of soil.
- Water your new container well.
- As your potatoes grow, if they begin to emerge cover with soil to keep it from sun exposure.
- Harvest when the plants begin to yellow and die back.
- Dig up one potato to test and confirm if it is time to harves the entire plant.
Notes
Spacing requirements: a 20-inch round container should hold no more than 4 small seed potatoes. To utilize the space of your container efficiently, plant your potatoes in a triangular shape.
Do a finger test to know if your potatoes need to be water. Stick your finger two inches into the soil. If it is dry - water. If it is wet - do not water.
Be sure your potato growing containers are in an area with 6-8 hours of sunlight a day.
Recommended Products
As an Amazon Associate and member of other affiliate programs, I earn from qualifying purchases.
-
 Back to the Roots 6qt Specialty Blend
 -
Simply Seed™ - Gold Rush Russet Potato Seed 5 Pounds - Naturally Grown - Non GMO -Order Now For Fall Planting
-
10 Gallon Grow Bags
-
Muriate of Potash 0-0-60 Fertilizer Made in USA - MOP Potassium Plant Food for Plants & Flower Gardens – Promotes Big Blooms! Fruit, Vegetables
-
Gardening Hand Trowel
-
Gardening Gloves for Women


That was a great tutorial, I am just starting out and I understood the process, I can’t wait to give it a try.
Thank you
Glad you enjoyed it, Cindy. Good luck!
Tracy Lynn
Thank you! Trying to teach my son, but my teaching vs his learning methods when it comes to gardening aren’t working as well or as efficiently as either of us would like. I teach, he asks a question, I try to explain a different way, repeat, until finally his eyes just glaze over and he loses focus. He understood this and everything quickly and instantly clicked into place for him!
I have a couple of questions. One can you plant less corn in a grow bag and use the remaining space for pole beans using the corn as the “trellis” for the beans? Second question. What do you do with the soil you dump from the bag after harvest?”
These are great questions, Sandy!
I love the idea of using corn as a pole, and I would definitely give that a try. Also, if the plants were healthy, then I put the soil in our compost bin after the plant and roots have been removed.
Tracy Lynn