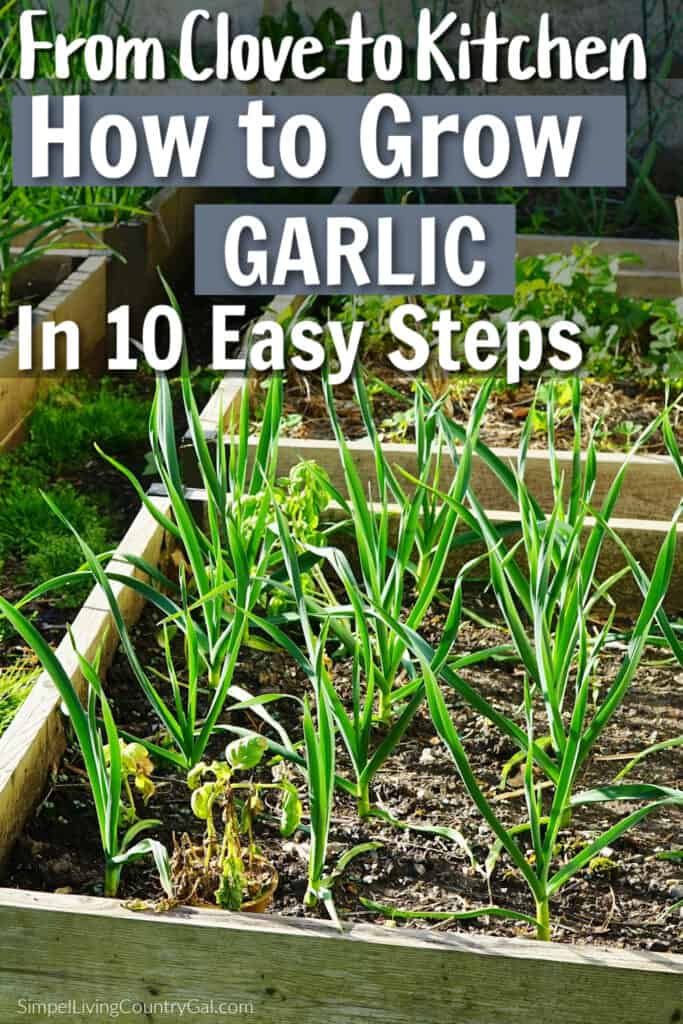
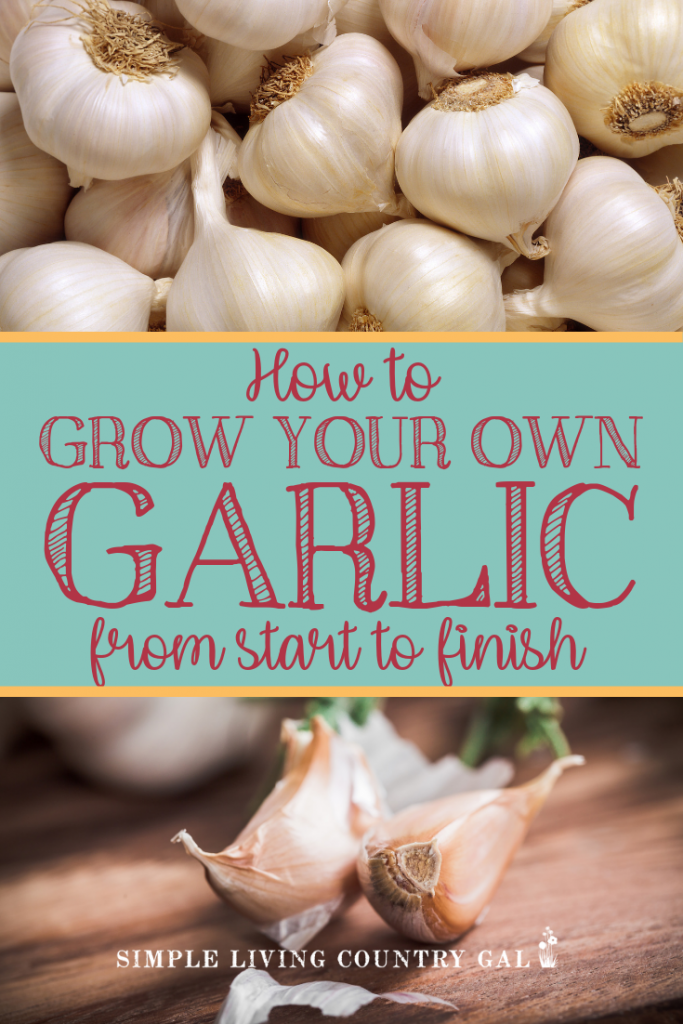
How to Grow Garlic Start To Finish In 10 Easy Steps
How to Grow Garlic Start to Finish in 10 Easy Steps is one of my favorite gardening projects to share, because garlic is truly that simple to grow. Plant it once in the fall, give it a little attention, and by summer you’ll have bulbs ready to enjoy (and store) all year long.
Garlic is also one of those crops that rarely fails, making it perfect for both beginner and seasoned homesteaders. Think of this guide as a handy gardening 101 resource you can come back to every fall when it’s time to plant again.
I still remember the first time I planted garlic. I was brand new to growing my own food and honestly had no idea what I was doing. In fact, I found myself learning as I went, right there with my hands in the dirt! What surprised me most was how different garlic was from anything else I’d ever grown. All the little “rules” I thought I knew about gardening didn’t seem to apply, and I had to just trust the process that first year.
When harvest time finally rolled around and I pulled up those first bulbs, I was completely hooked. From that moment on, garlic became a staple in my garden, one I look forward to planting year after year.
How to Grow Garlic in 10 Easy Steps
Gardening is one of those home projects that is a lot of work with just as much reward. Learn the basics of growing a handful of vegetables and you can turn your backyard into a full produce section as you see at a farmer’s market in the summer.
Most gardens get planted in the spring and harvested at the end of summer. Garlic is different, you plant it in the fall allow it to rest over winter, new shoots pop up in the spring and you tend it over the summer until it is ready to harvest.
Even better is the fact that once you grow heads, you love the taste of, you will have the seeds you need for every garden going forward. Garlic is one of those amazing plants that keep giving year after year.
Garlic Basics to Know
When it comes to garlic, there are two main varieties of garlic to be aware of: hardneck and softneck.
- The hardneck varieties prefer cold climates. So if you live in an area that has normal to hard winters, you will want to grow hardneck garlic. This is usually zones 1-5.
- Softneck varieties do better in mild climates. If you live in an area that has mild or no winters, then you will want to grow softneck garlic. This is usually zones 8-12.
There are many different types of garlic to consider; you can see them all here. My best advice is to try a few each year until you find what grows the best and which ones you prefer the taste of.
After a few years of experimenting, I found we enjoy Elephant garlic the best and now grow it year after year.
Step #1. Plant Garlic in the Fall
In colder climates like Northwestern PA, where I live, the most important thing to remember about garlic is that it needs to be planted in the fall. Target planting months may vary depending on where you live but the range will be from August-November.
I know some folks say spring is fine for planting garlic as well, but I’ve tried spring planting and was very unsuccessful. Fall planting is definitely the way to go, as it allows the heads to take root before they begin hibernating (in a sense) for the winter.
In our location, our target planting time ranges from late September through early October or before the frosts hit, making the ground too hard to work.
I have even planted them as late as November, and they still did well, although not quite as big as I would have liked. The key is to watch your frost dates and try to plant your garlic a week or so before your first frost.
For most areas, you will want to plant your garlic 3-5 weeks before the first frost in the fall.
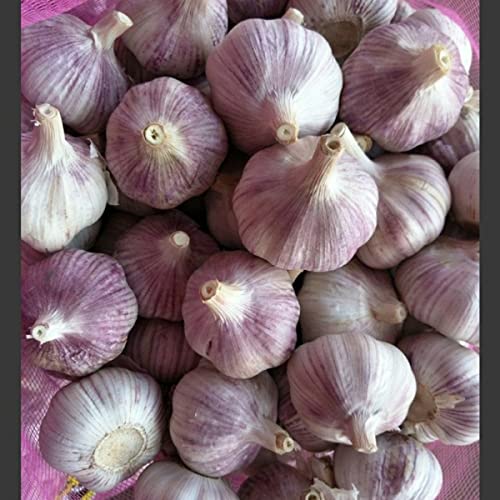
Garlic Heads for Planting:
Garlic Bulbs Whole, Early Purple Italian Garlic Bulbs, 4 Bulbs, This Garlic is ready for Eating or Planting, Cool Beans N Sprouts Garlic Bulb (3 Pack), Fresh Siberian HARDNECK Garlic Bulb for Planting and Growing Your OWN Garlic OR EatingElephant Garlic 2 Huge Bulbs! Great for Fall Planting! Non GMO Milder Tasting Garlic by Daylily NurseryMixed Garlic Bulbs for Planting Outdoors, 4 Bulbs Purple, Early Italian Garlic, German, Russian Garlic Seed Bulbs


Why does garlic need to be planted in the fall?
Garlic is typically planted in the fall for several reasons:
- Cold Stratification means giving the cloves time for roots to develop using the colder temperatures to promote root growth. The cold triggers growth in a sense, allowing the garlic to develop into a plant.
- Root Development: Planting garlic in the fall gives the cloves time to establish a strong root system before the onset of winter. This ensures the plant will be healthy and thriving and ready to grow when spring arrives.
- Bulb Formation: When garlic grows it does so in two stages. The first stage focuses on the roots and the second stage focuses on the bulb. Planting garlic in the fall gives the bulbs enough time to start growing during the cold months, resulting in larger and healthier bulbs at harvest time.
- Pest and Disease Control: Planting garlic in the fall also helps to deter pests and diseases. The cold temperatures allow the plant to grow without much risk of pests like nematodes and fungal disease which are dormant at this time.
It’s important to note that the exact timing for planting garlic may vary depending on your specific climate and region. Consulting with local gardening resources or agricultural extension offices can provide more specific guidelines for your area.
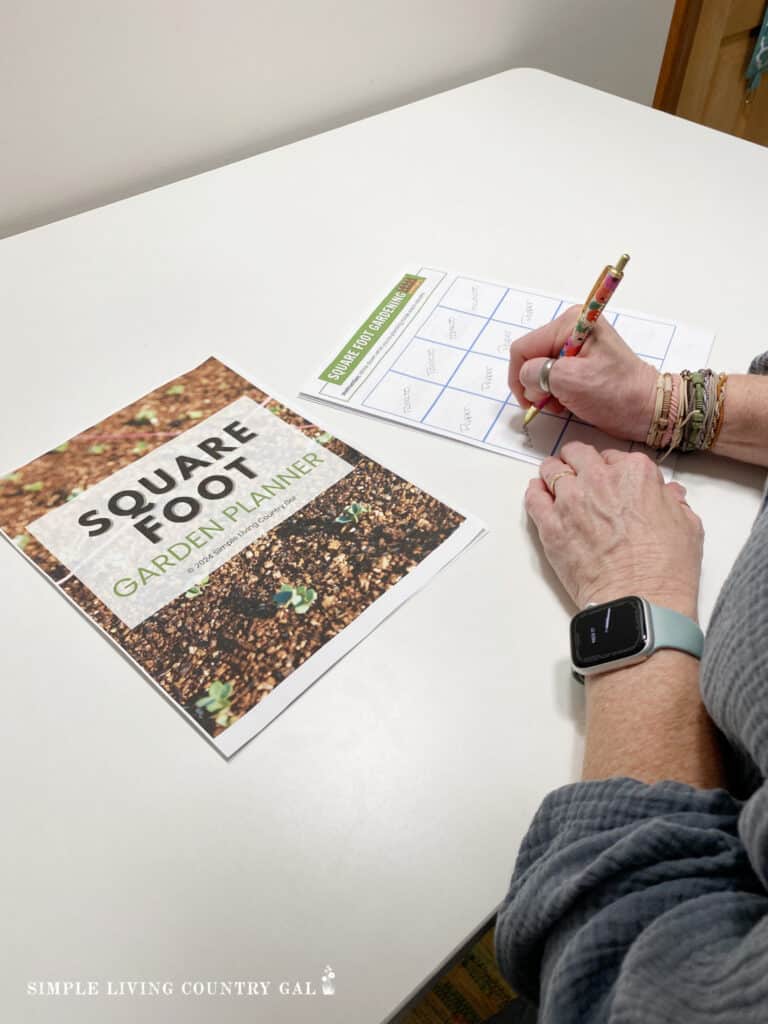
Keep a note of dates in your gardening journal so you can refer to them each planting season.
Timing is everything
When you plant garlic in the fall, you want to do it before the ground freezes. This will allow the roots to begin growing. Once things freeze, your garlic will go dormant over winter, hibernating until spring arrives and the ground warms up.
Planting before freezing will give your crop a good head start for the growing season. Once the ground thaws, your garlic will continue growing until it is ready to harvest in mid to late summer.
For those of you who live in a warmer area, February to March is the best time for you to plant. I suggest asking local farmers in your area for specific times and advice.
SLCG PRO TIP: Never underestimate the knowledge your local farmers have. I love to talk with our farming friends, and the information I have gotten from them has been invaluable.
They have helped me know the best way to purchase, when to harvest garlic, how to grow HUGE onions, and even the best way to hatch eggs with our chickens.
Farmers are your best resource, which I hope you will use as you grow your homestead.
Step # 2. Decide how Much Garlic to Plant
In our home, we eat a lot of garlic, using it in just about every meal. We also give it away as gifts for the holidays (which people love!). Knowing I need this much better helps me to know how much to plant.
Get our list of Homemade Gifts Made Easy for some unique ideas.
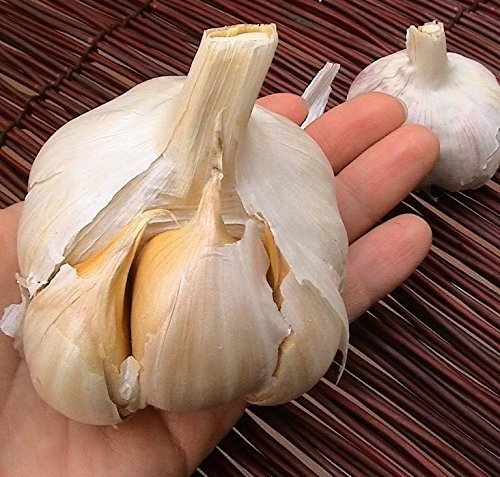
When planting garlic, you will want to purchase heads specifically meant for growing in a garden. Each head can then be broken down into individual cloves which you will plant in your garden.
Garlic Math
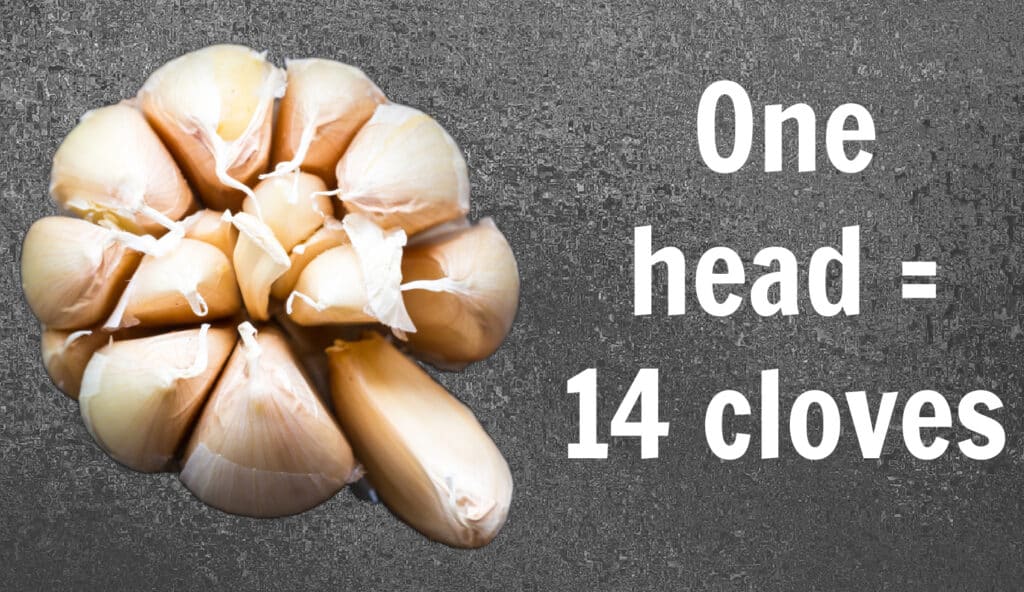
Here’s where growing garlic gets a little exciting, because the return is huge! One head of garlic can be broken apart into 10–15 cloves, and each of those cloves will grow into a whole new bulb by harvest time.
So let’s do the math:
- 1 head of garlic = 10–15 cloves to plant
- 1 clove planted = 1 full head at harvest
- Which means 1 head of garlic can turn into 10–15 new heads.
The first time I tried this, I didn’t quite realize how quickly it multiplied. I planted ten whole heads’ worth of cloves that year and ended up with garlic everywhere, enough for cooking, gifting, and storing.
Step #3. Plant Your Garlic
Now comes the fun part: getting your cloves into the soil. Garlic isn’t picky, but it does appreciate good drainage and loose, healthy soil. In our backyard, we use raised beds because they make it easier to control the soil conditions, keep the moisture just right, and give us a healthier harvest overall.
If you don’t have raised beds, don’t worry, garlic will grow beautifully in garden rows or even large containers, as long as the soil drains well.
Layout Tips
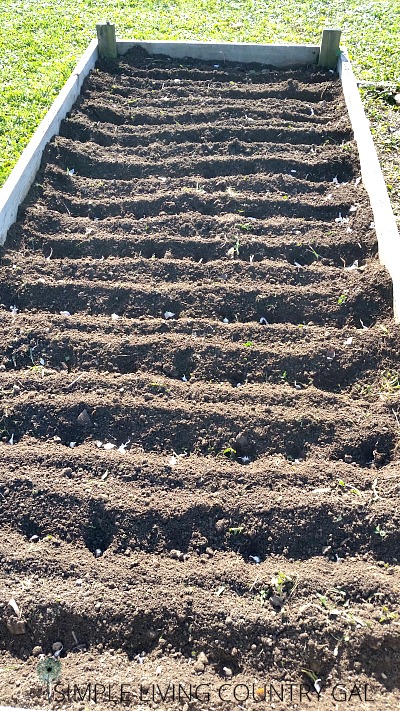
In a 4 x 8-foot bed, I can plant quite a few heads. The good news is that garlic doesn’t need much room to grow. A good rule of thumb is to plant each clove of garlic about 4″ apart and about 2″ deep, laid out in rows.

Garlic Seed Tips
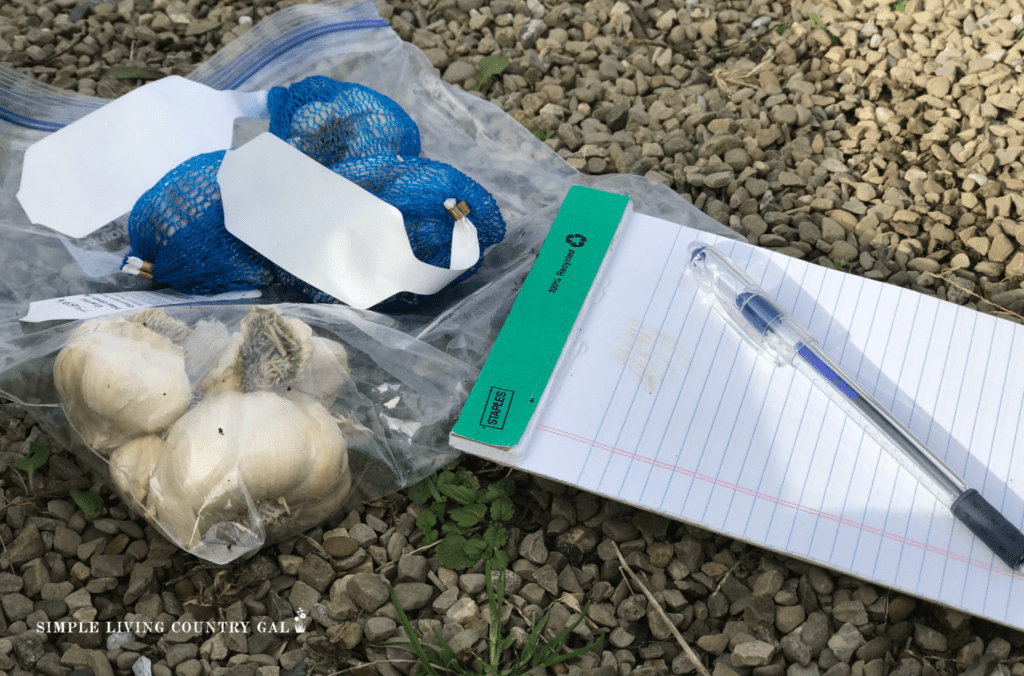
Before you begin planting, be sure you have nice good quality seed garlic. I prefer to purchase our garlic from our local farmers’ market because this will tell me just what does well in our climate.
If you are not sure what garlic is best to grow in your area, ask. Most of your neighbors may have the best advice on what will grow well in your local weather.
Keep the heads intact until you are ready to plant. A few days before planting, break up the heads and allow them to sit with the papery skins on. Store them in a brown paper bag until you are ready to plant.
Spacing and Depth Tips
Using a garden hoe, dig trenches about 2 inches deep and 4-6 inches apart. Follow this list for the best practices for planting garlic cloves.
- Depth: Plant cloves knot side down with papers still on at 2″ deep.
- Spacing: Keep heads 4-5″ apart.
- Rows: Keep rows 12″ apart (less if using raised beds or containers for your garden setup.)
SLCG PRO TIP: Use garden markers to help you remember what variety of garlic you have planted and where. This will allow you to test some of the amazing varieties available to find what you and your family love most.
Planting Tips
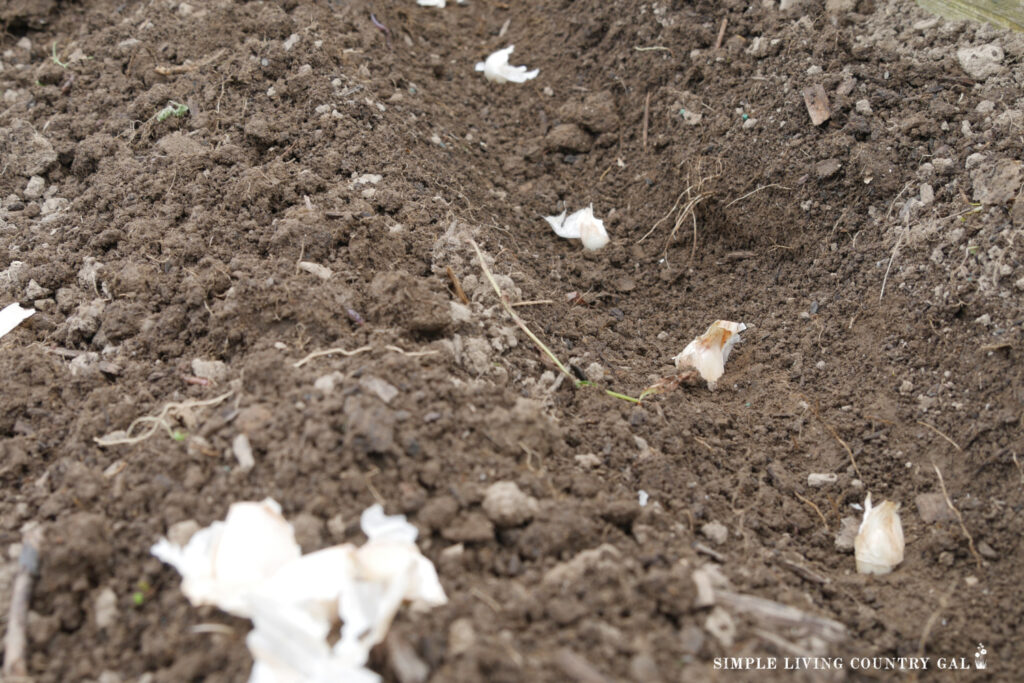
When it’s time to plant, place each clove in the ground with the root end facing down and the pointed end up—this is called the “upright” position.
After you’ve set the cloves in place, cover them with soil and add your garden marker so you’ll remember which variety is planted where.
Continue row by row until all your cloves are tucked into the soil, markers included.
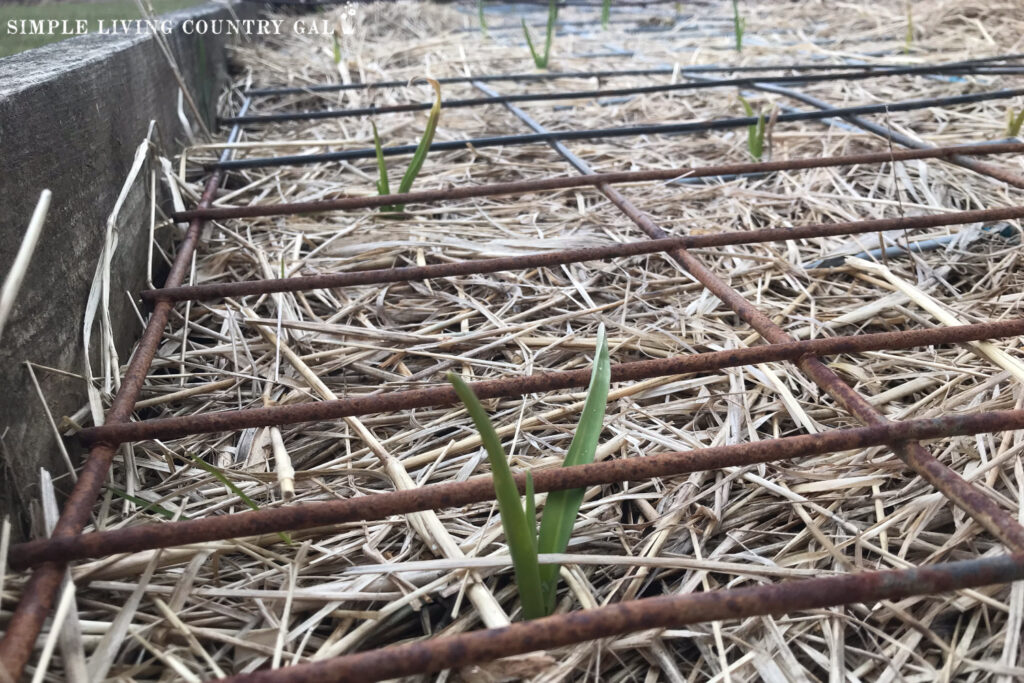
Step #4. Prepare your Garlic Bed for Hibernation
I like to call this step “hibernation,” because that’s exactly what your garlic will be doing, resting under a protective layer all winter before emerging in the spring.
Once all your cloves are planted, cover the entire bed with mulch. My favorite choice is straw because it insulates well and breaks down nicely over time. If straw isn’t available, dried leaves or grass clippings can also work.
How much you add is up to you and will depend on the weather where you live. Remember, the goal is to protect the planted area but not so much that your shoots have a hard time breaking through the coverage.
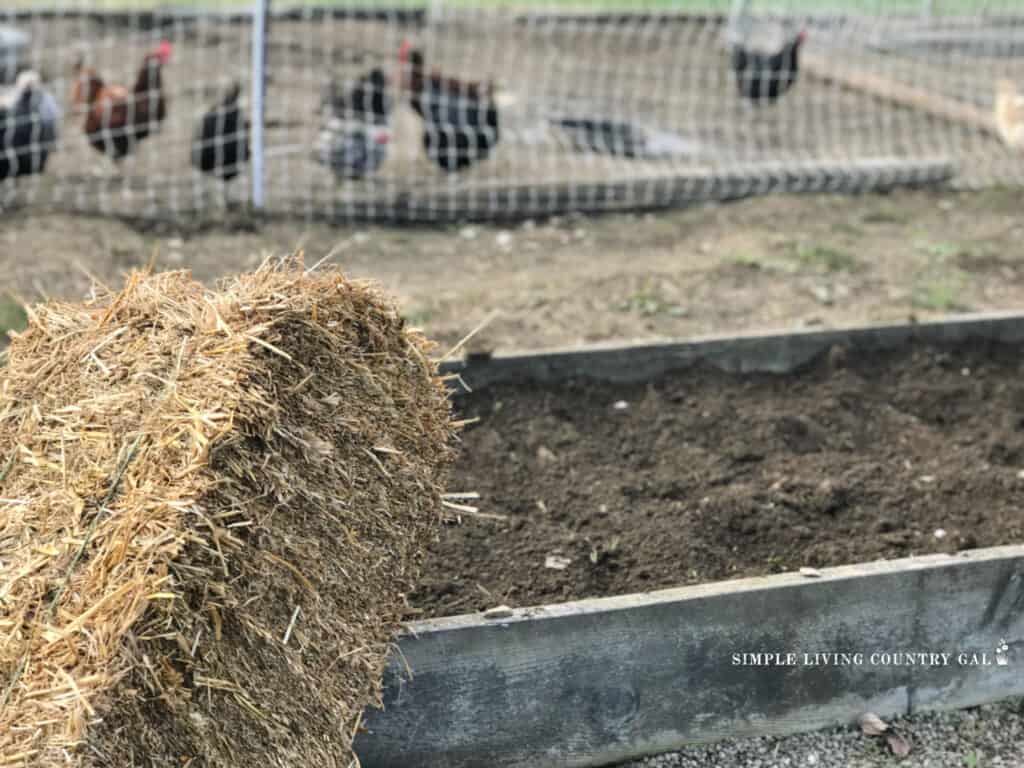
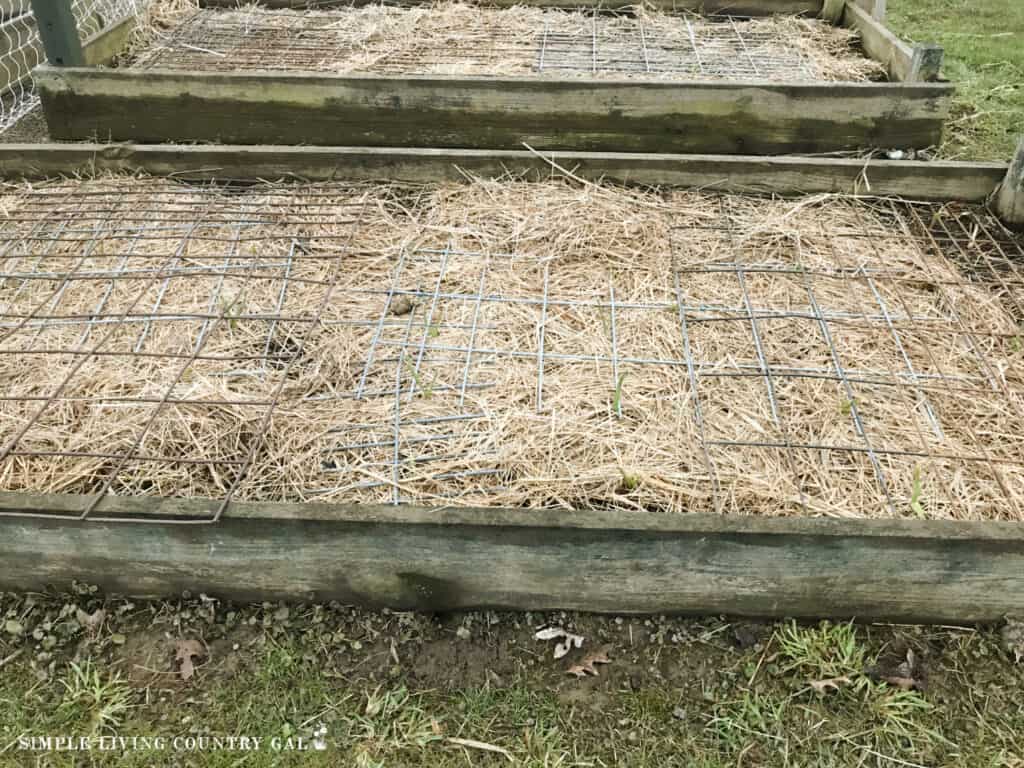
Once your mulch is in place, you will need to anchor it down so that it doesn’t blow away during the winter months. A good anchor is something light yet heavy that will allow your garlic to grow through in the spring. This way your shoots can start to emerge until you are able to remove the coverage.
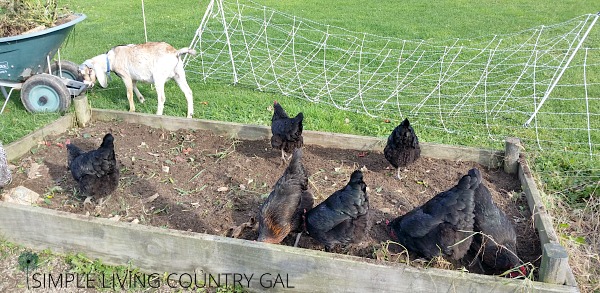
I love to use metal fencing to hold our straw in place. We have a pile of fence scraps that I use each year or you can purchase a new piece of fencing for your garlic bed.
The fencing works in two ways. First, it keeps my chickens deterred, making it more difficult for them to dig up my freshly planted cloves, and second, it keeps the straw from blowing away. Another bonus is that the openings give plenty of space for shoots to emerge.
Once the fencing is in place, let it sit all winter and only remove it in the spring.
SLCG PRO TIP: Do not use hay to cover your garlic. Hay is not the same as straw for one reason, and this is a reason that is incredibly important.
Hay contains seeds in the cutting, not only from the grass but also from any weeds. If you use hay, you will be adding to your fresh garlic cloves a layer of seeds you will need to weed out in the spring and summer.
Read our guide on: What is the Difference Between Hay and Stray to get the full scoop on what to use and when.
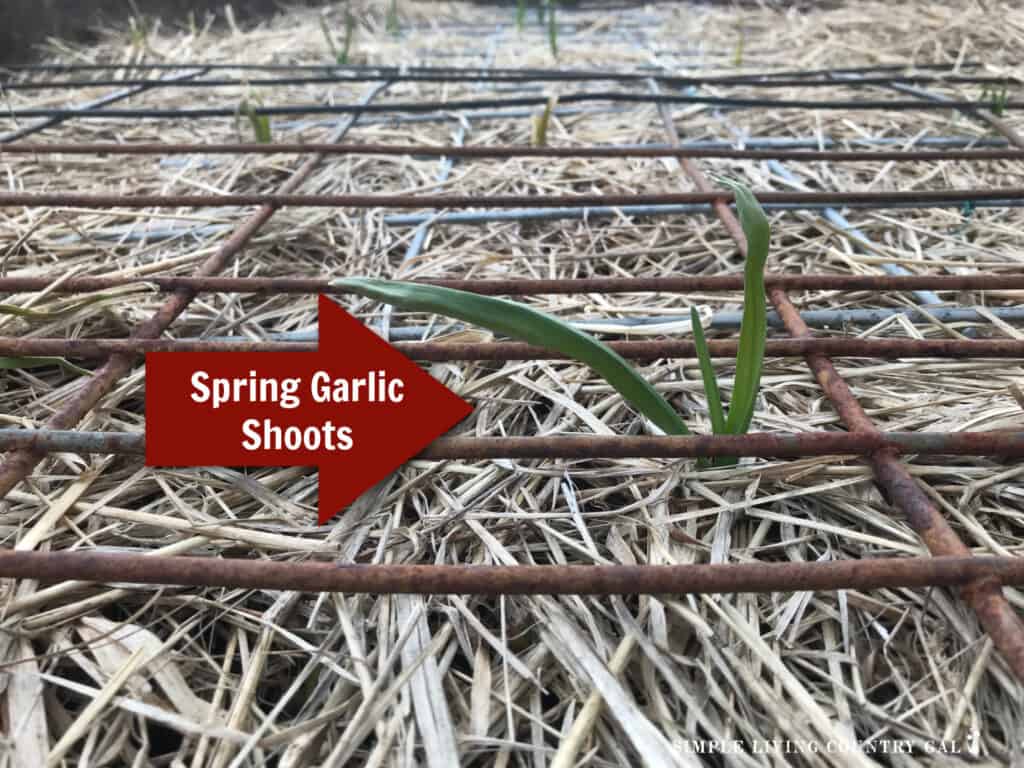
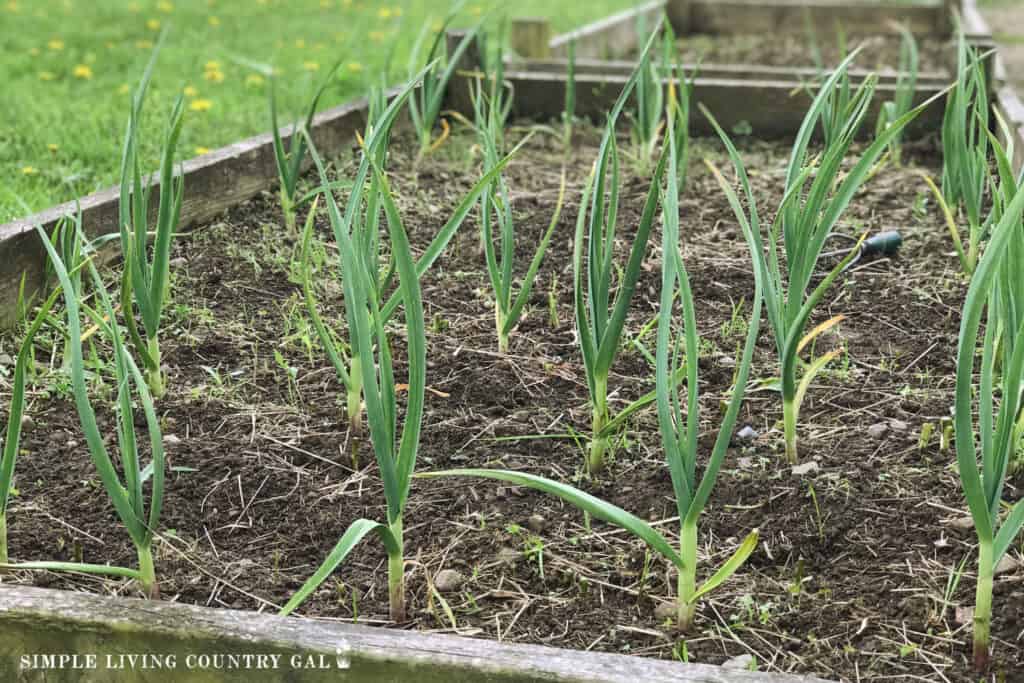
Step #5. Don’t Do a Thing Until Spring
This might be a bit difficult at first, but leave your newly planted garlic alone until spring. You will not even need to water them unless you are in a drought.
When spring arrives, you will begin to see green shoots emerging from the ground. That is a wonderful site, for sure. At this point, remove any fencing you used to hold the mulch in place as well as some of the mulch, especially if you used quite a bit of it.
Before doing this, however, be sure your weather is warm enough so as to not damage your new plants.
SLCG PRO TIP: Leave some of the mulch from winter in place to help deter any weeds as your garlic grows.
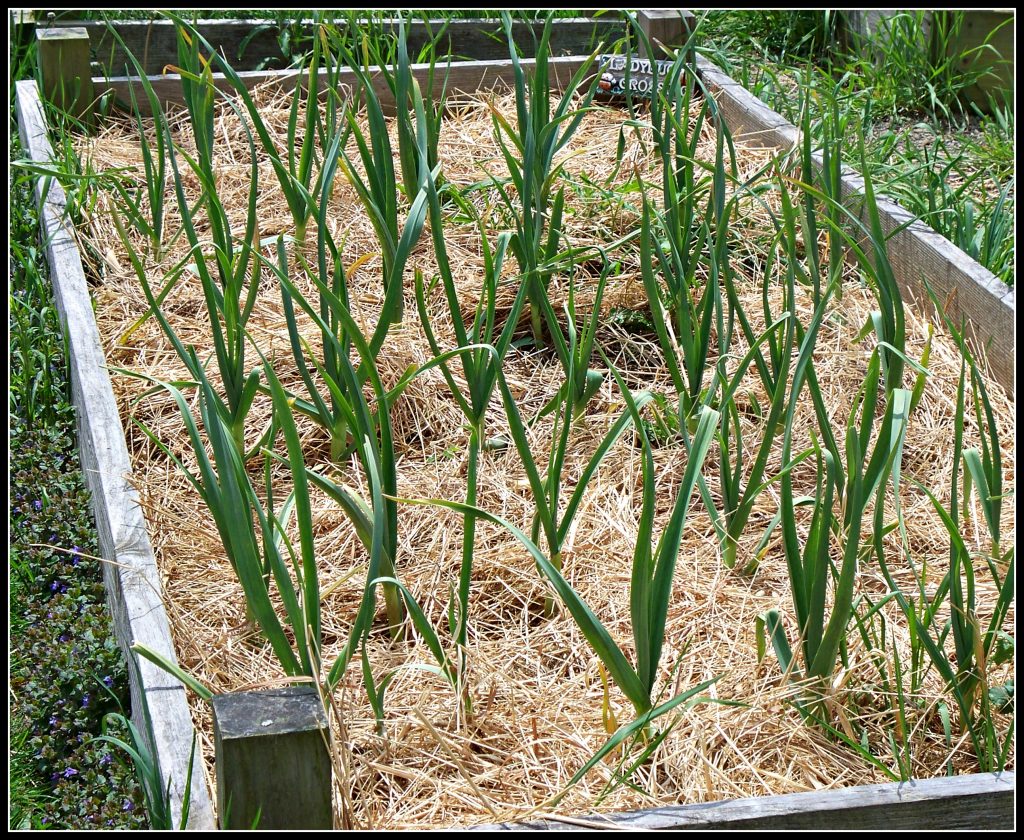
Step #6. Water as Needed
Once your garlic shoots start emerging, it’s time to start tending them regularly. This mainly means watering when the soil is dry and keeping weeds in check so your garlic has room to grow.
If you haven’t already, remove any fencing or protective covers. This makes it easier to care for your plants and harvest later. And don’t worry if you have chickens nearby—they usually leave garlic alone once it’s too big for them to bother with.
When you water, take a moment to check each plant. Look for signs of pests or disease so you can catch any issues early. The sooner you notice a problem, the easier it is to manage—and that helps ensure a healthy, bountiful harvest.
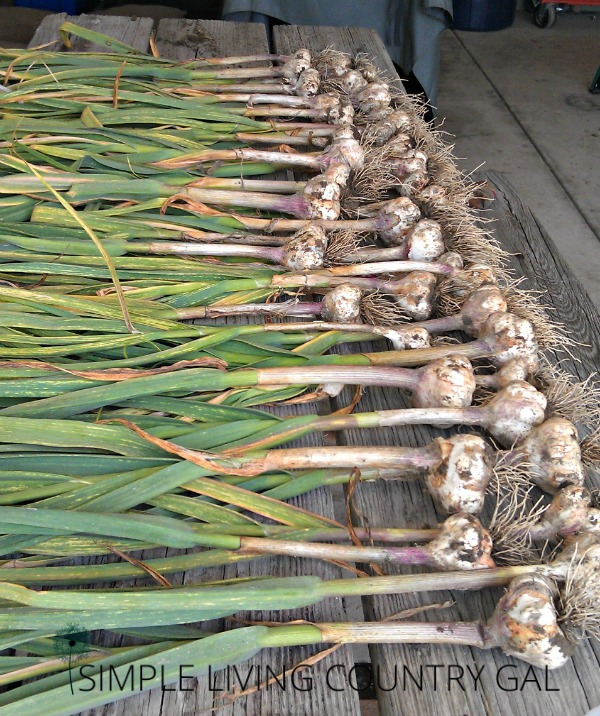
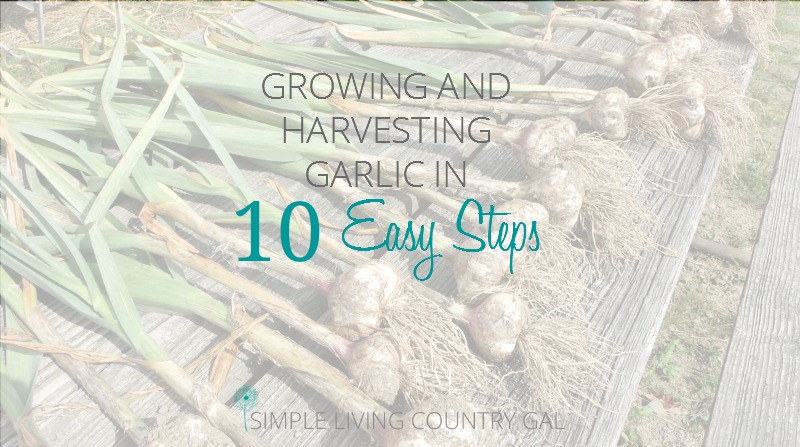
Step #7. Harvest Your Garlic
The type of garlic you plant will determine exactly when it’s ready to harvest, but for us, that usually falls around the end of July. The best way to know if your garlic is ready is by checking the shoots—the green tops growing out of the ground. They should be about 2–3 feet tall and starting to turn brown and droop. That’s your cue: it’s time to harvest.
Harvest Tips
Before digging up your entire crop, it’s smart to do a test dig. Pick one plant and gently dig it up from the soil to see if the head is fully formed. If it looks ready, go ahead and harvest the rest. If not, wait another week or so and check again.
How to Tell If Garlic is Ready
Here are the main signs to look for when deciding if it’s time to harvest:
Ready:
- Leaves are yellow or brown and drooping
- The papers (outer layers) are dry, thin, and papery
- The head has light spacing at the top
Too Early:
- Papers are still thin and delicate
- The head is tight with little to no spacing
Too Late:
- Don’t worry—split heads are still good to use, just a bit drier than others
- The head is splitting heavily at the top
Digging Up Garlic
Garlic doesn’t like to come up easily, so you can’t just pull it out by hand. It has been firmly rooted all winter, which is a good thing, but it does mean you’ll need a shovel.
When digging, place your shovel well away from where you think the head is. Digging too close risks slicing the bulb and losing cloves. Also, insert the shovel deeper than you think you need to go. Start further out and deeper than feels necessary—it’s better to be safe than sorry, especially with your first harvest.
Once the garlic is dug up, gently remove excess soil by hand, keeping the outer papery layers intact. This will help your garlic cure properly for storage.
Shovel, Garden Shovel for Digging, 31 inch Small Shovels Heavy Duty Portable Mini Spade with Curved D-Handle for Gardening, Digging, Camping, Car, Kids Sand Beach ShovelsVNIMTI Heavy Duty Shovel with Fiberglass Handle for Digging and Gardening, Metal, 58 InchesSun Joe 9 Inch Digging Shovel with Assist Handle, Heavy Duty Steel Spear Head Gardening Tool, Shovelution, Green/Black, SJ-SHLV07


Step #8. Let the Garlic Sit So it Can Dry
Before you can take garlic into your kitchen and start cooking with it, you will need to give it time to dry. This will help the dirt that is on the head to dry, making it easier to remove it without risking damage to the papers. I like to dry my garlic in two steps.
Drying Garlic Tips
First, lay your newly harvested plants out in a single layer, allowing them to dry outside. If you have a picnic table this is a good spot to use, however you will want to be sure it is not in direct sunlight.
This initial drying time allows the warm summer air to dry the excess soil on the heads more quickly. After a few days to a week, you should be able to shake off the excess dirt. it is time to shake off the excess dirt.
Next, using your hands, gently rub the heads, letting the soil fall off as you do. If possible, do not remove any papers when doing this.
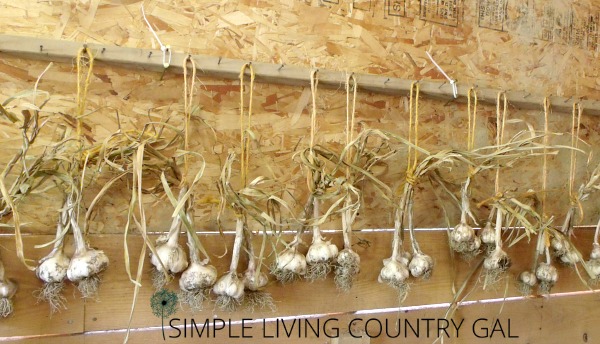
Once all the excess dirt is removed, gather your garlic in clumps of 3’s and 4’s to hang in a place with good air circulation that is free of dampness.
Since drying garlic can be quite aromatic, I like to hang ours in the barn. This keeps the smell out of the house; however, the barn smells like an Italian restaurant.
The good news is that the goats really don’t seem to mind. 🙂

Let your bundles of garlic hang for at least a week or two. The purpose of drying is to seal up the heads so you can trim them for storage. Watch the tops of your garlic and use them as your guide to know when your heads are ready to trim.
Read my post on How To Cure Garlic for more details.
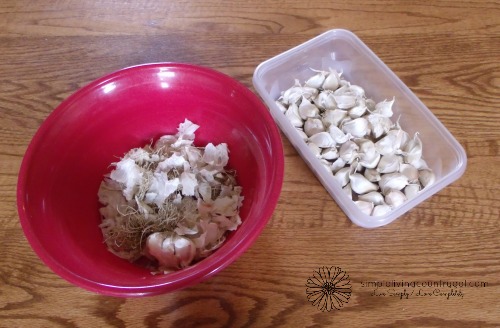
Step #9. Cut, Clean, and Store
Once the garlic is completely dried, it’s time to get them ready for storage.
- First, cut the stalks off close to the head and remove the outer layers of the husk, leaving a few papers on to keep the heads and cloves protected.
- Next, cut the roots off completely.
- Finally, store them in cloth bags or any other mesh bags that you have lying around your home. I like to save the mesh bags from onions and citrus fruit that I keep throughout the winter just for this purpose.
This is also the time I will pull a few of my best heads out for next year’s planting. Once you find a variety you and your family love, you can save the seed garlic for the next season’s planting.
This should be in a few short weeks since garlic is planted in the fall. Another benefit of growing garlic. To store your seed garlic, place the heads and/or cloves in an open brown bag until you are ready to plant.
Step #10. How to Store Garlic
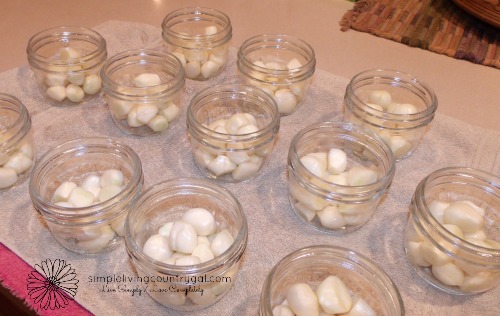
I usually keep about ten heads of garlic in our pantry for short-term use, storing them in mesh bags to allow plenty of air circulation. In a cool, dark spot, this garlic will stay fresh for a couple of months, perfect for everyday cooking.
For the rest of my harvest, I like to preserve it in a boiling vinegar solution. Once cooled, the garlic can be stored in the refrigerator for up to a year. (For more tips on keeping your garlic fresh and dry, read: How to Store Garlic)
This method isn’t pantry shelf-stable, but it’s a simple way to enjoy homegrown garlic year-round. When you’re ready to use it, just remove the number of cloves you need and give them a quick rinse; the vinegar doesn’t soak into the garlic, so the flavor stays true.
I’ll admit, the first time I tried this, I worried the garlic might taste odd. But I’m happy to report there’s absolutely no vinegar flavor. It has now become a favorite method in our annual garlic routine, keeping our harvest delicious, convenient, and ready whenever we need it.
Garlic Growing FAQ
When is the best time to plant garlic?
Plant garlic in the fall, about 3–5 weeks before your first frost. This gives the cloves time to root before winter. In warmer areas, late winter to early spring is also an option.
Do I plant the whole garlic bulb or just the cloves?
Only the individual cloves get planted (keep the papery skin on). Each clove will grow into a full bulb by harvest time.
How do I know when garlic is ready to harvest?
Garlic is usually ready in mid-to-late summer when the tops start turning brown and falling over. Do a quick test dig, if the bulb has formed layers of papery skin, it’s ready.
Can I save garlic to plant again next year?
Yes! Simply set aside a few of your best bulbs after harvest. Plant those cloves in the fall, and you’ll have an endless supply year after year.
There’s nothing quite as satisfying as pulling fresh garlic from your own garden and knowing you’ll enjoy that flavor for months to come. Garlic truly is one of the easiest crops to grow, perfect for anyone looking to dip their toes into gardening 101 or add more homegrown goodness to their pantry.
With just a little effort each fall, you’ll have a steady supply of garlic to cook with, share, and even replant year after year. Now that you know exactly how to grow garlic from start to finish in 10 easy steps, I hope it becomes a staple in your garden too. Here’s to simpler living, fuller pantries, and plenty of delicious, homegrown garlic.
More Gardening How to Grow Guides:
- How to Grow Squash for Beginners
- How to Grow Kale for Beginners
- How to Grow Sweet Potatoes for Beginners
Thank you for such an easy to understand article on growing garlic !
My pleasure! 🙂
Wow! This is great information! I just planted my first garlic this year! I didn’t know you could can it like that! That is great to know! Thank you for sharing at the Our Simple Homestead Hop 🙂 I’m pinning this to read again next year!
Hello!
I am so glad you found the information helpful. I have been canning my garlic that way for 3 years and it has been working great! Just remember to keep it in the fridge :). I just love having garlic ready to use from my garden year round, I know you will love it too!
thank you for the explanation on how to grow your eyes, I have done this only without the protection over it.
Thanks for joining us at Simple Homestead Hop!
This will be my feature post tomorrow 🙂
Sandra,
Thank you so much!! How exciting and fun 🙂
Tracy Lynn
Last year was my first time growing garlic, and it is so easy and so satisfying! Everyone should plant at least a little garlic, don’t you think? Shared and pinned to spread the word!
Michelle,
Thanks so much for sharing! I ADORE garlic and if Yankee candle had a garlic candle I would probably buy it! 🙂
Tracy Lynn
I just planted my garlic about a week ago, so your article is very timely. Thank you for all the great tips! I look forward to making some garlic powder. I love garlic, and it’s a special treat to make some homemade bread and slather it with garlic. Yum! I’m glad I saw your link on the blog hop!
Hi Michelle!
I have never tried making garlic powder, I will definitely have to look that up!
Thanks for ways on planting garlic . I am eager to follow for new guides on how to be successful on garlic gardening. .its fun and exciting activity in home. .
Hi Jean,
Yes, garlic is by far my favorite thing to plant and grow!
Hello – I notice you don’t mention removing the flower head in the spring…do you remove it or not? Thanks. Hoping to plant today!
Hi Bea,
Yes, I do remove the flower (or scapes) in the spring. I know some do not, however, I have found by removing the scapes the plant’s energy goes into the bulb making it bigger and helping it to mature faster. I will add that to my post, thanks for reminding me!
Don’t waste the scaps. They are good in salads and stews. Is the vinegar from the canning safe to use for salad dressings?
To be honest, I am not sure. It is pretty potent though, so I would hesitate to use it. 🙂
I have been searching for a very precise and detailed method to grow garlic! You’re article nailed it!! I can’t wait to grow for the first time!! You’re amazing!!
Aw, thank you, Chelsea!
I am so glad I was able to help. I hope you have much garlic growing success. 🙂
Best wishes,
Tracy Lynn
Hi, Tracy! Super detailed tips. I was wondering if you ever tried using the vinegar soak solution in salad dressing (homemade)? It should have some residual garlic flavor but might need additional vinegar for backup acid power. Anyhow- a thought 😉 Love the post.
Hi, Sandi!
You know, I have been asked this before and to be honest, I haven’t tried it. I do not see why you couldn’t. I will have to give it a try and see how it turns out. 🙂
So happy you stopped by!
Tracy Lynn
Thanks for sharing! I am glad you included storing instructions to!
Hi Tracey!
What do you recommend for growing garlic in containers?