How To Grow Bigger Onions
Next to garlic, onions are one of the easiest things to grow. Requiring little attention, they are a hardy plant that can and will do well in just about any environment. This article will help you on how to grow huge organic onions in your backyard garden.
If you are a beginner gardener, learning how to grow bigger onions is a great way to get your feet wet learning all there is to know about gardening 101.
Onions are one of those vegetables that are most likely found in every kitchen. For that reason, onions are also one of the vegetables found in every backyard garden. Growing onions is easy, and that makes it a top pick for any garden in any location.
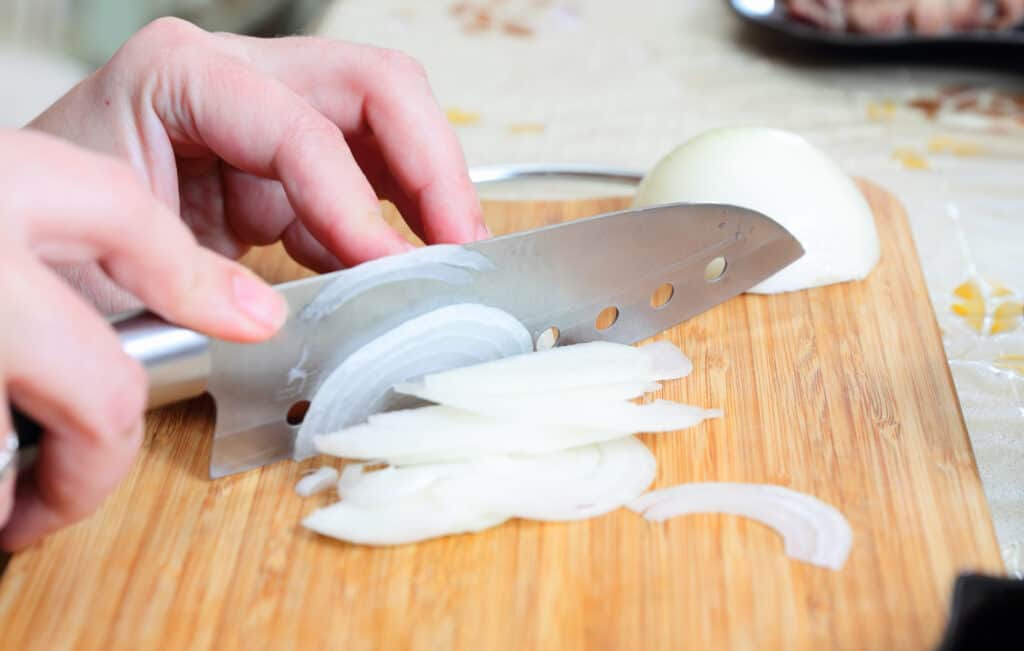
Whether you keep your onions stored in a cool dark root cellar, add them to canning recipes, or dice/slice and freeze, you can easily enjoy your summer harvest throughout the winter months.
With so many varieties and uses, onions are a staple in just about every home. No matter what you are cooking, more often than not, onions are likely to be an ingredient that is called for.
And that is great news because onions are a very economical vegetable to grow. Not only that, you can grow enough onions for the entire year ahead, and that means a huge payoff for your gardening efforts.
How To Grow Bigger Onions – a Step by Step Guide
When growing anything in your garden, be sure to keep notes so you can improve what you grow every year.
Step #1. Prep Your soil
Not all soil is created equal. This was something I learned the hard way with our awful clay soil. Most soil needs to be prepped before it can be planted, and I cannot stress enough how important this step is. Without healthy soil, most, if not all, of what you plant will do poorly.
By taking the time to ensure your soil is at its very best, you will be already ahead of the gardening game.
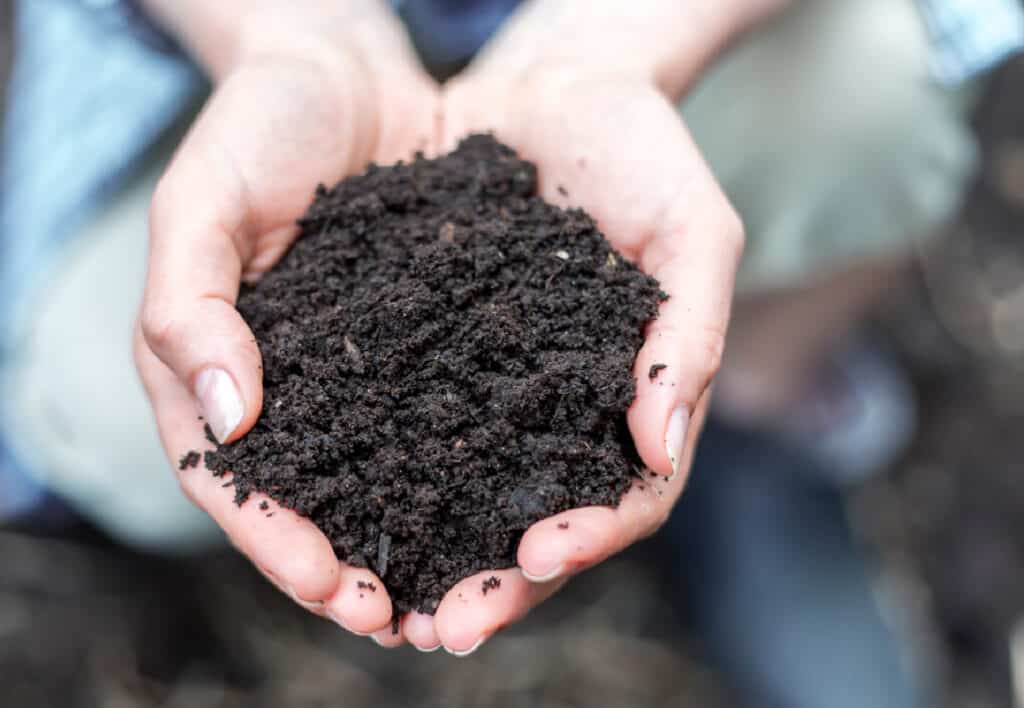
Now, don’t let this step deter you from gardening. Being sure your soil is healthy and balanced is actually easier than you may think. You will first want to start by doing a test to see where your pH is now. You can use a garden soil test kit to help.
If you test and find your soil is low in Nitrogen, you can improve things with a healthy dose of compost. Onions prefer nitrogen-rich soil, and by testing, you can see what level you are at before working to improve it.
Garden Soil Resources:
STEP #2. Choose the Best Onion Variety
With so many onion varieties to choose from, it can be a bit overwhelming to decide exactly what onions you will want to plant. Let’s take a look at a few of the most common options available.
Onion Varieties:
- Scallions – Also known as spring onions. Scallions have a mild taste and can be used in recipes that are both raw or cooked. They also work well chopped up raw in summer salads.
- Vidalias – A lovely sweet onion that can be used in dishes, with a mixture of grilled veggies or even cooked and eaten alone. Since Vidalias are sweeter you may need to adjust your recipe a bit to counter this if needed.
- Yellow Onions – These are the most popular onion and probably what the average cook is used to having in their pantry. A light sweet flavor they work in just about any dish from sweet to savory. Yellow onions are the most commonly found year-round in the grocery store.
- White Onions – Have a more pungent flavor than yellow onions and work well in salsas.
- Red Onions – With flavors that closely resemble the yellow onion, these do best raw in salads.
- Shallots – Have a flavor that is softer than a yellow onion resembling garlic more than onion when you add it to dishes.
- Leeks – Have a more delicate flavor than that of a yellow onion and do very well in stocks and soups.
My best advice is to try a few varieties each year and see what you like. I prefer the yellow onion simply because of its wide range of uses. These onions do very well in all styles of cooking and are perfect for soups like French Onion.
Knowing what you usually cook will help you better narrow down your choice. Also, keep in mind that the right variety depends on where you live and what grows best in your local environment.
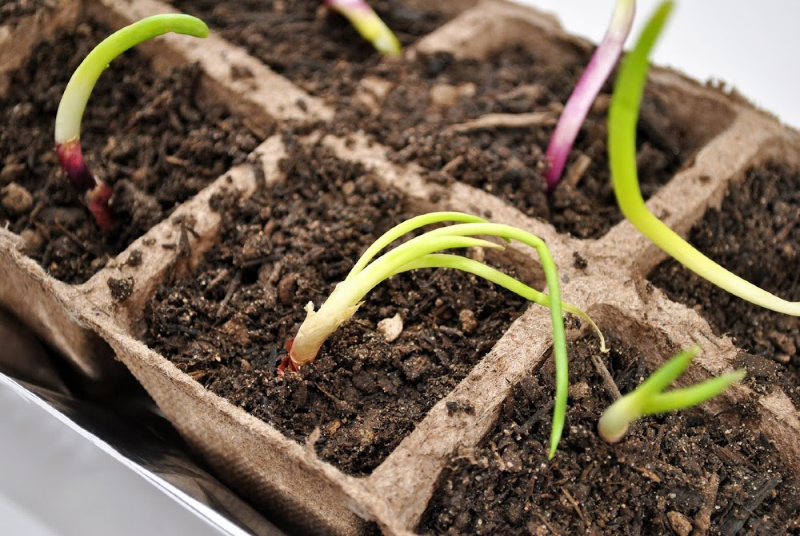
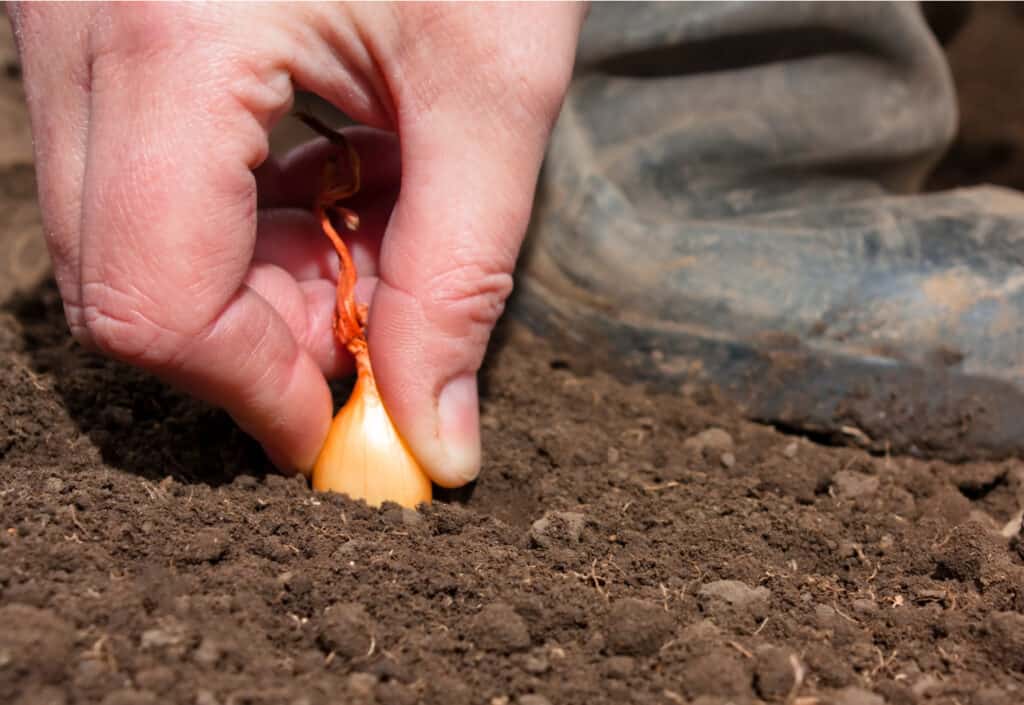
Step #3. Onion Set, or Seed
Where I live, onion sets work the best because they allow me to jump-start the growing. Since we live in a cold climate, our growing season is short and sets will help to give enough time for the onions to reach maturity.
What is an onion set?
An onion set is a small bulb of onion that has been started from seed, grown, then stored to plant for the next growing season.
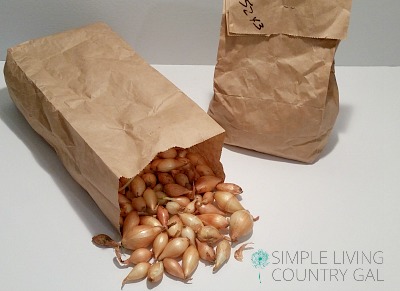
They resemble a mini onion and are usually sold in mesh bags or brown lunch bags to help keep them fresh. Sets are a great option for northern gardens because they give you a bit of a growing head start that seeds do not.
Onion sets are easy to plant and require less attention than seeds. The cost is still pretty low with this option, about $2 a pound which will give you approximately 100 or more sets depending on the size.
If you prefer the less costly seed option be prepared to do extra weeding since the seedlings can easily be crowded out especially in the beginning when they are small and fragile.
You can also start your seeds indoors and transplant them when they are bigger. Seeds need to be started about 6 weeks prior to outside planting and hardened a few days to acclimate them to your weather. Read: How to Start Seeds Indoors
Step #4. when to Plant Onions
Here in Pennsylvania, I have found it is best to plant onions just as soon as you can work the ground. This, for us, is late March or early April. Check your Gardening Zone to know the best time to get your plants into the ground.
If you miss your window to plant, don’t worry. You can still get those sets into the ground. Just know that harvest time will be well into the fall rather than late summer. Remember, the later you plant the later your harvest will be. Another thing to remember is the later you plant the smaller those onions are going to be.
Bottom line? Get your onion sets into the ground in the window your zone allows.
If you plant a large number of onions, it is best to stagger your plantings. What I mean by that is, plant 1/3 of your sets on week one, the next third on week three, and the final third on week 5. This way you will have a steady stream of ripe onions come fall.
Again, be sure you have a large enough window to do this before deciding to stagger plant your onions.
Starter Vegetable Gardens, 2nd Edition: 24 No-Fail Plans for Small Organic Gardens Mini Farming: Self-Sufficiency on 1/4 AcreRaised-Bed Gardening for Beginners: Everything You Need to Know to Start and Sustain a Thriving GardenThe Family Garden Plan: Grow a Year’s Worth of Sustainable and Healthy Food


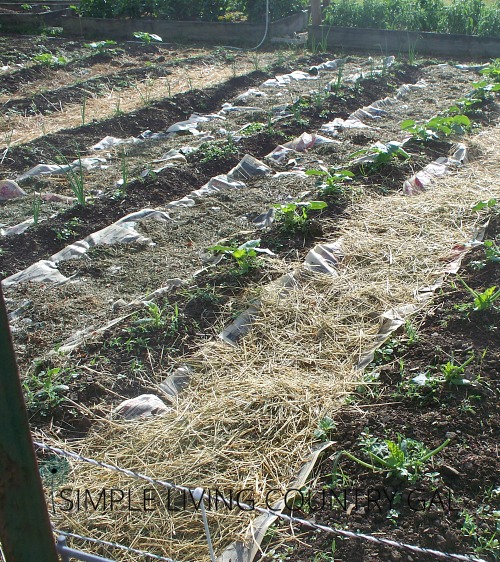
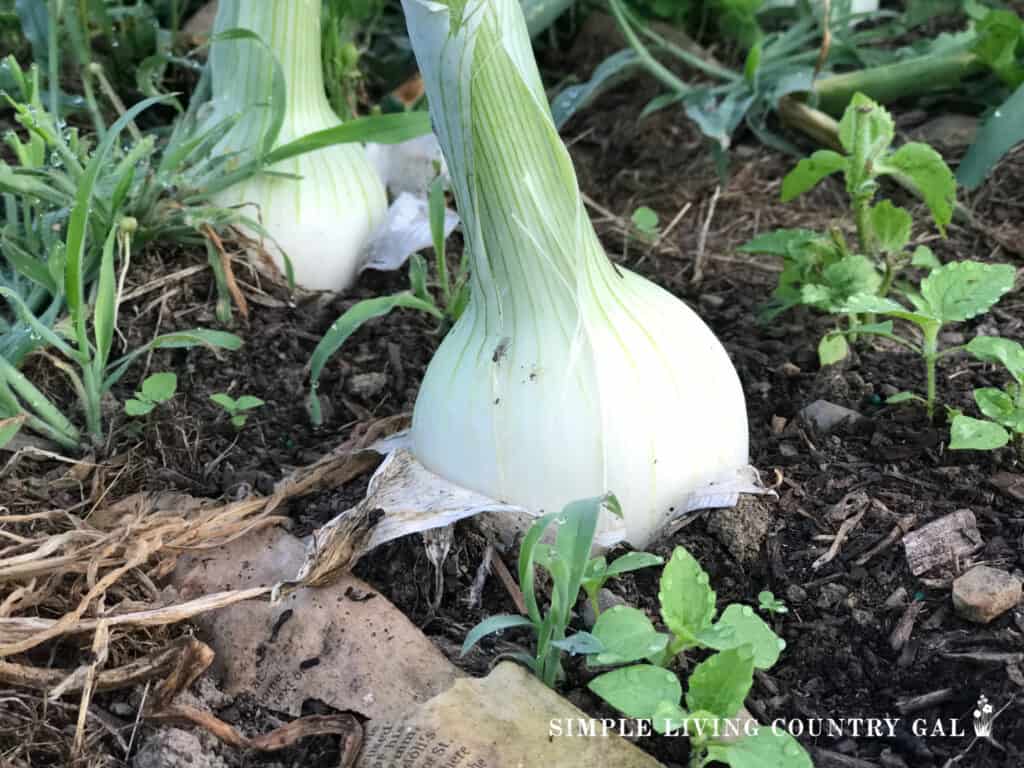
Step #5. Plant in Raised Rows
One thing I struggle with where we live is that our entire property is wet. Really – really wet. This means that if I am not careful, most of our root vegetables run the risk of rotting out rather than flourishing.
A few years ago I was given advice by a farmer friend of mine to put our onions up in heaped rows. This would allow the onions to sit above the resting water we are always battling here.
The following year I took his advice and the results were pretty amazing. Our onions were HUGE! And the level of rot was pretty much non-existent. I was so impressed with the results, that I now plant most of my root vegetables this way.
When making your rows use a garden hoe and work the ground line by line, pulling the dirt in to create a straight row of raised ground. When you are done, go back and pat the row down gently with your hands to firm things up. This will allow the ground to become more stable making it easier to plant in.
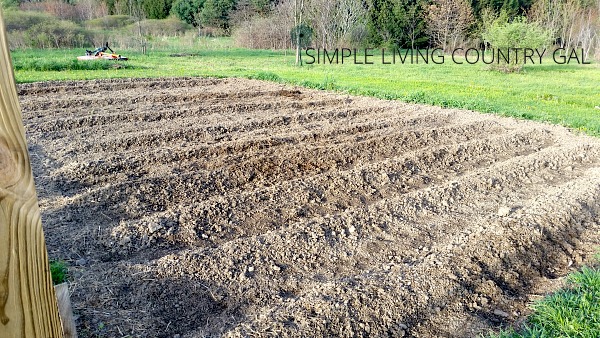
You will want your rows a good 18″ or more apart. This will allow enough room to get down between the rows without risking injury to the plants. It also is enough room for a rototiller to get in there if this is your preferred method of weeding.
When planting your onion sets, be sure to space your onions 4-5″ apart and plant sets at 1″ deep.
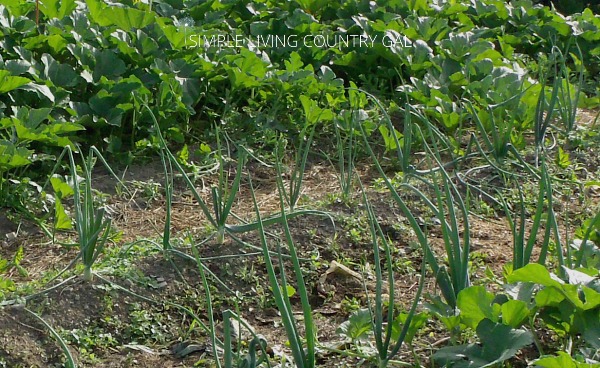
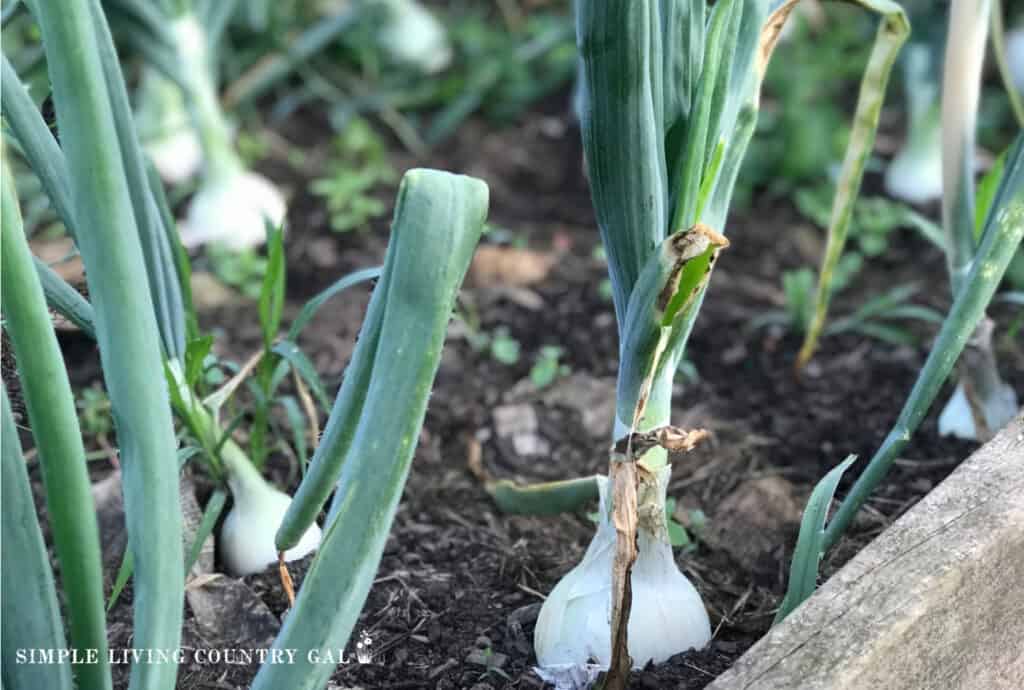
Step #6. Mulch around your Onions
Since onions require very little attention, mulching well from the start is an important step. I used to forget about my onions once planted, instead giving all my attention to my delicate tomato and pepper plants. When it came time to harvest, however, my poor onions would be lost in a sea of weeds.
Gardening Hand Tool Set 3 Pack – MDSXO Heavy Duty Gardening Kit with Non-Slip Soft Ergonomic Handle, Great Garden Gift for Women Men[Stainless Steel]BESTHLS Garden Kneeler and Seat – Heavy Duty Folding Stool for Gardening, Protects Knees and Back, Supports up to 330 lbs – Great Gift for GardenersNoCry Extra Thick Professional Garden Kneeling Pad — Heavy Duty Anti-Slip Coating, Ultra Soft High Density Foam Cushion, Water & Dirt Resistant, Shock Absorbent Garden KneelerWeed Puller Tool Garden Weed Pulling Tool, Portable Garden Weeder Tool Uprooting Weeding Tool, 4 Teeth Manganese Steel Forged Hand Weeder for Vegetable Gardening Backyard Farm Planting & WeedingHIRALIY 118FT Garden Watering System, Drip Irrigation Kits for Plants, New Quick-Connect Fittings, Blank Distribution Tubing, Saving Water Automatic Irrigation Equipment for Patio Lawn
![Gardening Hand Tool Set 3 Pack - MDSXO Heavy Duty Gardening Kit with Non-Slip Soft Ergonomic Handle, Great Garden Gift for Women Men[Stainless Steel]](https://m.media-amazon.com/images/I/41qgPIFVlJL._SL500_.jpg)
Because the weeds stole all the nutrients from the soil, my onions would be very small and soft. I have since learned that mulching really cuts down on the weeds allowing those onions to really grow and flourish.
To mulch I have a super easy way for you to try. Lay down a layer of newspaper on the ground around each onion and cover that paper with cut grass or straw.
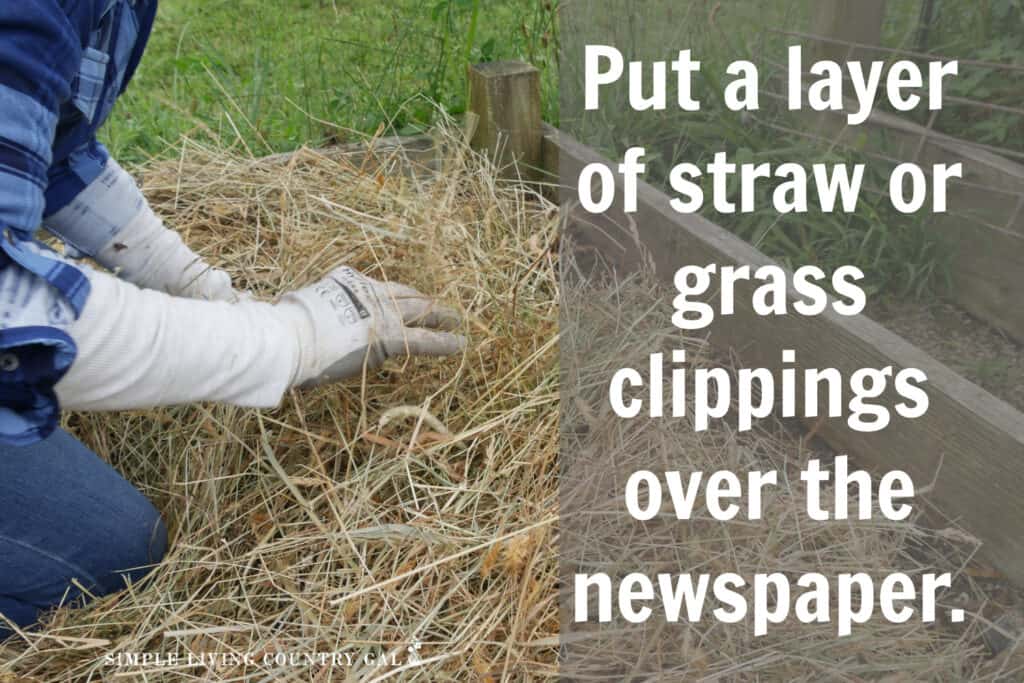
The newspaper will naturally compost down as the growing season progresses and will act as a barrier limiting the number of weeds that will grow. Read: How to Mulch Your Garden for more tips.
Now that I am mulching my raised onion rows, I only need to weed around the very base of each plant. A weedless onion is a happy onion. It just amazes me how a little time in March can make all the difference come September. 😉
Be careful when doing close weeding near young onion sets so you do not accidentally pull out your onion plant. When onions are young, it is best to hold the plant in with one hand and gently pull the close week out with the other.
Step #7. Water Your Onions Correctly
This part can be a bit tricky. Water too much and you will encourage diseases. Water too little and you will produce small and weak plants.
Mulch is also very helpful not only with stopping weeds but with watering as well. The mulch will help to ensure better drainage and keep the soil moist longer.
SLCG PRO TIP: if you want a sweeter onion, water more steadily. Be sure to keep water off of the leaves since this can promote fungal diseases. A soaker hose is a perfect option for this. Drought onions tend to be a bit pungent so keep this in mind when growing.
Step #8. Cover or Not to Cover
As your onions grow they will emerge from the ground exposing part of the onion. At this point, it may be tempting to cover the exposed onion with a layer of soil.
When I was a new gardener I was given the advice to cover the onion with soil and what resulted was a batch of smaller and softer onions.
My advice to you is to leave your onions as they are. But you will get different answers depending on who you ask. The final decision is up to you, but you can try to cover half and leave the other half go and see what results you get.
Step #9. Diseases to Watch For
The biggest problem I have had with my onions is bolting.
Bolt is when an onion produces a flower about 1/2 to 3/4 of the way through the growing season. This can occur especially if the growing season is wet or chilly and is bad news.
Once an onion bolts, it is pretty much done growing so your best bet is to remove the stalk and flower to see if you can “jump-start” it back.
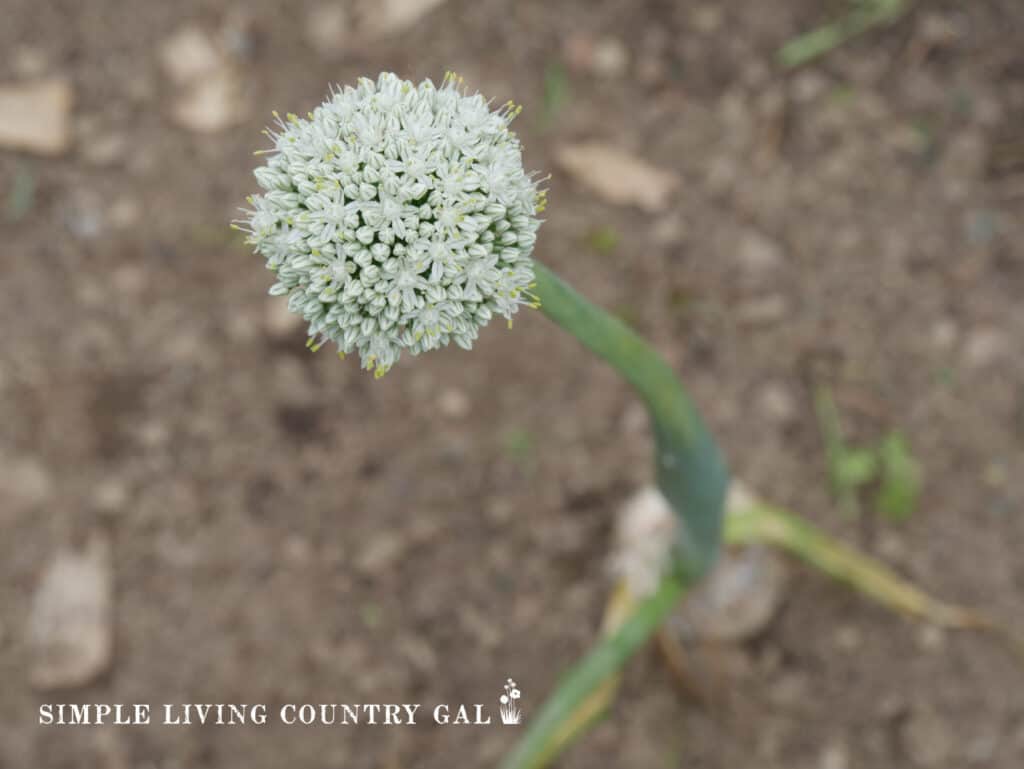
But the odds of this working are not in your favor. Your best bet is if the onion is large enough, you can harvest your bolted onion, simply dry it, and use it as you normally would. They may be smaller onions but will taste just fine.
Step #10. Harvest
When your onion tops begin to yellow and fall over drooping towards the ground, that is a sign that your onions are ready for harvest.
You can encourage things by bending your tops over and even loosening the soil around the bulb just a bit. After a few days your onions should be ready for harvesting.
To harvest, gently pull your onions out of the ground keeping your hand close to the bulb to reduce risk of breakage.
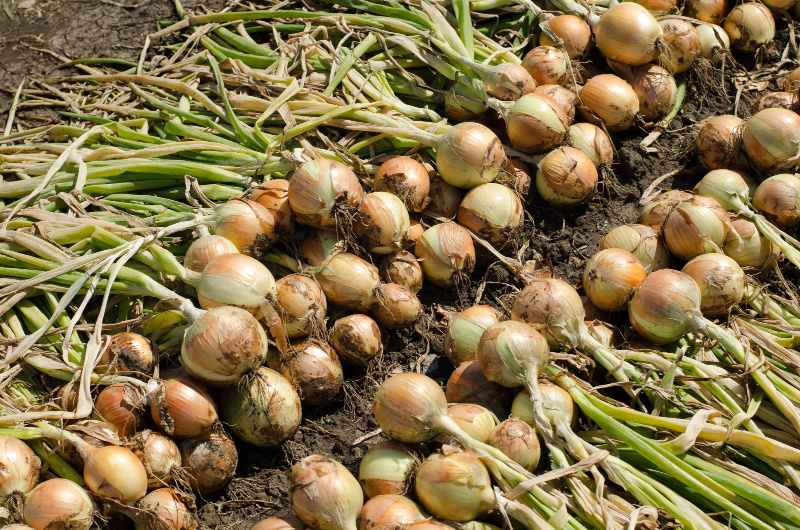
Once pulled, lie the onion on the ground and let it dry in the warm air. This will help the damp soil to dry so you can knock it off without damaging the onion itself.
Step #11. Dry and store
When your onions are finished drying outside, gather them up shaking off excess dirt as you go. This is just your initial drying and meant to make any soil easy to shake off.
To finish drying your onions, move them to a safe area where they can continue to rest until the tops are brown and dry. This should take 1-2 weeks.
I have found an old window screen works perfectly for this. But you can use any solid surface to hold and dry your crop.
Once you are sure your onions are dry, remove the tops and the roots with a pair of scissors. I like to remove the outer skin especially if it is brittle and dry. This just keeps things a bit neater in my pantry.
You can store your onions in mesh breathable bags in your root cellar or pantry. This is a good spot if you intend to use them up quickly.
Inspect your onion supply each week for any signs of rot. One bad onion can spoil several neighbors so it is important to be diligent on this. Onions will last 2-3 months in a pantry and 5-8 months in a cool, dry root cellar.
Step #12. Freezing Onions
Another storing option for onions is freezing. If you plan to freeze your onions make sure you dice them or slice them before you do. Place your cut onions on a foil-covered cookie sheet and par-freeze first. This will keep the moisture-filled onions from clumping together in an icy mass.
Once your onions are par frozen, you can put the onions into labeled freezer bags being sure to remove as much air as you can before your final freeze. By doing this you will keep your onions from getting freezer burned allowing them to last longer.
Whether you are beginning your first garden or a seasoned pro, onions can be a great addition. A simple vegetable to grow and store this option should be on any beginner gardener’s must-try list.
Learning how to grow bigger onions that are huge, healthy, and organic is a simple and great way to fill your winter pantry.
This article helps me a lot! I grow onions every year and they aren’t much bigger than the sets! Thanks
Hi, Tammy,
I am so glad you found tips and I hope they work as well for you as they did for me. I am telling you, the mounds did the trick for me. And I now make them for all my plants even my pumpkins!
Thanks for stopping by,
Tracy Lynn
I always struggle with onions. Thanks for all the great tips. I’ll try them this year! Found your post at the Simple Homestead Blog Hop.
Hello, Andrea!
I have to tell you the game changer for me was the raised rows. Our soil is just awful here and once I raised up the rows my onions went crazy! I hope this helps.
Tracy Lynn
Awesome article!!!! This is my first year planting onions and you have given me a ton of awesome information, I am excited!!!
Good luck!
Found article to be very helpful, I’m growing onions for the first time in 20 years. Did I miss it but do not recall any mention of fertilizers.
I planted my onion set in two places, in the ground and in a two planting bags. After less then a week I see some onion tops breaking the surface in both the bags and the row in the earth.
Hello!
Yes, those onions can grow quickly! I have not used fertilizer on our onions as we have not had the need to. You can of course use something if your ground is less than optimal.
Tracy Lynn
Onions are biennial, so they want to go to seed the second year, meaning they want to put their energy into making seeds instead of bulbs. This means they put up a seed spike like garlic instead of making a big bulb. Think of garlic scapes, usually the hard neck varieties. You want to plant starts, like baby green onions instead of the sets, they will make a bigger onion and not want to go to seed. If you want big, beautiful onions, pass up the sets, and either buy starts or start the seeds inside late fall and transplant them to the garden early spring.