Feeding Dairy Goats – Training Rowdy Goats
If you struggle with your goats at feed time, then this guide on tethered feeding rowdy goats will help make things more enjoyable for you and your herd.
Your how to raise dairy goats should be a pleasant journey, and if it’s not, my goal is to help. I have tips you can use to calm your rowdy herd and set up a safe environment for everyone.
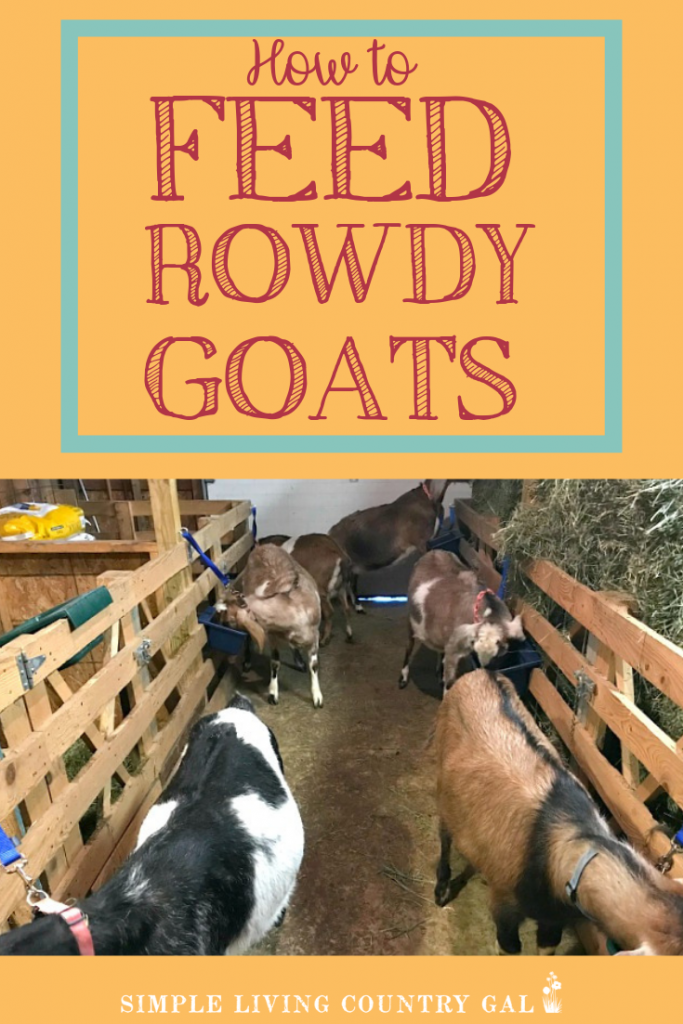
Raising dairy goats is a lot like raising a herd of toddlers. They are loving, easily distracted, determined (boy, are they determined!), curious, and ALWAYS HUNGRY. Whenever I went into the main pen to feed my little herd, I was pummeled by hungry rowdy goats who were understandably excited by the food I was carrying.
I realized very early on that feeding this way allowed certain unruly goats to get most of the food as they ran from bowl to bowl, gobbling things up just as quickly as they could. This was an even bigger problem if I needed to add herbs or other medications to a certain goat’s feed.
I knew I needed to learn how to feed rowdy goats while giving a more customized diet to those who needed it.
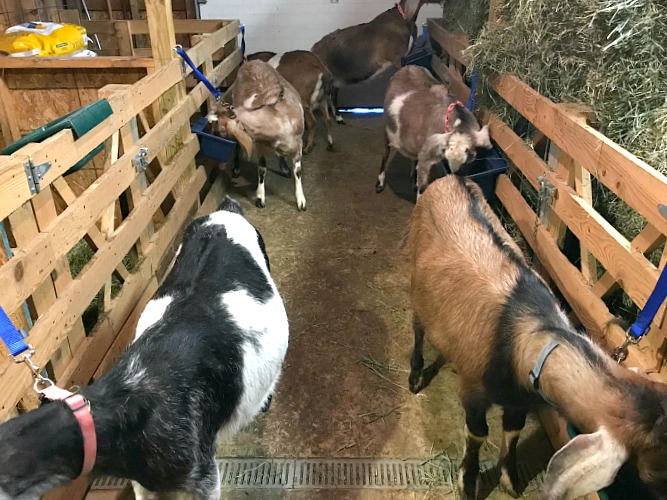
One day while playing on the internet I stumbled across the site called, Fiasco Farm. As I was reading through some of their articles, I saw their unique feeding system. They actually pulled all of their goats out of the main pen, hooked them to a rail, and fed them each separately. Each dairy goat stood patiently and politely tethered in their spot, waiting for their food.
I was completely amazed at how well those dairy goats stood there waiting patiently to eat.
It was just a photograph, however, and without a step-by-step guide on how to do this system, I quickly left and forgot about it.
As I began to rely more and more on herbal nutrition for my animals, it was important for me to find a way to feed my dairy goats independently. I also acquired a few very timed and rowdy goats, and after fighting with them feeding after feeding, I needed to come up with a better way. A way to feed those unruly goats without getting hurt and to also give a more customized diet to those that needed it.
I revisited that site and told myself I needed to figure out how to feed this way and teach my rowdy dairy goats to eat calmly and quietly.
Little did I know that it would be so much easier to do than, I thought!
READ: HOW TO NATURALLY PREPARE YOUR GOAT’S HEALTH FOR BREEDING
tethered feeding rowdy goats
This is a fairly easy design to set up as long as you have an open and separate area to feed in. If not, you can also use a fence, the outside wall of your shelter, or stakes driven into the ground.
Grab the FREE Goat Training Guide Below!
Step 1 Pick a spot to feed
The most important part of this tethered goat feeding system is to choose a spot that will work for feeding this way. Understandably it will be different depending on your set up but I do think you can make pretty much any arrangement work.
Our barn is a shed that we converted into a fully functioning barn with a center section of stalls and two communal herd pens on each side. I use the center area for birthing, kidding, quarantine, and sick care. It is concrete and easy to keep neat and clear, free from obstacles.
I found that the fewer distractions when training my backyard goats, the easier it is to acclimate them to a new routine or system.
Step 2 Tethers, ties, or leads
When setting up an area for feeding goats, you will want to incorporate tolls that are strong and durable.
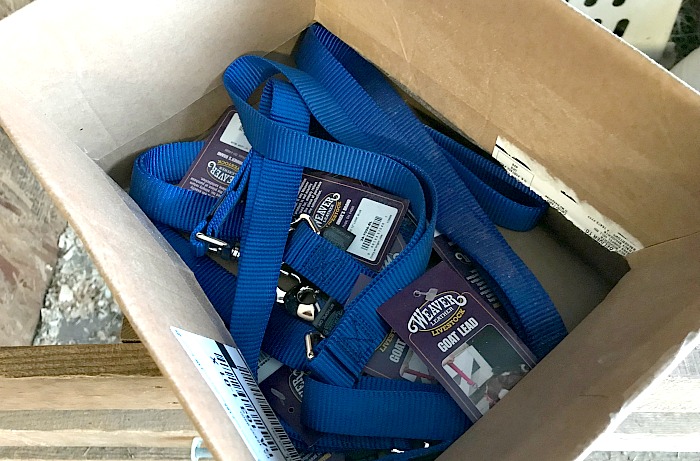
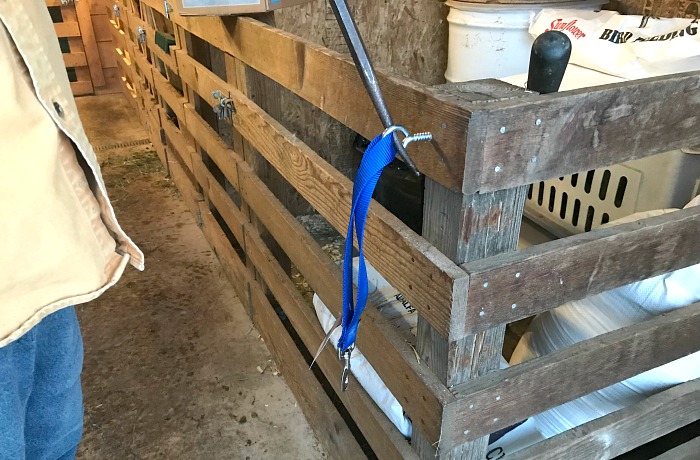
I found goat leads made of strong material that worked great. You may also find a more affordable option at your local pet store. You want them to be about 11-12 inches long so your goat has enough room to eat without feeling confined.
No matter what goat tether or strap you choose, make sure it is made of durable material so it will safely and securely hold your goats.
Step #3 Eyebolts
You will want to have a strong attachment to keep the leads securely in place. I was a bit leery about this part since my goats had never been tethered before. My goal was to have something that would hold them so they could not get loose and hurt themselves or the other goats.
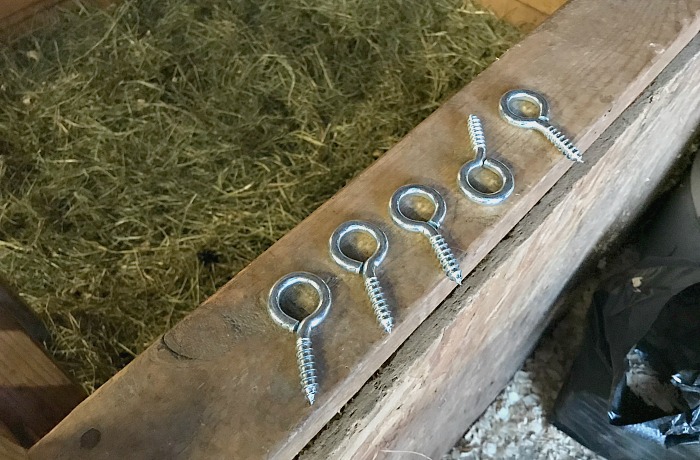
We opted to use steel eyebolts that were 1″. Not only where they easy to install they have been working perfectly for years now.
We chose a height that was comfortable for each of our goats and spaced the leads far enough apart so that one goat couldn’t bother another while they were eating.
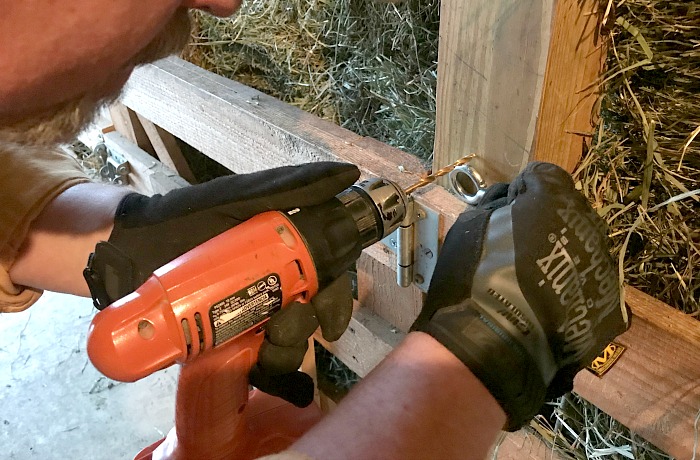
To make screwing in the eye bolt easier, we drilled a small starter hole at each site first.
Our eye hooks needed to be stretched just a bit to allow us to fit the canvas trap of the tether into the hook. This we easily did by using a vice, and a steel grow bar. Make sure you only move the opening enough to fit the lead into the eye bolt. If you open it too much, you risk the lead coming out during feeding.
Step #4 Attach the leads to the eye bolts
Continue drilling holes, screwing in eye bolts, and attaching all your leads.
Remember when tethered or tie feeding your goats is to be aware of your spacing in both your height and distance. You do not want any tension on your leads that will in any way frighten your goats. Once you lose your goat’s trust it will be tricky getting it back.
Hubs being the perfectionist that he is, insisted that all eye bolts face the same way so we needed to use a crowbar to do it. Let’s say I am the practical farmer, and he is the pretty farmer. I just want things to work, whereas he wants things to work and look good too.
Step #5 Lead Each Goat Slowly
If you do not normally work with your rowdy goats, then they will naturally be a bit hesitant the first few times you walk them out. Do not lose your patience or your cool. If you keep calm, then your goats will do the same.
You will want to walk each of your goats to their specific lead and feed bowl every single time you feed. This repetition will teach them that food is at the end of each guided walk.
We like to keep our feed bowls labeled to always be sure that the correct goat is getting the right feed. This is just another way to keep things structured for both our goats and ourselves.
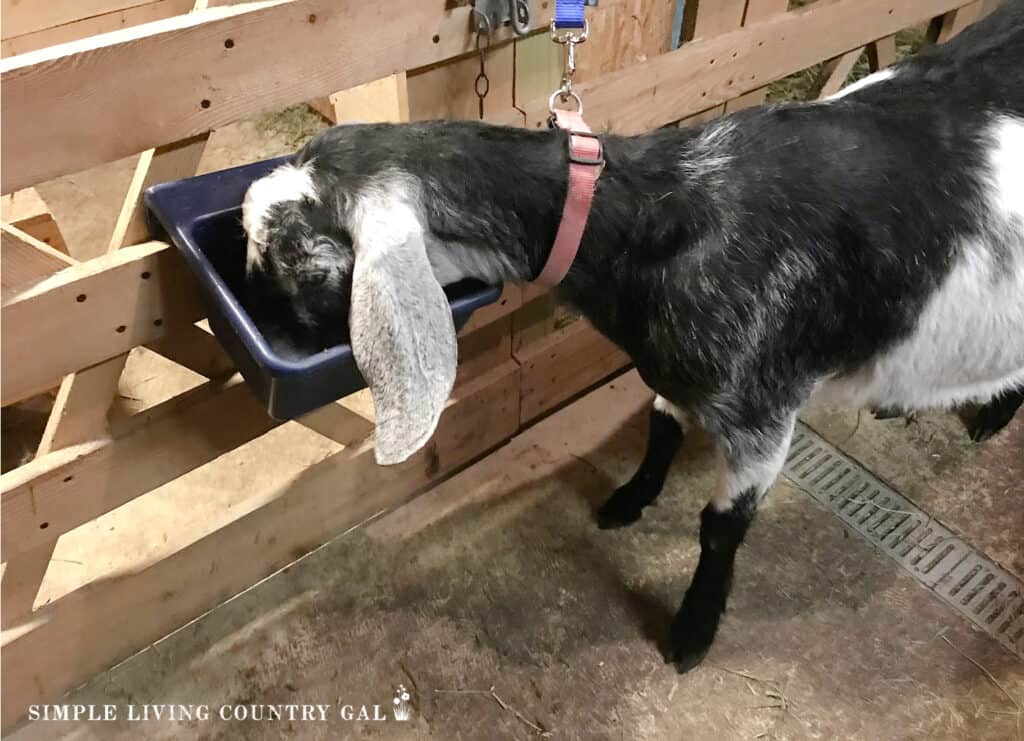
Set up your first goat’s feed bowl, and get your goat. Walk them calmly to the first station. Once they are there and have settled in to eat, you may then attach the lead to their collar.
SLCG Pro Tip: If you don’t use collars on your goats, you can find safe break-away collars like the ones I use here. These are surprisingly heavy-duty yet will break if a goat is caught in a dangerous situation.
After your first dairy goat is settled, you can place the next feed bowl in place and go get your second goat. Notice I did not put all the feed bowls out at once. This will keep your goats from getting confused and distracted. Continue retrieving goats and setting them in the correct spot until all of your goats are eating.
Once everyone is settled and calm, do not leave. Stay with your goats for at least the first few days. If someone gets spooked, you will want to step in immediately so a dangerous chain reaction does not begin. I just walk over pet and soothe the goat until they return to eating again.
Step #6 Put everyone back
While they are eating, I like to fill the hay feeders in the main pen. Then when they are finished, I can easily escort each goat back to the pen, and they will run over to the hay feeders. Again, showing them that food or hay is at the end of each walk will encourage them to go where they need to.
Eventually, you will no longer need to lead them but open the door and let them out one at a time. When they are finished, once trained, you can again unhook them from their lead, and they will go back to the main pen since they know that is where the hay will be.
You will be surprised at how quickly your goats will learn what is expected of them. If food or hay is involved, they will quickly learn to do what you need without much fuss. Yes, even the rowdiest goats will learn to listen when food is involved.
If you find your rowdy goats are not quite getting it, don’t give up.
Keep leading, keep working, and keep encouraging. Before you know it, they will walk themselves right on over to their feed bowl with no issues.
I do not suggest doing this feeding system with large goat bucks or overzealous goats that might possibly hurt you or themselves.
Use common sense and work with goats with a temperament that will allow them to learn without risk of injury. As you learn to train your goats, you can move on to the bigger, more determined goats. Remember to have more patience when dealing with these animals. Keeping your cool will help them better learn what is expected of them.
Safety should always be a top priority when raising livestock. Think and plan, and you will set yourself and your homestead up for success.
Whether you are brand new to dairy goats, are a backyard goat owner, or want to get started with goats having a loving and hands-on approach is always best. Work with your goats from day one and teach them that you are the one that feeds them and the one your goat herd needs to trust.
Raising dairy goats is such a fun and rewarding experience! I encourage you to read up on goat raising and all the basics before you begin. Fresh milk on a goat farm is a wonderful way to feed your family delicious and healthy milk. With just one or two goats, you can fill your home with milk, cheese, butter, and much more!
READ: HOW TO GET DELICIOUS TASTING GOAT MILK
I hope you find this guide on tethered feeding rowdy goats a helpful tool you can use with your own herd.


This is so inspiring and I’m really excited to try this. Can I ask how you manage to lead just one goat at a time? We have the “rowdy” goat scenario during feeding time and I’m trying imagine how I keep all of them from following while I lead one to their tether. Thanks for this post, and any additional info!
Yes, that part is a bit tricky in the beginning. My son actually helped me the first few times until my goats learned the order. We started with our rowdiest goat which he led to the door so I could get her our and setup and we continued this way until everyone was in place. After a few days, the goats new the order and yes there were still some trying to “jump in line” but not bad enough that I couldn’t do it myself.
Hope this helps!
Tracy Lynn