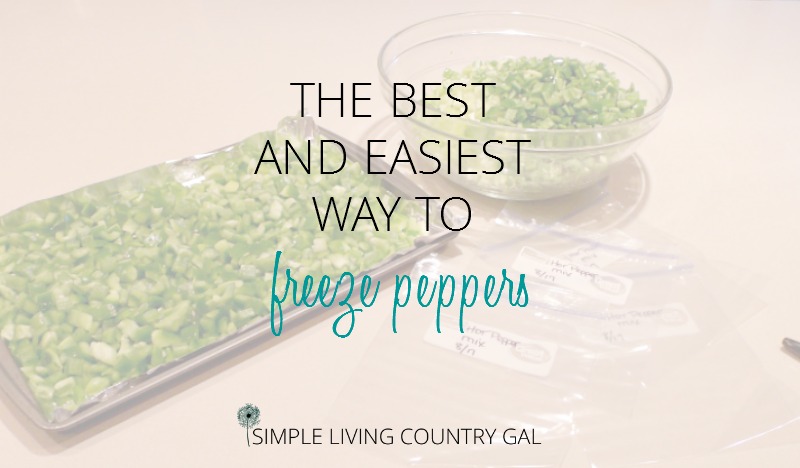
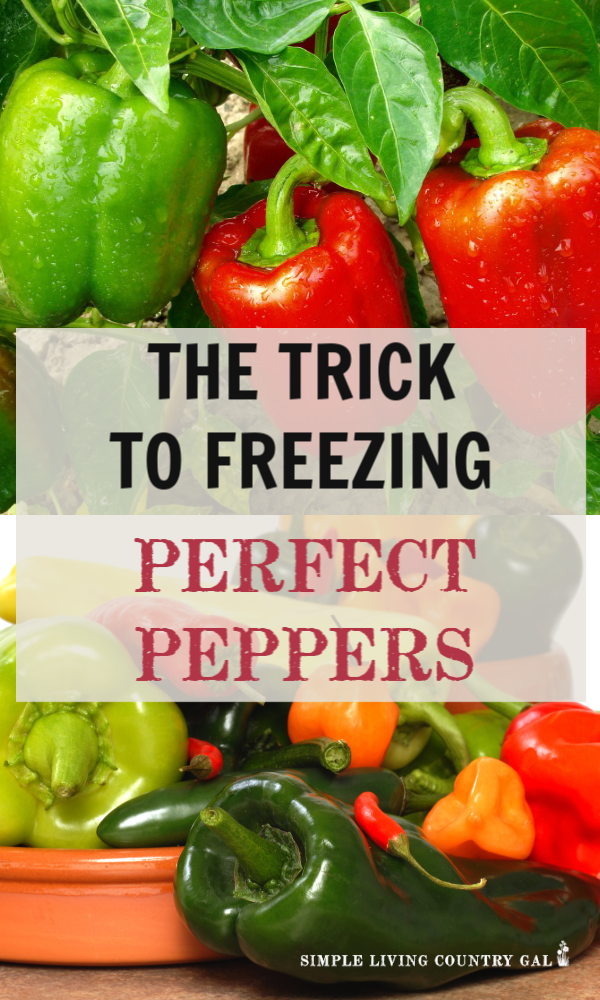
How to Freeze Peppers
Garden or no garden, freezing fresh summer produce is a smart way to keep your kitchen stocked. Here are the best tips on how to freeze peppers so they stay fresh and ready for your favorite recipes.
Gardening isn’t just for summer—you can enjoy its rewards all year by stocking your freezer with bags of peppers.

Peppers are the Stars of the Garden
With so many varieties out there, you could easily fill a 20′ x 40′ garden with hundreds of pepper plants, each offering something unique.
But when it comes to preserving them, freezing peppers can be a bit of an art. Over the years, I’ve picked up some tips to make sure frozen peppers come out just as flavorful as when they went in.
Even if spicy food isn’t your thing, peppers are absolutely worth growing. Trust me, I’ve lost count of how many times a new recipe has called for diced peppers. From adding a zesty kick to a sweet, subtle flavor, they can completely transform a dish.
Whether you’re scrambling eggs or slow-cooking a hearty stew, peppers bring a little magic to the table.

Stock Your Freezer With Fresh Produce
Creating a self-reliant kitchen means keeping most of the ingredients you need on hand, whether in your pantry or freezer. The more produce you freeze, the less you’ll rely on out-of-season grocery store options, which often cost more and lack quality.
How to Freeze Peppers
When it comes to freezing vegetables like peppers, there are a few things to keep in mind. For one, don’t plan to eat frozen peppers raw—they just won’t have the same crunch.
Peppers contain a lot of water, so freezing and thawing them often leaves them with a softer, mushy texture. That said, frozen peppers are perfect for cooking—think omelets, stir-fries, soups, and stews.
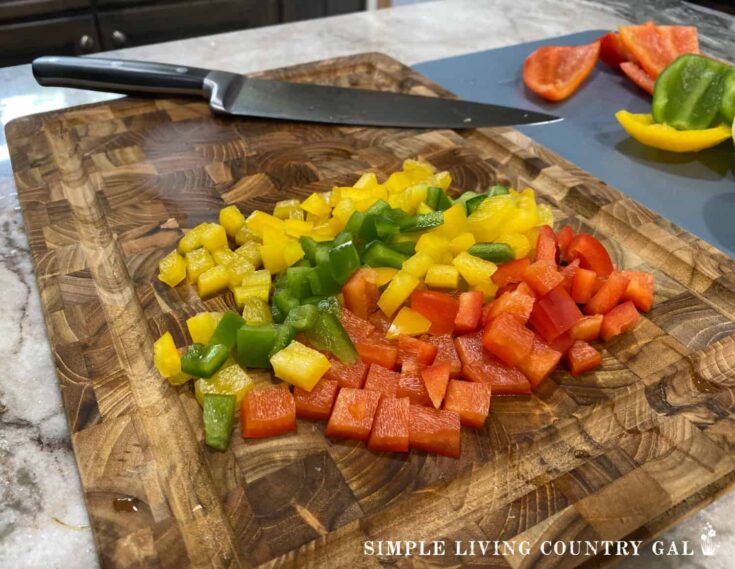
The key to success is freezing them the right way. Start by seeding and dicing your peppers before freezing.
Because of their high water content, freezing them incorrectly could leave you with a block of ice instead of usable diced peppers.
Get the method down, and you’ll have flavorful, ready-to-use peppers on hand whenever you need them.
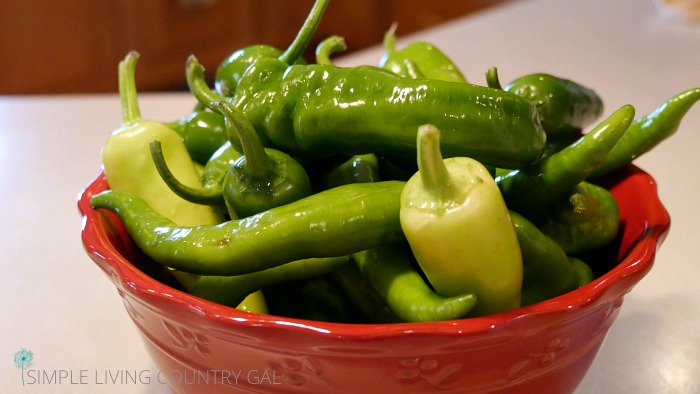
Step #1: Freeze Only the Freshest
Peppers can soften quickly, so it’s best to pick them on the same day you plan to freeze them. One major perk of freezing your own produce is knowing exactly when it was harvested, making store-bought produce less ideal for this purpose.
To lock in all those vitamins and nutrients, plan to freeze your peppers as soon as possible—ideally right after picking.
When Is the Best Time to Pick Peppers?
The perfect moment to harvest peppers is when they’re firm to the touch and fully ripe. Peppers often start off green and gradually change colors as they mature—turning shades of red, yellow, or even purple, depending on the variety.
If you prefer peppers with a bit of heat, wait a bit to harvest. The longer you leave peppers on the plant, the spicier their flavor becomes.
Food Dicer Chopper 5 Blades, Onion Dicer Chopper, Kitchen Chopper, Fruit and Veggie Chopper for Vegetables Chopper, Food Prep Chopper, Light Green Cuisinart 12-Piece Kitchen Knife Set, Advantage Color Collection with Blade Guards, Multicolored, C55-12PCER1Brandon-super Food Prep Gloves Plastic Food Safe Gloves, Food Handling, One Size Fits Most Poly 500ct Clear 500 Count (Pack of 1)Quart Freezer Bags – 150 Count, Resealable Plastic Freezer Containers – Reusable Double Zipper Pouches for Food Storage, Meat, Fresh Vegetables, Fruit – Microwave-Safe, Zero BPA – 2 BoxesStackable Refrigerator Organizer Bins, 6 Pack Clear Kitchen Organizer Container Bins with Handles and 20 PCS Plastic Bags for Pantry, Cabinets, Shelves, Drawer, Freezer – Food Safe, BPA Free 10Amazon Basics Stackable Metal Kitchen Storage Shelves, Set of 2 – White, 12.5


Step #2: Freeze the Best, Use the Rest
Stock your freezer with only the best peppers. If you spot a pepper with a blemish, don’t freeze it. Instead, cut out the damaged part, slice or dice the rest, and store it in the fridge. These cut peppers will stay fresh for a few days and are perfect for your next meal.
Before you start prepping for freezing, do a quick sort of your harvest. This helps you see how many peppers you need to freeze versus how many you’ll need to use up right away.
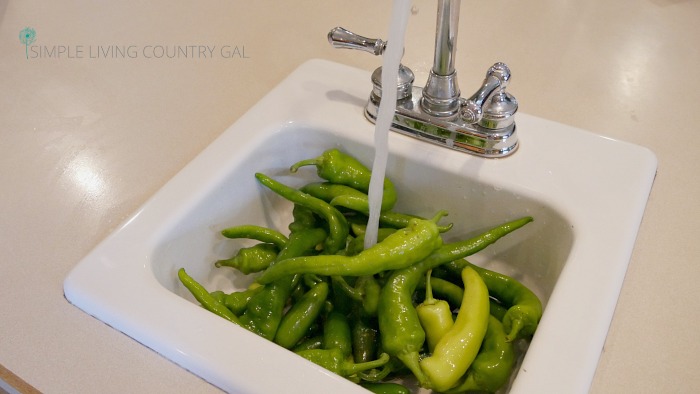
Step #3: Wash, Rinse, Repeat
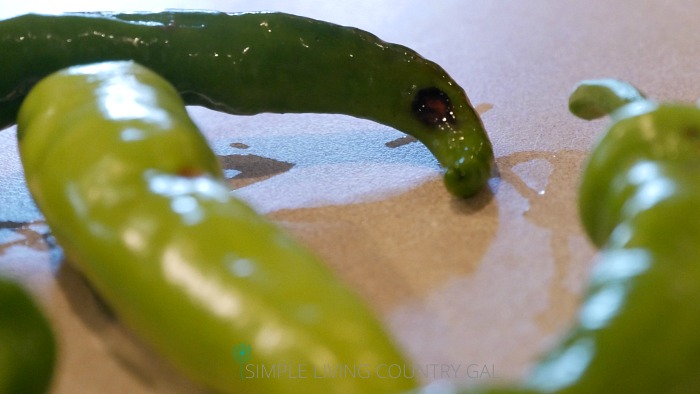
Start by giving your peppers a gentle rinse to remove any dirt. Be careful not to scrub too hard—this can bruise the peppers and affect their quality.
Once washed, place the peppers on a clean towel and allow them to air dry while you move on to the next batch. This step helps prevent excess moisture, which can cause ice crystals to form when freezing.
Before you start dicing, use a paper towel to pat them dry and remove any remaining water. Taking the time to ensure your peppers are dry will make the freezing process smoother and keep your produce in top shape.
Step #4: Protect Your Hands
Even when handling mild peppers like bell peppers, wearing gloves is a must. You might think bare hands are fine, but trust me, they’re not. I’ve skipped gloves before, only to find my hands burning hours later, despite multiple washes.
Pepper juices, even from mild varieties, can irritate your skin without you realizing it right away. And whatever you do, don’t touch or rub your eyes! One accidental rub can result in an instant, painful burn—I’ve made that mistake more than once.
Opt for thin, disposable gloves, or use reusable kitchen gloves if that’s your preference. Just be cautious—some gloves contain latex, so check for allergies before using them.
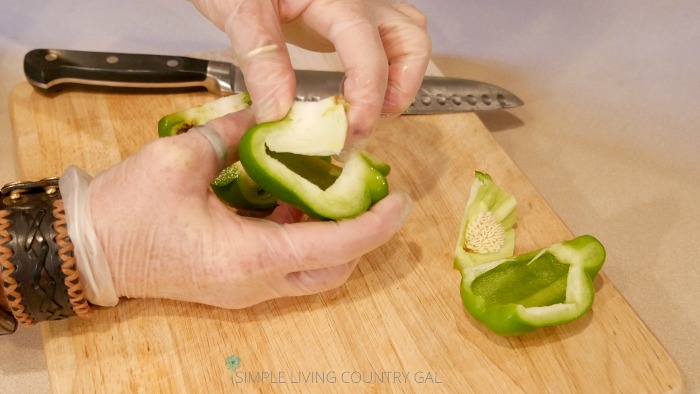
Step #5: Seed and Core Your Peppers
Carefully remove the seeds and inner membrane from your peppers. I recommend using your hands for this—don’t forget to wear gloves! It’s often easier to pull the seeds and membrane out manually rather than slicing them away.
Pro Tip: Craving some heat? Keep the seeds and membrane intact for spicier peppers. The more you leave behind, the hotter the flavor.
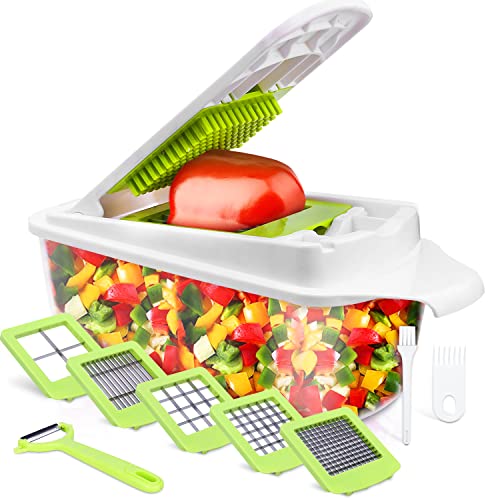
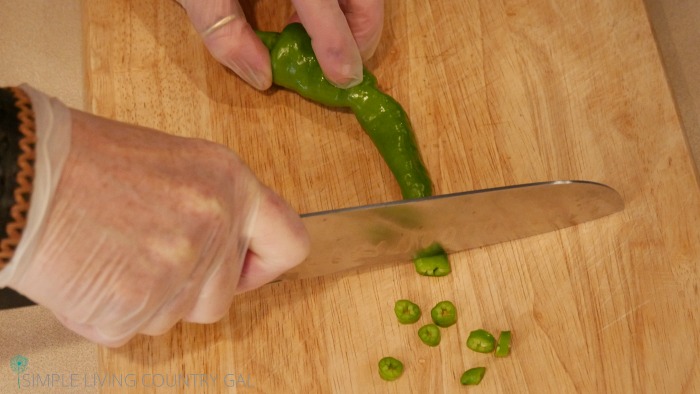
Step #6: Dice Evenly for Perfect Results
When dicing, be sure to cut pieces close to the same size. Uniform cuts ensure even cooking so you do not have harder pepper pieces in a dish next to softer ones. You can stick to the traditional knife method or save time using a food dicer.
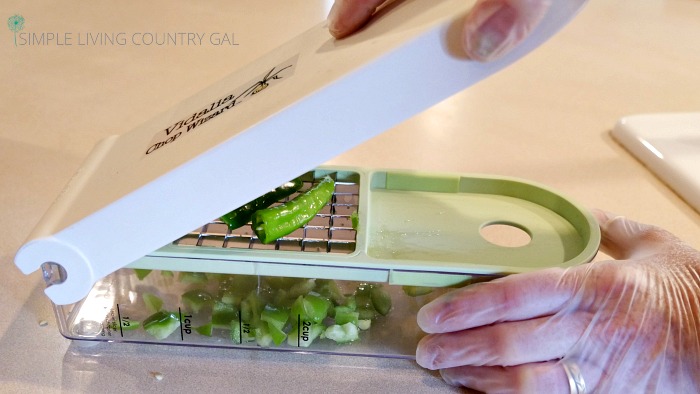
Preserving food can be time-consuming, and as a midlife homesteader, I’ve learned to appreciate tools that make the process easier on my back. My go-to is the Vidalia Chop Wizard—it’s been a kitchen lifesaver for years. It’s quick, easy to clean, and perfect for creating uniform dices with any veggie.
Vegetable Chopper, Onion Chopper, Mandolin Slicer,Pro 10 in 1professional food Choppermultifunctional Vegetable Chopper and Slicer, Dicing Machine, AdjustableVegetable Cutter With Container (Grey)Mueller Vegetable Chopper Mandoline Slicer, Food Veggie Chopper, Cheese Grater, Onion Vegetable Cutter with Container, Dicer, Kitchen Gadgets & Essentials, White Sand/GreyFullstar Compact Vegetable Chopper – Food Chopper, Veggie Chopper, Onion Chopper, With Container, Vegetable Cutter, Mandoline Slicer (White/Black)


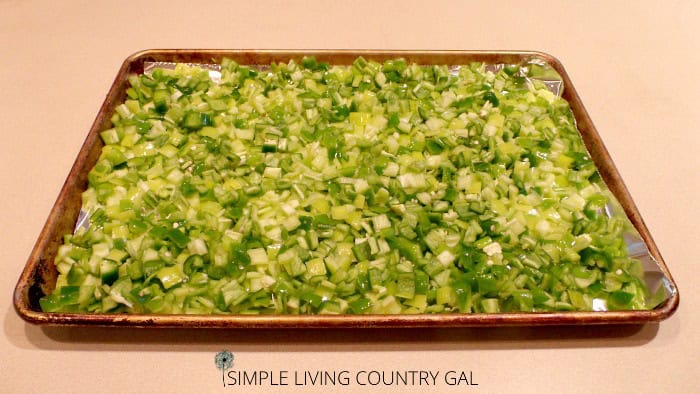
Step #7: Par Freeze for Perfect Storage
Keep your peppers free of ice and clumps with this simple trick. Peppers are water-rich, so freezing them separately is the secret to preventing clumps and ice crystals.
- Line a baking sheet with foil and spread your peppers out in a single layer.
- Place the sheet in the freezer uncovered for 15–20 minutes.
- Check to be sure they are frozen before moving on to the next step.
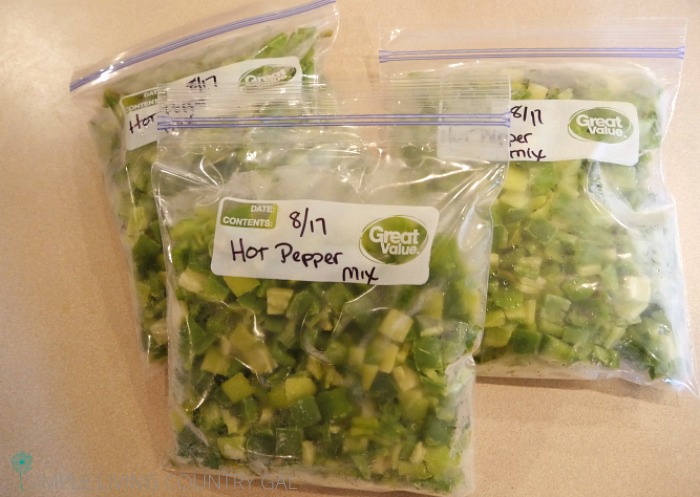
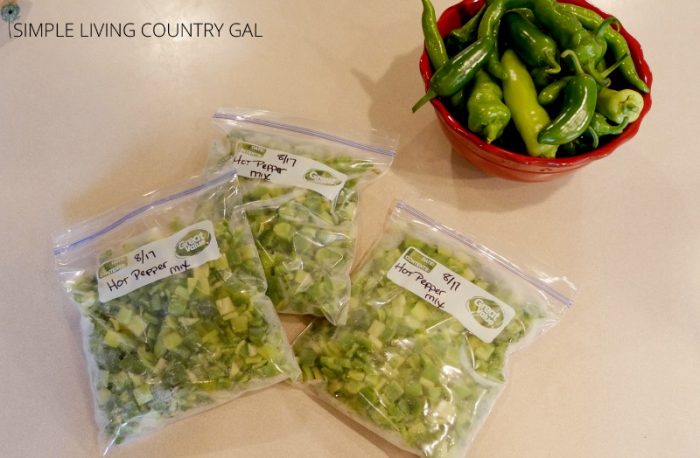
Step #8: Store Peppers in Labeled Freezer Bags
Once your peppers are par-frozen, check to see if they’re firm. The trick is to work in small batches.
- Remove a tray.
- Fill one quart-sized bag.
- Return the tray to the freezer to prevent thawing.
Working quickly minimizes any defrosting, which can cause unwanted moisture and ice buildup.
I recommend using one-quart bags—they’re family-friendly for portioning and help preserve the freshness of your peppers. Smaller bags mean less opening and closing, reducing air exposure and preventing ice crystals from forming on your precious veggies. Efficient storage equals better-quality peppers.
Step #9: Remove Excess Air for Better Freezing
Don’t overlook this step when freezing peppers—trapped air can lead to ice buildup, which we want to avoid.
Start by squeezing out as much air as you can before sealing your bag. For an even tighter seal, use a straw to suck out any remaining air for the best results.
For a hassle-free solution, consider investing in a vacuum sealer. It’s a reliable way to keep your produce fresh and ice-free with minimal effort.
Vacuum Sealer, Food Vacuum Sealer Machine, 80Kpa Powerful Compact Vacuum Food Sealer with Bags Storage and 5 Bags, 1 Pack Bag Roll, Dry & Moist Modes (Silver)MOMODA Sous Vide Cooking Bags – Set of 40 | BPA-Free Reusable Vacuum Seal Bags with Air Valve for Joule and Anova Cookers | Freezer Safe Vacuum Food Storage Bags with Upgraded Hand Pump IncludedVacuum Sealer,Equipped With 20 Vacuum Sealed Bags,Fully Automatic Dry and Wet Dual use Food Vacuum Sealer Machine,One Click Intelligent Operation,Digital Display,Super Strong Suction Power


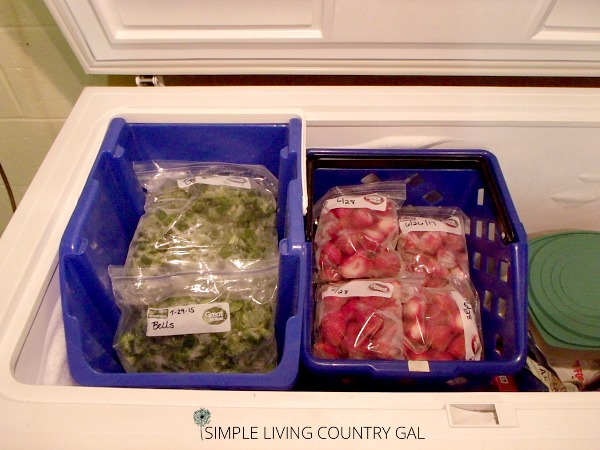
Step #10: Freeze and Organize
Before you freeze your peppers, label and date the bags to keep track of freshness and ensure you use within the 6-8 month time frame. Depending on your freezer space, lay the bags flat on a shelf or stand them vertically in a drawer or organizer.
Keep an inventory of what you have in your freezer to help you use all the food up over the winter months.
For easy organization, consider storing your frozen bags in plastic baskets. My personal favorite? Plastic recycling baskets with handles.
While they may be pricey, they’re a game-changer for a deep chest freezer, giving you double storage that is neat and organized. Totally worth the investment.
Understanding Pepper Heat Levels
Peppers come in a variety of heat levels, so you can always find the right one for your taste.
- Sweet/Mild Heat: Bell Peppers
- Medium Heat: Banana Peppers, Hungarian Wax Peppers
- High Heat: Jalapeños, Chili Peppers, Habanero Peppers
Peppers love containers, which means you can grow them anywhere! This easy guide can help you Learn How to Grow Peppers on Your Patio.
Freezer Organizing Tips
Is your freezer feeling chaotic? Use these tips to keep things more organized.
- When restocking, place fresh produce behind any older items you already have. This simple step ensures you use up last season’s stash first, reducing waste and keeping your freezer efficient.
- Keep a running list of what you have in your freezer to help you use it up before it goes bad. This way, you’ll know exactly what you have on hand and can plan meals accordingly.
- Try using clear bins or baskets for easy visibility and access to your frozen produce.
- If you have multiple freezers, designate one for long-term storage (6-8 months) and one for short-term storage (1-2 months).
Peppers frozen following the steps in this guide can last up to a year without losing their quality. You can store different pepper varieties separately for precise recipes, or mix them together for an easy, flavorful seasonal blend.
Living a simple life is easier when you have a freezer full of food that you grew or was grown organically.
There’s something special about having fresh, organic ingredients ready in your freezer and pantry all year. With just a bit of planning and prep, and this How to Freeze Peppers guide, you can stock up on spicy, mild, and overall flavorful produce so you can enjoy your garden’s harvest well into the winter months.
And don’t worry—having a big garden isn’t necessary. A couple of planters on your porch or patio can yield enough peppers to freeze and enjoy with your family. Fresh, homegrown goodness is easier than you think.
Excited to try the ultimate Garden Salsa Recipe? Grow your own tomatoes, peppers, and herbs for the most flavorful homemade dip.
Freezing Perfect Peppers
Fill your freezer with fresh amazing produce that tastes just as good coming out as it did going in! These tips will help you to freeze bags of peppers that are free of ice crystals and do not clump.
Ingredients
- 16 Whole Bell Peppers (You can also use any type of pepper here. )
- 4 1 Quart Freezer Bags
- Cookie Sheet
- Foil to line the sheet during freezing
Instructions
- Sort your pepper harvest removing any peppers with blemishes.
- Wash peppers and allow them to dry on a towel.
- Use a paper towel to remove any excess water before dicing.
- Cut the pepper in half and remove the core, membrane, and any seeds. Be sure to wear gloves.
- Using a knife, cut into equal sizes. You can also use a dicer to speed this step up.
- Place diced pepper onto a foil lined cooking sheet and place in the freezer for 15-20 minutes.
- If frozen, quickly place them into 1-quart freezer bags.
- Remove all the air before sealing.
Notes
When using peppers from the freezer, remove the portion needed quickly. Air can quickly defrost the contents, causing ice to form later.
Peppers frozen correctly will last up to one year in the freezer.
Use peppers in any recipe!
How to Grow Resources for Your Garden:
I have found that my bell peppers get extremely bitter if I freeze them – even when added in a recipe – unless I char the skins and remove them first. Have you ever had that problem, and do you have a solution for it?
Hi, Theresa,
If you have bitter tasting peppers, odds are they did not get enough water during growing season. This tends to happen in very dry climates or in areas with dry and hot summers. It should not have anything to do with freezing them, but it may make the bitter taste a bit more obvious.
Maybe next season increase your watering time to see if that helps?
Tracy Lynn
Great post! Thanks for sharing it with us at the Homestead Blog Hop!
Great article, thanks for sharing?
Do you find that the peppers lose some heat the longer they stay frozen? We plan our preserves toast about a year, and some veggies, though still good to use, tend to lose some their ‘oomf.’
Have a wonderful week!
If you do, then I would include the seeds and part of the membrane when freezing to pack in a little “extra” heat.