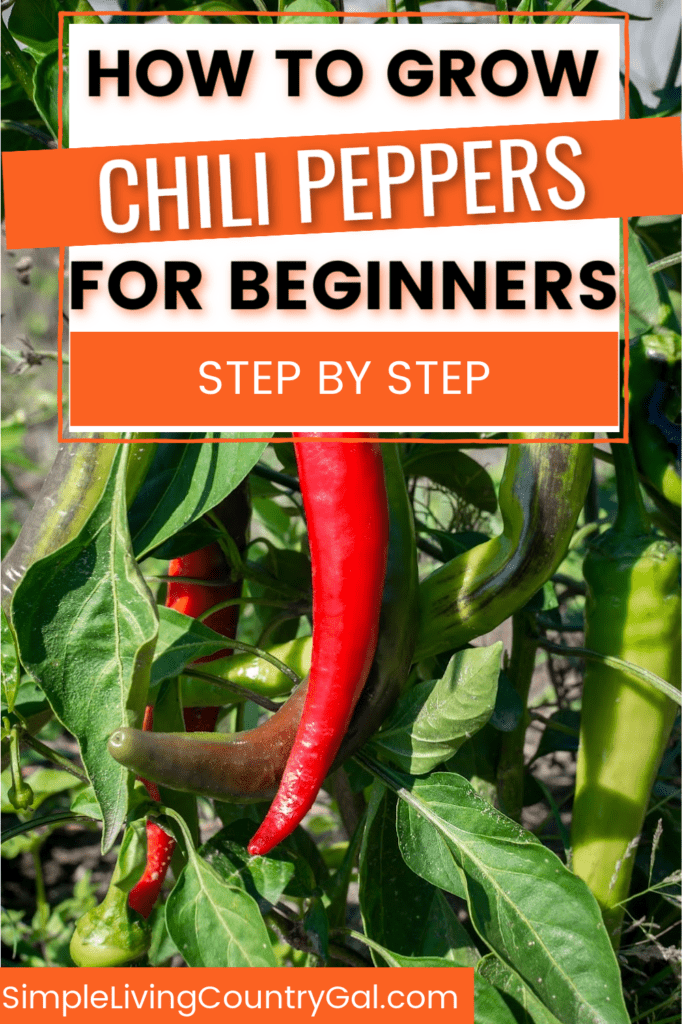
How to Grow Chili Peppers for Beginners
If you’re a gardening enthusiast, a salsa fanatic, or simply can’t get enough of spicy flavors, you’re in the right place. Learning how to grow chili peppers for beginners is easier than you might think, and it’s a rewarding way to spice up your garden and your meals. From planting the seeds to harvesting those fiery little gems, we’ll walk you through everything you need to know to satisfy your love for heat and flavor.
Add this spicy addition to your gardening 101 lineup and bring a bit of fun to your favorite salsa recipes.
I have to admit, I’m not the biggest fan of spicy foods, but my family? They’re all about the heat. Hot sauce is king in our house, even more popular than ketchup. It doesn’t matter what we’re eating; scrambled eggs, pasta, or even a sandwich, everything gets a generous splash of spice. Seriously, nothing is safe.
Years ago, I decided to start growing peppers in our garden, and chili peppers quickly became one of my favorites to plant. They’re one of those plants that are fun to grow. Unlike bell peppers, where each plant gives you just a handful, chili plants absolutely overflow with peppers.
I’ll never forget the first time I grew them. Each plant was so weighed down with peppers, they were practically toppling over. It was hilarious to see, and honestly, that feeling of excitement hasn’t worn off. To this day, I still get a kick out of watching those plants flourish.
Things to Know About Chili Peppers
Chili peppers might have started off as a staple for hot sauces and ethnic dishes, but these days, they’re popping up in home gardens everywhere. Some pack a fiery punch, while others lean a little sweeter, making them a great fit for all kinds of recipes. Plus, they bring a pop of vibrant color to your garden, so they’re as fun to look at as they are to grow.
The best part? Chili peppers aren’t tough to grow. They’re perfect for beginner gardeners and give you a big harvest. A few plants will keep you well-stocked for the season. Whether you’re a spice lover or prefer to keep things mild, you can easily adjust the amount of chili in your dishes to match your taste.
Fun Fact: While we often think of peppers as vegetables, they’re actually fruits! They have seeds and grow from flowers, just like tomatoes and cucumbers.
Types of Chili Peppers
When it comes to chili peppers, there’s a variety to suit every taste—from mild and mellow to downright fiery. Whether you’re aiming to spice up your dishes or simply looking for a fun addition to your garden, there’s a chili pepper for you.
- Cayenne – long and thin peppers with a medium to high level of spiciness
- Jalapeno – short, tapered peppers with a medium to high level of spiciness
- Tabasco – short, pointy peppers with a medium to high level of spiciness
- Anaheim – long, tapered peppers with a mild to medium level of spiciness
- Habanero – short and squat peppers with a high level of spiciness
- Ghost Peppers – short and squat with an extremely high level of spiciness
- Demon Red – dwarf variety perfect for container and windowsill gardens with an extremely high level of spiciness.
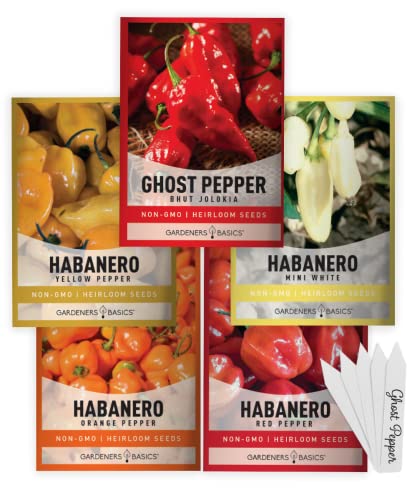
Survival Garden Seeds Hot Pepper Collection Seed Vault – Cayenne, Habanero, Jalapeño, Serrano Seed Packets to Grow in Your Vegetable Garden – Non-GMO Heirloom Seeds – 4 Packs of Popular Hot Peppers Gardeners Basics, Hot Pepper Seeds for Planting Ghost Habanero – 5 Varieties Pack Ghost Pepper Seeds, Red, Orange, Yellow, White Habanero Seeds for Planting in Garden Non GMO, Heirloom Peppers SeedsHot Pepper Seeds for Planting, Cayenne, Hungarian Yellow, Jalapeno, Serrano, Habanero Orange, Heirloom Pepper Seeds Variety Pack, NonGMO, Made in USA


How Much to Plant
Chili pepper plants are pretty generous when it comes to their harvest, which is great since you probably won’t need a ton of them in your daily cooking. For most heat-loving folks, planting just 1 to 2 plants is plenty to keep you stocked.
On average, a single plant can produce anywhere from 20 to 50 peppers. And here’s the best part—they freeze beautifully. This means you can stash a batch in your freezer and enjoy your homegrown heat all year long.
Check out our guide on The Best Way to Freeze Peppers for tips on how to freeze any pepper variety so you have chopped peppers ready to use through the winter months.
SEeds or Plants
When it comes to growing chili peppers, you have a few options for how to get started. You can grow them from seeds sown directly into the ground or opt for young plants to jump-start your growing season. Seeds are still a great option, particularly if you start them indoors and transplant them once the weather warms up.
If starting seeds indoors isn’t for you, you can always pick up seedlings at your local garden center. Pepper seedlings transplant very well and provide a great head start for your growing season.
What You Need to Grow Chili Peppers
Before you start planting, let’s quickly go over the basics so you can have your best harvest.
- Location: Choose a spot with good airflow and plenty of sun. Raised beds or containers work well if your garden space is limited.
- When to Plant: Start seeds indoors 6-8 weeks before the last frost, or plant outside once the soil is warm and frost-free.
- Sun: Chili peppers love sunlight. Aim for at least 6-8 hours of full sun every day.
- Soil: They thrive in well-drained, nutrient-rich soil. Adding compost or organic matter can help.
When to Plant Chili Peppers
When to plant depends on your region. For outdoor planting, the soil and air temperature need to be at least 50° F with no chance of frost. For many regions, that usually means mid to late April.
If starting your seeds indoors, start them at least 6 to 8 weeks before the last frost of the season. They’ll be ready to plant in the garden as soon as the temperatures warm up and the threat of frost has passed. January and February are the perfect months to start your seeds indoors.
The hottest varieties will need the longest growing period, so if you’re planning to grow peppers with a high level of spiciness, you’ll need to start them early.
SLCG PRO TIP: Start a journal of times, dates, and other planting tips for everything you plant in your backyard garden. This will help you to become not only more efficient in your garden but more successful as well.
How to Grow Chili Peppers for Beginners
Chili peppers will need to be started in warm soil of at least 50° F and after the season’s last frost. Cold weather and soil can keep the plants from producing flowers which will delay the growth of the peppers.
If you live in an area with a short warm season, consider starting your plants indoors or purchasing seedlings. The earlier the seeds are sown, the more time the plants will have to produce healthy fruits.
#1. Temperature
Chili peppers are a warm-weather fruit and need temperatures of both soil and air to be above 50° F to grow, but ideally, they prefer temperatures that are hot, 80-85° F.
#2. Sun
You’ll want to choose a spot in your garden that receives plenty of sunlight, at least 6-8 hours a day. If starting your seedlings indoors, you’ll want to provide 6-8 hours per day under a grow light to simulate the sun’s light.
#3. Soil
When planting indoors use a good seed starting mix for your starters. They’ll be ready to transplant when the outdoor temperatures warm up and the plants are large enough to handle without damaging them.
When transplanting or growing directly in the ground, be sure to mix some organic compost into the soil to provide nutrients to the plants.
Chili peppers prefer well-draining soil so the plants stay moist but don’t receive an overwatering.
#4. Water
It’s important to water your seedlings immediately upon planting and to water your transplants immediately after planting in your garden. This will help the seeds to germinate and the roots take hold.
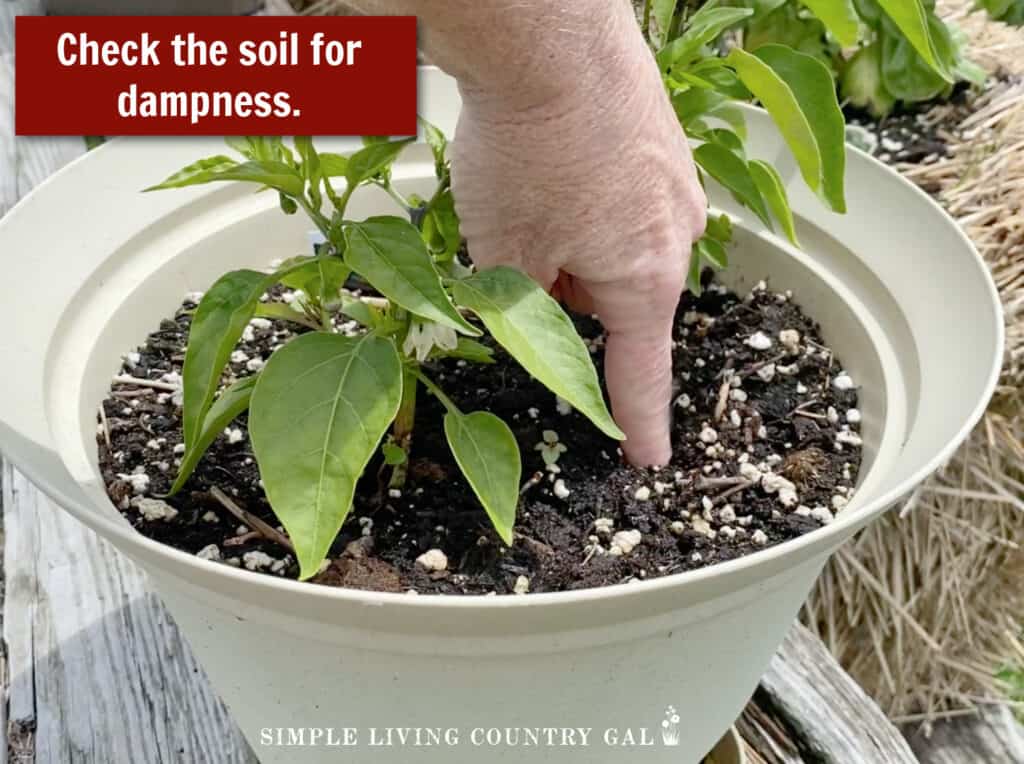
Chili pepper plants will need regular watering throughout the season, approximately 1-2 inches per week and more if the temperatures are hotter. It’s best to check the soil by sticking your finger up to your first knuckle. If the soil is dry, it’s time to water.
Water evenly being sure not to drench the plants; give the soil time to absorb the water. Overwatering can drown the plants and cause root rot. Keep in mind the plants will need more water as they germinate and a little less when they start to grow.
#5. Fertilizing
Your plants will need to be fertilized in order to grow the healthiest peppers with the largest possible harvest. Well-rotted compost and manure work really well. Another option is a commercially produced tomato fertilizer; yes, it will work for chili peppers too.
Look for a 5-10-10 fertilizer and work some of it into the soil before transplanting your seedlings to the garden. Plan on about 3 pounds of fertilizer per 100 square feet of soil.
#6. Support
While chili pepper plants don’t require staking, it does have its benefits. The plants can become heavy with fruits, allowing the peppers to droop closer to the ground where they’re more susceptible to pests and rotting.
Staking the plants helps to keep them fully upright with the peppers up and off the ground. It also helps to reduce scalding from the sun.
How to Plant Chili Peppers
To allow for the longest growing season possible, it’s best to start your chili pepper plants indoors and then move them to your garden once the temperatures warm up. They can be planted indoors 8-10 weeks before the season’s last frost and then transplanted in the garden.
Spacing
Seeds should be planted about a ¼ inch deep both when starting indoors or starting directly in the garden. If growing indoors, plant in small seedling starters or seedling pots using a good quality topsoil. When moving them outdoors, prepare the soil by mixing in organic compost. Plant the transplanted plants to the base of the plant so that all roots are in the soil.
SOLIGT 60 Cell Seed Starter Kit with Grow Light and Heat Mat, Seed Starter Tray with Higher 4.3” Humidity Dome, Flexible Light Positioning for Seed Starting & Seedling GrowthYAUNGEL Seed Starter Tray with Grow Light, 5 Pack Seed Starter Kit with Heat Mat, Seedling Starter Trays with Timing Controller Adjustable Brightness, Thicken Trays with Humidity DomesSeed Starter Kit with 100 Peat Pots for Seedlings Seed Starter Tray, Including 100 Square Biodegradable Seed Starter Pods, 5 Plastic Growing Trays with Water Strainer& 20 Plant Labels


Plants should be approximately 18 to 36 inches apart, about 2 to 3 feet between the rows. This will give them plenty of room to grow.
Depth
Whether planting outdoors or starting seedlings indoors, seeds should be planted about a ¼ inch deep.
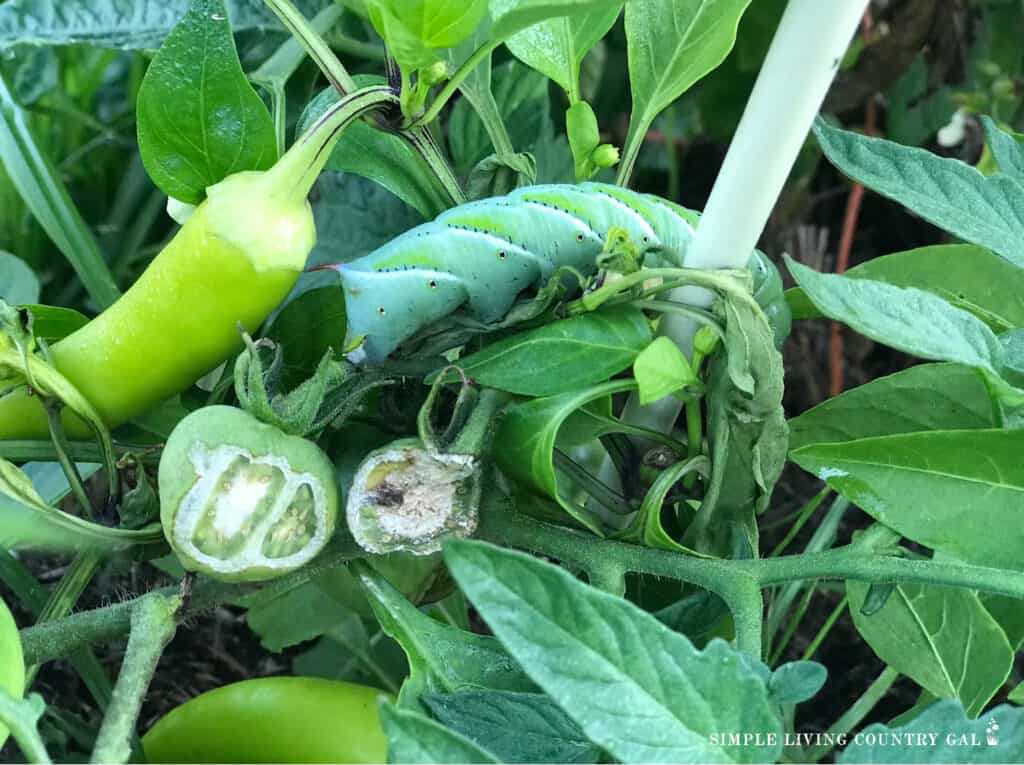
Diseases and Pests to Watch Out For
Just like other garden fruits and veggies, chili peppers can face a few pests and diseases. Here are some common ones to keep an eye on:
- Blossom End Rot: This shows up as dark spots on the bottoms of your peppers and is often due to low calcium, usually caused by inconsistent watering or high temperatures.
- Root Knot: This happens when the roots of the plant become tangled and knotted, leading to poor nutrition and wilting plants.
- Common Pests: Chili pepper plants can attract pests like aphids, thrips, leafhoppers, and whiteflies. These pests not only damage the leaves and plants but can also spread viruses. If you spot them, remove them quickly. For heavily infested plants, it’s often better to take the whole plant out of the garden to avoid further issues.
By keeping an eye out, you can tackle these problems early and keep your chili pepper plants healthy.
How to Harvest Chili Peppers
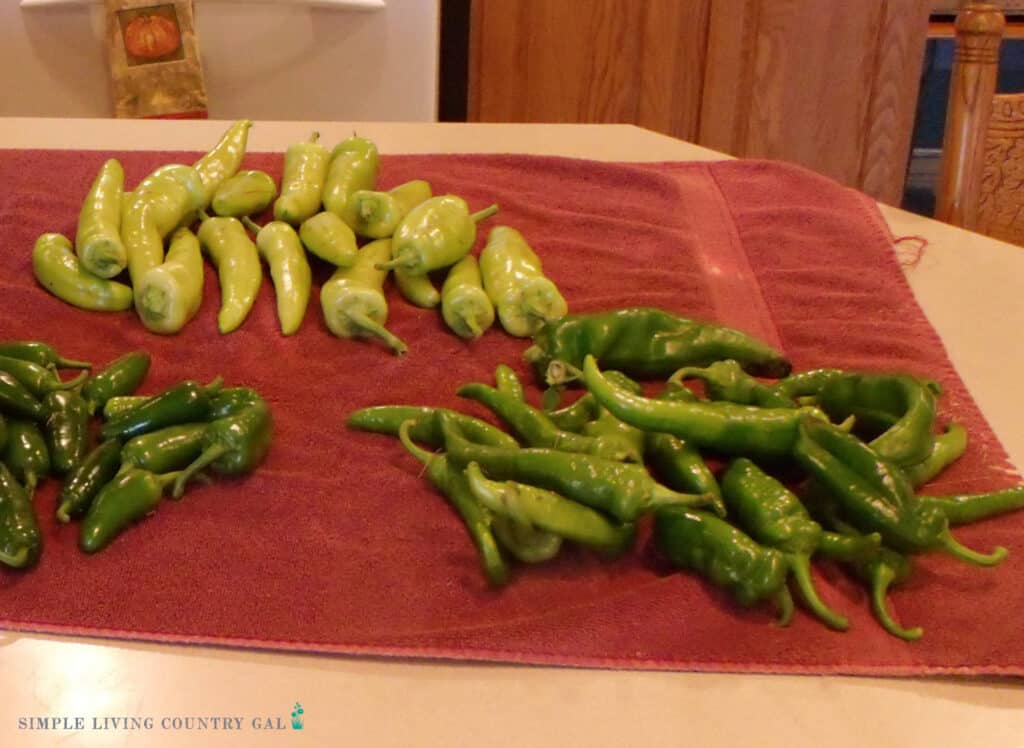
Harvesting chili peppers regularly encourages the plant to keep producing, so try to pick them as they ripen. To avoid damaging the plant, gently pinch or snip the peppers off where the stem connects to the plant.
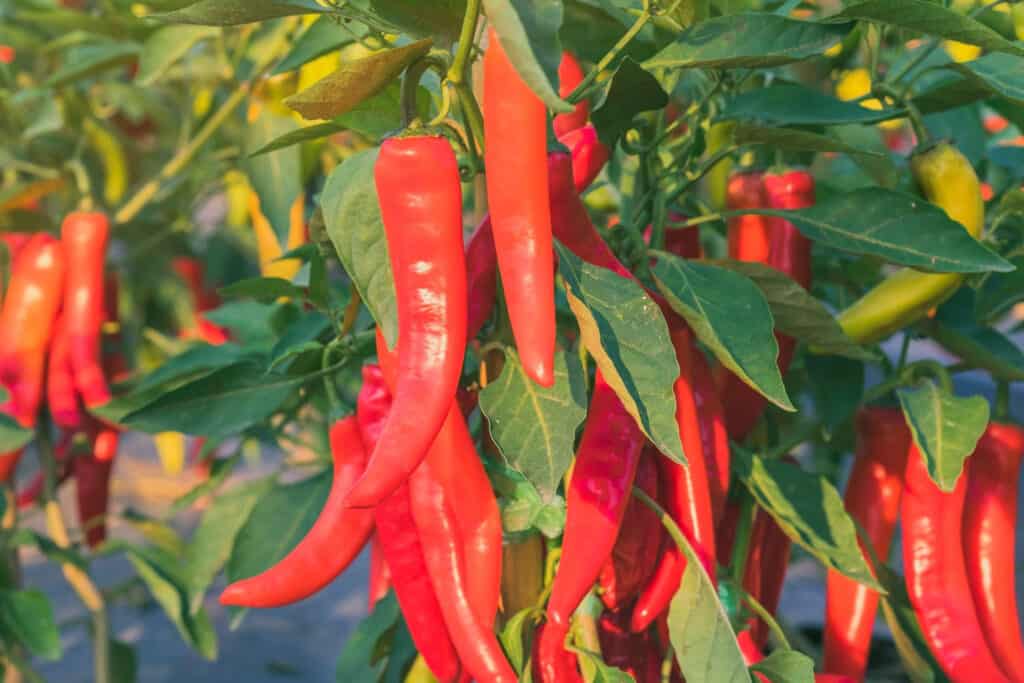
You can pick a few as you need them or leave some on the plant longer to deepen their color and flavor. Green peppers tend to have a milder taste, while those left to turn red will pack more heat.
How to Store Chili Peppers
If you plan to use your chili peppers within a few days to a week, you can simply store them at room temperature. For longer storage, drying or freezing works great.
To dry them, you can thread a needle and string the peppers together by their stems to create a “daisy chain.” Hang them in a warm, ventilated space, and in about 4 to 5 weeks, they should be fully dried. Once dry, store them in an airtight container until you’re ready to use them.
For freezing, just pop the freshly picked peppers into a freezer bag without washing or prepping them. Toss the bag in the freezer, and when you’re ready to use them, just defrost. The texture may soften a little, but the flavor will still be as fresh as the day you picked them.
Rubbermaid FreshWorks Produce Saver, Medium and Large Storage Containers, 8-Piece Set, Set of 4, Med & Lg, ClearKUMD 10 Pack Fridge Organizer, Stackable Refrigerator Organizer Bins with Lids, BPA-Free Produce Fruit Storage Containers for Storage Clear for Kitchen, Food, Drinks, Vegetable StorageZiploc Quart Food Storage Freezer Bags, Stay Open Design with Stand-Up Bottom, Easy to Fill, 100 Count


Can You Grow Chili Peppers in Containers?
Absolutely! Growing chili peppers in containers is perfect if you’re short on space or just want more control over the growing environment.
- To get started, pick a pot or grow bag that’s at least 12 inches deep and wide enough for the plant to spread its roots comfortably. Make sure it has drainage holes so water doesn’t build up and cause root rot.
- Use good-quality, well-draining potting soil made for container gardening. This will give your plants the nutrients and space they need to thrive.
- Watering is key—but there’s a balance to strike. Keep the soil consistently moist, but avoid overwatering, as it can lead to root rot. On the other hand, letting the soil dry out too much can stunt growth or make the leaves droop. Just check the soil regularly to keep things on track.
- Chili peppers love sunlight, so aim for six to eight hours a day. If you’re growing indoors, place the pot by a sunny, south-facing window or use a grow light to make sure they get enough light.
- A balanced fertilizer with equal parts nitrogen, phosphorus, and potassium will do wonders for your chili pepper plant. Adding compost or organic matter to the soil can also help boost growth.
- Trim dead leaves, flowers, and branches to encourage bushier growth and a bigger harvest, while also helping to keep pests and diseases away.
Growing chili peppers in containers is not just doable; it’s rewarding, too. Following these simple tips gives you another option for growing this season.
Growing Tips for Chili Peppers
- Save seeds from a few of your peppers to replant next year. It’s an easy way to keep growing without buying new seeds annually.
- You can grow chili peppers year-round indoors. When the weather cools, transfer your outdoor plants inside for the winter. Outdoors, they’re a one-season plant, but indoors, many gardeners manage to keep them thriving for 2-3 years.
- Watch your watering habits. Chili pepper plants need regular watering, but too much can cause trouble. Oversaturation can lead to waterlogged roots, so aim for consistent but not excessive moisture.
- Use soil that holds moisture while still draining well. This balance helps prevent overwatering while keeping your plants happy.
- Adding a layer of mulch can lock in moisture and reduce evaporation on hot days.
- Avoid overwatering and over-fertilizing. While chili peppers do need nutrients, a basic 5-10-10 fertilizer is all they require. Apply it when transplanting and again once the peppers start forming, but don’t overdo it, as too much can slow fruit production.
- For fuller, bushier plants, pinch the growing tips when they reach about 6 inches tall. Removing early flowers can also help the plant direct its energy toward strong growth rather than producing fruit too soon.
Learning how to grow chili peppers for beginners doesn’t have to be complicated, and with the right tips, you’ll be enjoying a bountiful harvest in no time. By choosing the right soil, providing plenty of sunlight, and managing watering carefully, you’ll set your plants up for success. Don’t forget to harvest regularly and experiment with preserving your peppers so you can use them in your recipes all year long.