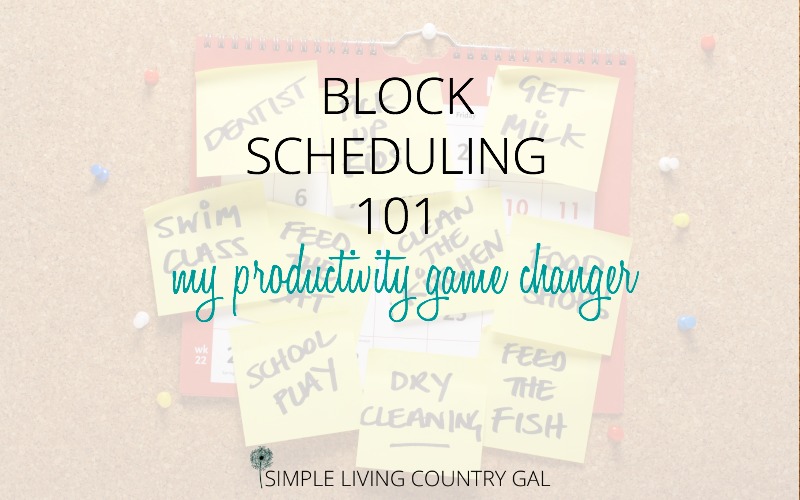
Block Scheduling 101 My Productivity Game Changer!
If you struggle with to-do list overload, then block scheduling might be the answer you have been looking for. It is a simple way to create a weekly plan that keeps you focused instead of overwhelmed, getting more done in a day than you ever have before.

It’s crazy how busy we are sometimes. Heck, who am I kidding….it’s crazy how busy we are ALL THE TIME.
If you are anything like I am, you have many different areas of your life pulling at your pant legs. Family, work, the house, the bills, the kids, the spouse, the laundry, the shopping, the cooking…I could go on and on.
I used to spend my days literally running all day long, being what I thought was “busy” when all I was doing was spinning my wheels. One day I was introduced to Block Scheduling, and my whole world completely changed. This super simple tool turned my home on its ear, and I have never looked back.
Please close your eyes and imagine angels singing. Yes, it was pretty much just like that.
But before I learned about block scheduling, I tried to do things my way because I was convinced it was the only way.
I started out using lists, but when your weekly “to-do’s” cover several pages of scrap papers, it is hard to focus on what is most important. Next, I tried setting up specific daily tasks, and although this was helpful, things were still falling through the cracks…really important things.
So I got the brilliant idea of doing it my own way, tossing all the planning out the window, and just winging it. I won’t go into detail on how badly this method failed. Let’s just say that when something important falls through the cracks that involve your family or money, the results are never EVER good.
I am sure this story sounds familiar. You have tried so many schedules, tips, and techniques for time management but nothing is ever the right fit. And if you are here, then maybe it’s time to learn how to work smarter, not harder.

And this handy saying is the key to getting more done.
When you work smart, you focus your attention on specific areas at specific times. Working this way will not only help you to find balance so your days are filled with productivity, but it will also allow you to put some of your days on autopilot. This is the secret to enjoying your life instead of being ruled by it.
Okay, so I might be getting a little dramatic here, but you see my point. We need to give you a game plan. One that will work specifically with you and your schedule of how your day flows.
This is where block scheduling comes into play.
Okay, so block scheduling is nothing new, in fact, it’s been around for a long time, and there is a reason for this.
Simply put…..it works.
How to get started with block scheduling
If you have never heard of block scheduling, let’s go over that first.
What is block scheduling?
Block scheduling is the process of blocking off specific periods of time throughout your day. During those times you will work on specific tasks. You are probably doing that right now without even realizing it.
You have a certain time set aside each day for cooking and eating dinner. No matter what the day brings, you know dinner will get made at or close to that time each day.
What you want to do now is adapt that process to every area of your life for each day of the week.
Step #1 Section Your Life Into Focus Areas
To help explain this easier, I am going to use myself as an example.
My focus areas are:
- My blog – writing/technical/promoting/sharing
- My home – cleaning/cooking/financial/seasonal projects
- My farm – animal care/barn work/outside chores
- Personal – family time/me time/self-care/fun
These are the main areas of my life that need to have my attention each and every day. Your list may be similar to mine or different altogether, and that’s okay.
The important thing is to divide your day up into 2-6 categories so you can better map out a plan for the week that gives attention to each area.
Step #2 Make a List
Before the new week begins, list out on a piece of paper what needs to be done in each area. This will allow you to devote the right amount of time, keeping your schedule streamlined.
Be ruthless here. I am talking total brain dump.
What is a brain dump?
A brain dump is a way to get all the stuff out of your head and down onto paper. It can help you to give voice to nagging thoughts in your head and, in a sense, decluttering your mind.
How to do a brain dump:
- Grab a tablet and a pen and start writing down all the things that need to be done throughout the day and week.
- Be sure to list everything, from the smallest task to the biggest project.
- Keep that list out where you can add to it as things pop into your head.
- This is a great way to clean out some of the mental clutter that nags at us all day long.
No, not every single thing will get done on your brain dump list, but being aware of everything will help you better prioritize what exactly does get done.
I like to do my list-making every Sunday. For me, that is the best time since my head is clear and calm. I cannot make a list if I am stressed out dealing with things, and neither should you. Choose a time that is relaxing so you are at your best self and better able to see the week ahead.
READ: HOW TO SET UP A WEEKLY PLANNING BASKET
The most effective way to do this is to have a sheet for each area you plan to work on throughout your week. My lists, for example, would include one for my home, one for my online business, and one for my farm.
I like to lay my lists out on the counter and add to them as I come up with something. The trick here is to be as complete and thorough as you can, especially the first time you do this.
Step #3 Prioritize Your List
Once all the lists in each area are written up, it’s time to get focused. Grab yourself a yellow highlighter and choose the items that are a top priority needing your attention this week.
This is my favorite part because it is up to me to decide what makes the cut. If I am overwhelmed because my list is beyond reasonable, there is no one to blame but myself. Try to be realistic and create a schedule that you know you can easily handle.
When it comes to your to-do list, it’s okay to be a little selfish. What I mean by that is if, for example, you have been asked to help out at the school bazaar, but you see on your list that you need to get the car fixed, take the dog to the vet, and fill out papers to refinance your mortgage then you may need to politely decline the school bazaar request. Don’t beat yourself up over this. It’s not your fault you simply do not have time, and it’s absolutely okay to say no.
See how life-changing this system is?
No more spreading yourself too thin. Your weekly list will determine what you can do and what you must do.
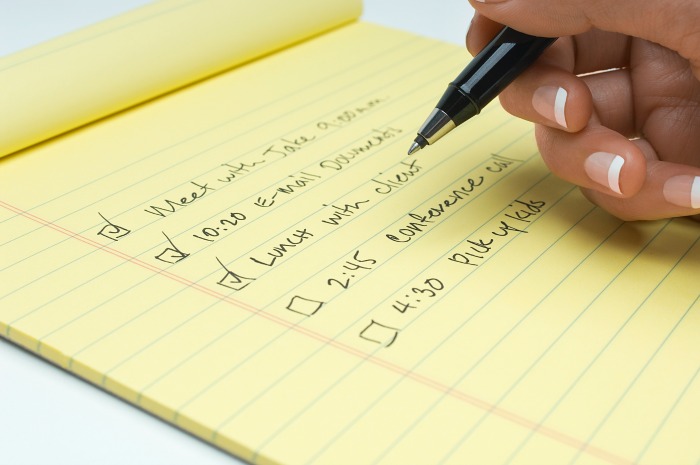
Step #4 Now that you have selected a list of specific goals you want to accomplish this week, you will want to get things down on your calendar. The easiest and most effective way to do this is to use a daily calendar with the times set up for you.
The picture below gives you a peek at my planner pages. I love the simplicity of these pages because they are all-inclusive. Time slots for a full day, room for your daily menu, and 3 main goals to focus on each day.
To set up your weekly block schedule, you will want to look at each day specifically. Since there is no rhyme or reason to what pulls at our attention on a given day, you will want to block out each day separately from the other.
So, for example, if you have an appointment at the bank on Tuesday at 1 pm, you will not want to scrub your floors right before you leave for that appointment. This is where this type of schedule is so genius. You can set it up so it works and flows within each day.
READ: HOW TO MAKE A WEEKLY MENU
Well, that is pretty much the basics; if you are ready, let’s get you all set up. By the end of this article, you will have a block schedule all set up for the week ahead.
Setting up a weekly block schedule.
So, if you are ready to take the Block Scheduling plunge, here is a quick list of how to get started.
Step #1 Make a list of areas you are responsible for.
At first, this list might be pretty large and don’t worry, that is completely normal. As you begin to implement block scheduling, you will streamline your areas, merging smaller ones together for easier scheduling.
When you have all your areas listed out, you will want to grab a pad of paper and list each area at the top of its own new sheet of paper.

Your goal is to have only four focus areas. This is to not overwhelm you and to keep your weekly schedule easy to read and use. If you have too much going on, even on your planner pages, you will be tempted to quit before you even begin. 4 areas are our goal, and that is what I want you to work towards.
Step #2 Make a list of what needs to be done.
Now that you have your areas written down, you will want to do a brain dump.
Take the time to list all the things that need to be done in each area. This step, although a bit time-consuming, is also the most liberating part of block scheduling. By getting all that clutter and mess out of your head and down on paper, you will feel much lighter and not just mentally. I cannot even tell you how nice it is to get that mess down on paper where it belongs, where it will get specific attention, and most importantly, where it will GET DONE.
This list, once completed, will be known as your master list. You will revisit this list each week to add to and check off items. It is the secret behind this system, so keep it someplace that you will always know where it is. I like to keep mine in my Weekend Basket since this gets looked at every Sunday. Not sure what a weekend basket is? Find out more!
Step #3 Choose what needs to be done in each area in the week ahead.
Now that your head is cleared out and you have all those little to-do gems down on paper, you will want to decide what needs to be done this week. Take a highlighter and go through each area’s list, highlighting tasks that you know you will need to get done in the week ahead.
This one step not only allows you to review what you have down in each area but will also help you better decide how much time you need to block off each day.
Transfer those highlighted tasks to your planner pages. This, again, will keep things streamlined so you can easily see what needs to be done when the block of time comes up.
Step #4 Write in any commitments.
Before we block out time slots, you will need to make sure you have all your commitments in first. Soccer practice, Doctor appointments, dinner dates. Get everything in so you don’t over schedule yourself.
SLCG Pro Tip: If you have a dinner date planned, make sure you section out time for getting ready as well. I have blocked off time until we needed to leave, completely forgetting I also needed time to shower and dress. The key to this system, in the beginning, is to be overly thorough. As you get better at scheduling in blocks of time, you will not need to be so strict.
Step #5 Block off your time on each day of the week ahead.
The trick here is only to work one week at a time. Going too far ahead will only make more work for you later since schedules are always changing.
Look at each area to better familiarize yourself with what needs to be done and then start with your first day. You can block off small amounts of time for each area or a large block for just one or two. This is especially helpful if you have a project requiring a larger block of time, such as freezer cooking or painting the family room.
Using a different color (if you find this helpful), section off times for each day of the week. Remember to write in meals and other routine tasks that get done daily. Sounds silly, but I blocked right through dinner every day that first week!
Step #6 Make sure to schedule your whole day.
This part was key for me. Even though this schedule is making for work, I will include personal tasks as well. This ensures I am not always working and taking time for my family and myself. Personal care is important and therefore needs to be on my list.
You will want to make sure you are blocking all the way to bedtime. This will ensure you are not working 24/7 risking burnout. This will also remind you to stop working and focus on what is most important…your family!

Step #7 Back Burner Tasks.
Do you have items on your list that are always being pushed to the side? Either because you don’t want to do them or they require help from someone else. I like to call these Back Burner Tasks because they are things that are always being put on the back burner where they seem to never get done.
Examples of Back Burner Tasks:
- Cleaning out your car.
- Painting your kitchen
- Organizing the office
- Planting that new flower bed
Choose a day each week to do at least one Back Burner Task. Saturdays are a great place to start this if you are unsure of the best day. Usually, these tasks require a larger chunk of time, so pick a day that will give you that.
Step #8 Use your schedule the right way.
Make sure when you are in your focus area’s time block, you are only doing things off of that corresponding list. The key to making this work is to use it the way it is intended. Time parameters will be the secret to your productivity success so work with it and not against it.
Step #9 Turn off and tune out.
Another key ingredient to this system working is to turn off distractions. Put that smartphone and turn the TV off. You only have so much time to get your area done so use it wisely and focus.
SLCG Pro Tip: Worried you will miss a call from your kids or spouse? Set up ringtones specific to each person. That way, if you hear a ring, you will know exactly who it is calling and whether or not you need to stop what you are doing and take the call.

Step #10 Give it a chance to evolve.
Like anything new, it takes time to perfect your dance. Give this system a chance! I told myself I had a month, but in reality, I only needed a good two weeks to work out the bugs.
Knowing you have time to tweak will take away the expectations that this will change your life overnight and the disappointment when it doesn’t do that very thing.
Make the changes needed as they arise and rebalance things as you see what is really important and what requires more time.
Ninja tip: In the beginning, I had a hard time sticking to my blocks. Not because I didn’t want to but because I totally forgot! Set a timer to remind you to stop and move on.
Step #11 Start fresh every week.
It is incredibly important to remember that your block scheduling needs to be redone each and every week. Focus Areas may change, projects will come up, and out of nowhere, a new area will need to be added to the list.
Pick a day each week to write your lists and plan your weekly schedule. My planning day is Sunday. That is my rest and relaxation day, so I am usually sitting just hanging out. This relaxed time is the perfect time to set up a new week.
When I first starting doing this system I did a page a day. Now I have a weekly schedule printable that I use. It takes a lot less time to fill out and saves on my ink budget as well. Until you get the hang of it, I would use the daily sheet, but my weekly printable is included below in the Mini Planner Home Pack that you can get for free! (psst…it also includes a weekly menu sheet!)

Even though this system took a bit to tweak and refine, it has been amazing. I can safely say it has completely changed my life and my productivity.
I start my days without the stress of having more to do than what I have time for. And I happily end just about every day feeling like I accomplished quite a bit. Knowing that each and every one of my key focus areas will get the daily attention it needs has made me more focused, more relaxed, and more productive.
More Productivity Resources:
Click here to subscribe
great tips, i’m always looking for ways to organize myself better (:
Thank you.this sounds like a workable system
Just one question.how do you decide how much time you should spend on each of your 4 areas and of there is not enough time how do you manage that.thanks
Hi, Alison!
Usually, I plan for about 1-2 hours for each area each day. The time all depends on how much I have listed for each area’s to-do list for the week. If you find you are short on time try this little trick. Pick your top 3 items on your list. Those few items are all you will focus on this week. Let the rest go. It will keep until next week so there is no need to stress too much about it.
The goal is to try to keep things reasonable on your list. When your list is too long choose the most pressing items and only focus on those. Do not think about the other things that are not getting done. Your goal is to give all your attention to that block of time so you are best able to get the most done.
I hope this helps!
Tracy Lynn
its wonderful and workable.
Thanks Tracy!