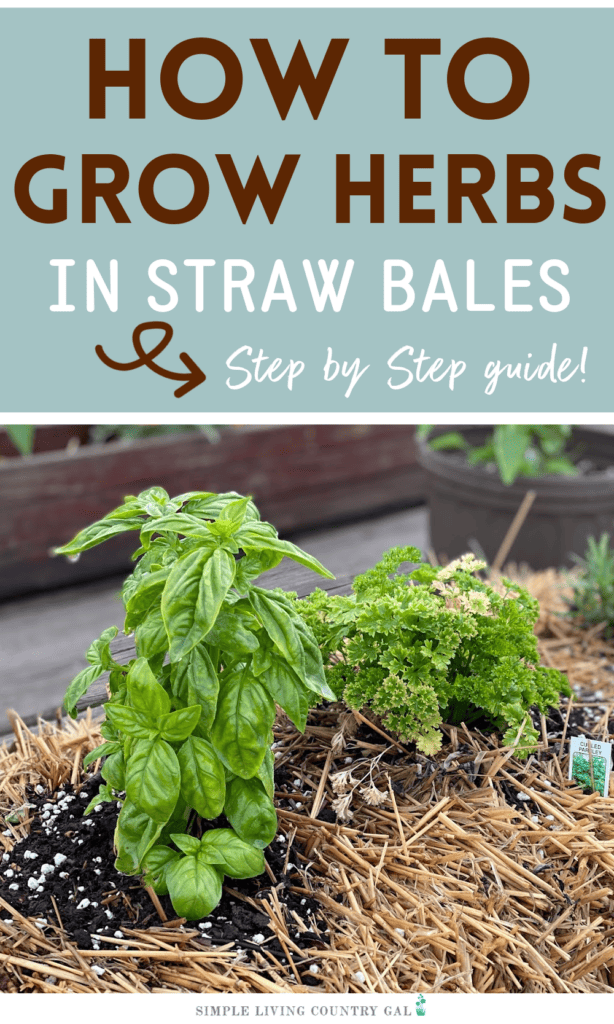
How to Grow Herbs in Straw Bales
How to grow herbs in straw bales giving you a unique way to grow the food you love no matter where you live. Bale growing can open up so many doors allowing you to add a garden to your life using compact areas in ways you may not have imagined. Get tips on planting, growing, and harvesting herbs so you can grow a culinary garden today.
Gardening 101 is all about exploring options, including growing your own herbs, so you never miss out on enjoying the foods you love.
If you love fresh herbs but don’t have the time or space for a traditional garden, straw bale gardening might be your perfect solution. This simple and budget-friendly method lets you plant herbs (and more) directly into straw bales, making the most of your available space while conserving water and leaving your backyard undisturbed.
Straw bale gardening, much like container gardening, is a space-saving method that’s easy to manage; with a few tips for container gardening, you can apply similar strategies to maximize your herb and vegetable yields.
What is straw bale gardening?
Straw bale gardening is a practical way to grow herbs, vegetables, and other plants by planting them directly into bales of straw. This method is not only easier than most traditional setups; it’s a great solution for anyone with limited space or poor soil.
The straw bales act as a container providing ideal conditions for plants to grow. With a special “recipe” you can speed up the internal composting process, enriching the bales with essential nutrients and creating a soil-like, nutrient-rich base where roots can thrive.
With easy setup and an even easier clean up, straw bale gardening is a growing option that is quickly gaining popularity all over.
the benefits of growing herbs in straw bales
Growing herbs in straw bales isn’t just easy—it’s packed with benefits that will make your gardening experience even better!
#1. Space Saving – For starters, it’s perfect if you’re short on space or dealing with poor soil. Straw bales act as a planter, giving you a practical solution when traditional gardening isn’t an option.
#2. Better Drainage – Plus, they provide excellent drainage, which means you don’t have to worry about root rot ruining your hard work.
#3. No Weeding – No more endless weeding. Straw bales are naturally weed-free, so you can focus on enjoying your garden instead of pulling out stubborn intruders.
#4. Healthier Growing – As the bales continue to break down, they release nutrients that give your herbs a little extra boost to thrive.
#5. Easier Gardening – The raised height of straw bales makes them super accessible, especially for anyone with mobility challenges. No bending or stooping—just easy access to your thriving herbs.
How to Grow Herbs in Straw Bales
As with anything new, there can be quite a bit of overwhelm your first time gardening in straw bales. To help, I have broken things down into small steps. Be sure to grab the recipe below to condition your bales for growing!
Step 1: Select Your Location
When deciding where to place your straw bale garden, keep these key factors to ensure the best growing conditions for your plants.
Sunlight: Make sure you pick a sunny spot for your straw bale garden—at least six hours of direct sunlight a day is a must for herbs to thrive. Watch out for trees or big bushes nearby; they can throw shade and steal the sunlight your plants need to grow their best.
Water: Since bales need to be watered daily, you will want to put them near to a water source. If this is not an option, you can always water by hand by keeping a rain barrel nearby and a hose or watering can.
Rihogar 100 Gallon Rain Barrel Water Tank – Portable Rain Water Collection Barrel – Large Water Storage Tank – Collapsible Rain Water Catching System with Spigot Overflow Kit, Black FCMP Outdoor 45 Gallon Heavy Duty Rain Water Catcher Barrel Container with Hose and Debris Screen for Outdoor Plants, Garden, and Landscapes (RC45-BLK) BlackFCMP Outdoor Catalina 45-Gallon Rain Barrel – BPA-Free Flat-Back Design with 3.5 Foot Garden Hose, Shut-Off Thumb Valve, and Fixed Lid, Light Granite


Soil: The beauty of straw bale gardening is that you don’t need a lot of soil for planting, however I do like to add a bit of soil mix for any seeds or seedlings I plant.
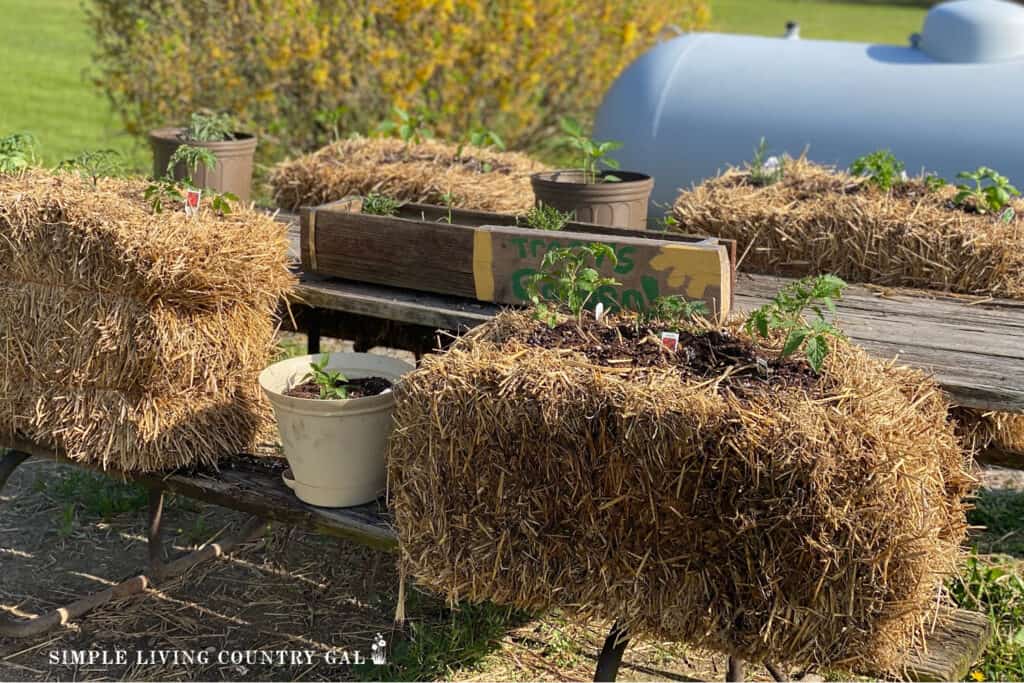
Space: Before setting up your straw bale garden, think about how much space you’ll need for the number of bales you want to plant. A standard two-string bale is about 14 inches by 18 inches by 36 inches, so plan accordingly.
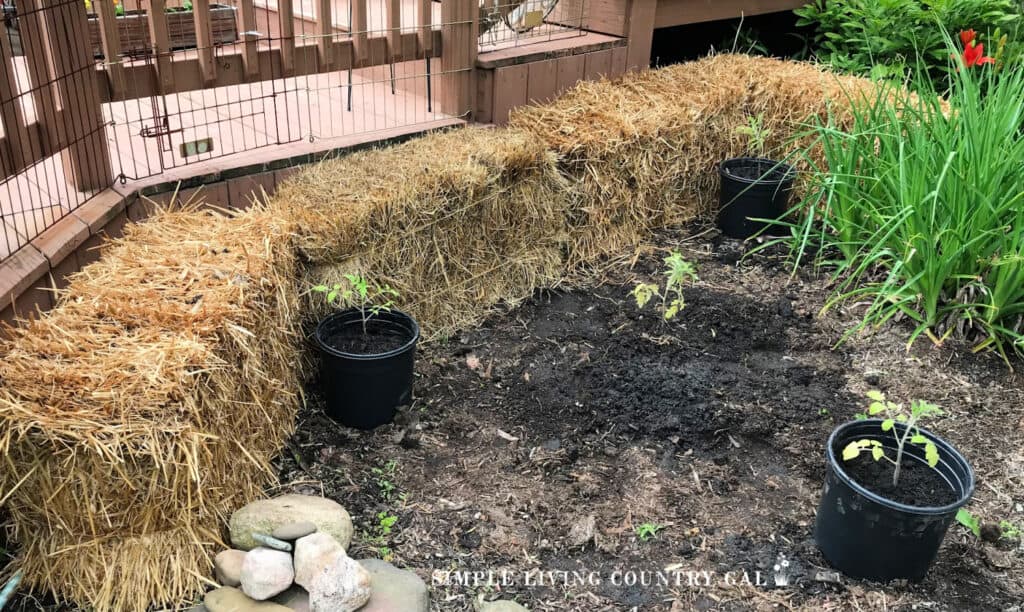
If you’re only working with one bale, you can squeeze it into wherever you have room. But if you’re going with more bales, arranging them in a pattern like an H, U, or L can really help.
These layouts not only save space but also make it super easy to water and tend to your plants from all sides. It’s a setup that’s practical and keeps everything within easy reach!
Accessibility: Don’t forget to think about your own needs and comfort. The spot you choose should be easy for you—and anyone else helping out—to access.
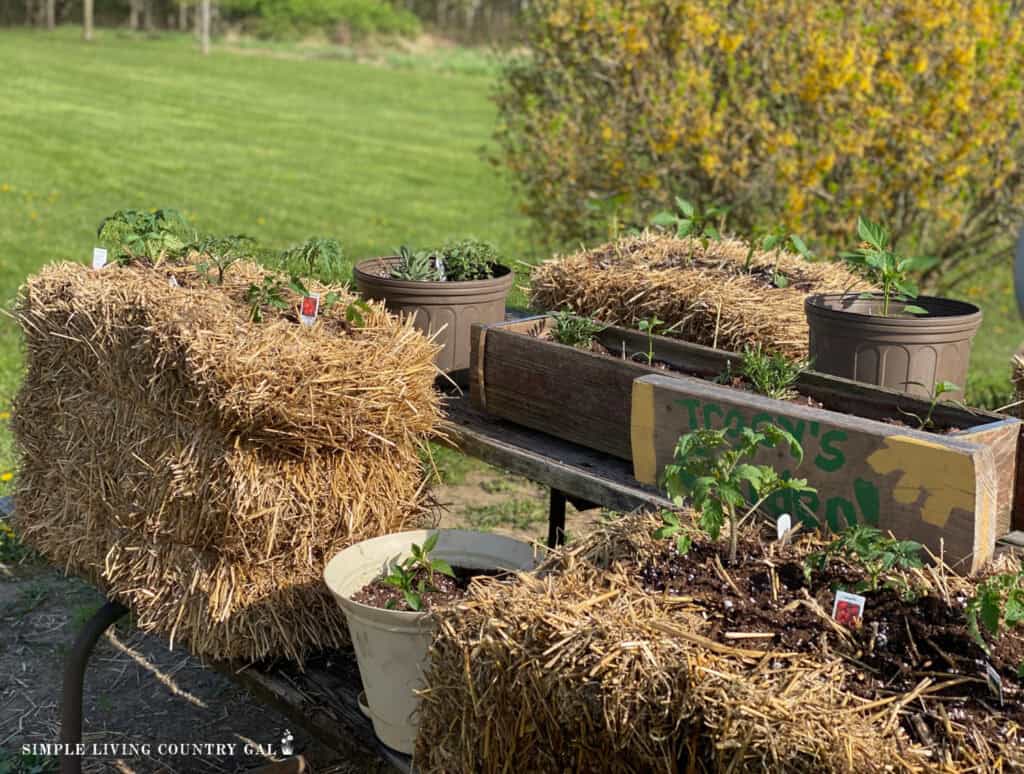
If you have physical limitations, such as a bad back or sore knees, no worries. You can put your bales on a bench or table to make them easier to reach. It’s all about finding the setup that works best for you so gardening stays enjoyable and stress-free.
What are the supplies you need for a straw bale garden?
To start an herb straw bale garden, you will need a few supplies:
Straw bales: Look for local bales where you live. Check with nearby farmers, swing by your local feed store, or even give your county extension office a call—they’re all great places to start.
Here’s another pro tip: don’t just grab the first bales you find. Take a moment to ask some questions, like whether pesticides were used when growing the straw. If you want to keep your garden organic and chemical-free, it’s worth making sure the bales you’re using are clean and safe.
Finally, make sure you are using STRAW bales and not HAY bales. If you are not sure of the difference, I encourage you to read my article: The Difference Between Hay and Straw Bales.
Fertilizers: Organic fertilizers such as blood meal, bone meal, or a balanced blend of NPK fertilizers are great options if needed.
Earth Science Natural Blood Meal Plant Food – Organic Nitrogen for Thriving Plants – Feed Flowers, Vegetables, Trees, Shrubs & Potted Plants – Activate Compost, Vibrant Growth, Bigger Harvests – 3lbBaleBuster4 Four Bale Conditioning Formula for Preparation of a Straw Bale Garden for Planting a Vegetable GardenEspoma Organic Blood Meal 12-0-0, 17 Pound bag.


Herb plants or seeds: Choose which herbs you want to grow and ensure the herb varieties are suitable for the soil and climate in your area. In some cases, you will want to use seeds in others, seedlings may be better.
Water source: You’ll need a convenient water source to make watering easier and more efficient. Invest in a good quality garden hose and spray nozzle that gives a steady, gentle flow allowing you to water without damaging your plants.
More Gardening Tools to Have:
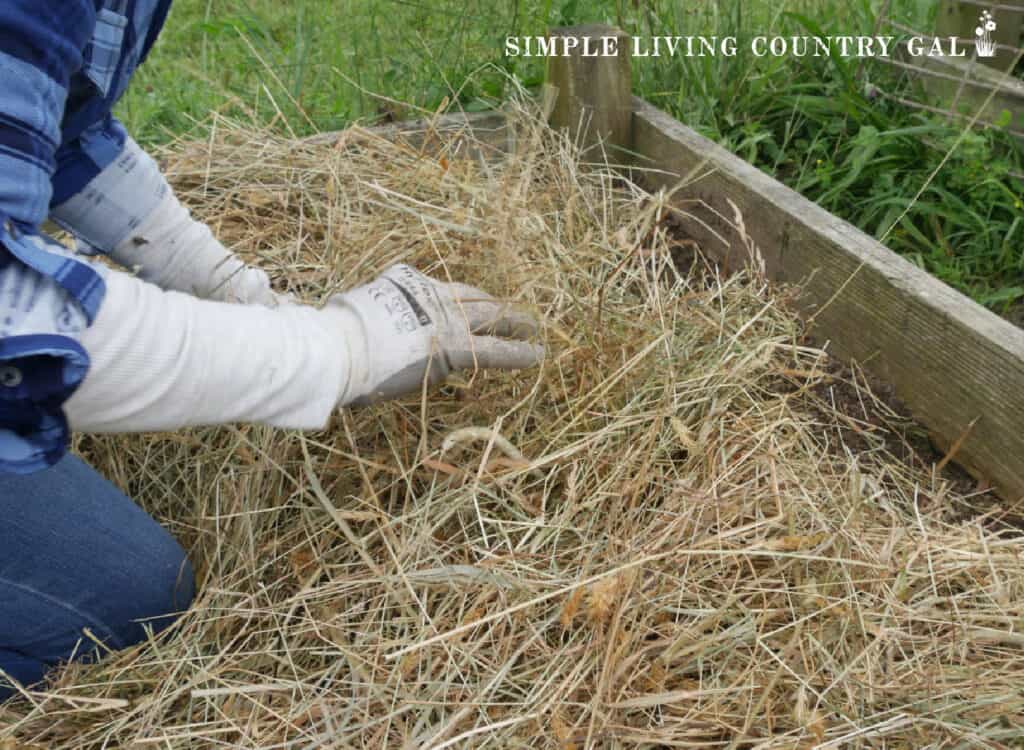
Step 2: Prepare the Straw Bales
Conditioning straw bales is an essential step in preparing them for planting and takes about two full weeks to complete. This process transforms the dense, dry straw into a nutrient-rich area that is perfect for growing. Conditioning means breaking down the straw, similar to composting, so the inside resembles fine and healthy soil.
Supplies needed:
- Straw bales – One 2-string bale will hold 6-8 herb plants, depending on the size of the herbs you are growing.
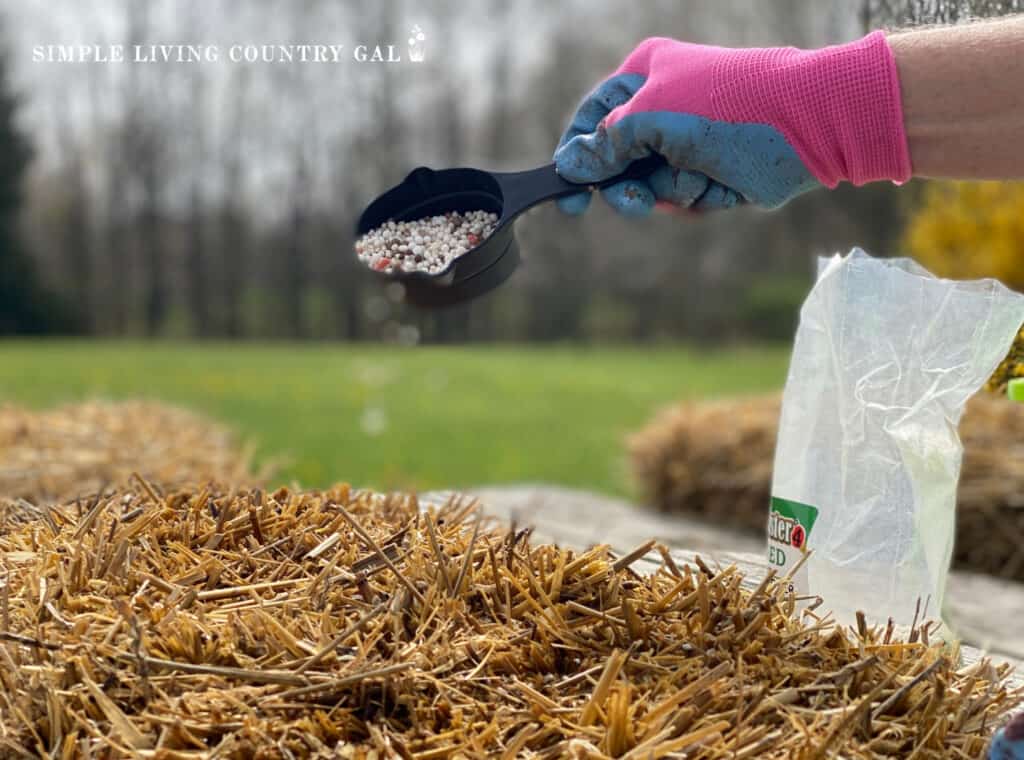
- Fertilizer – look for a high-nitrogen option. Avoid slow-release options or fertilizers with herbicides or crabgrass preventers.
- Bone/fish meal
- Wood ash – Do not use ash from chemical-treated wood.
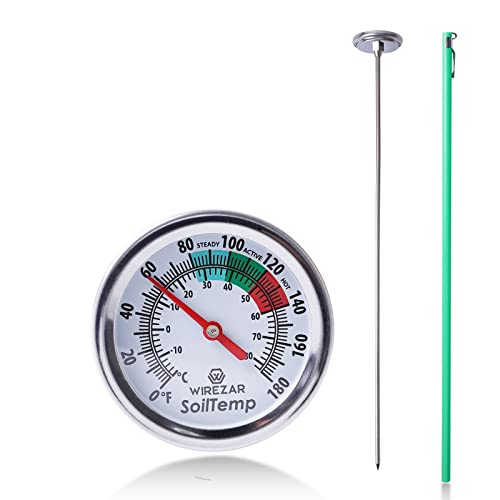
- Compost thermometer – To check the temp of the inside of the bale.
How to Prep Bales:
The condition process takes 14 days to complete. Keep this time in mind when planning your garden for spring.
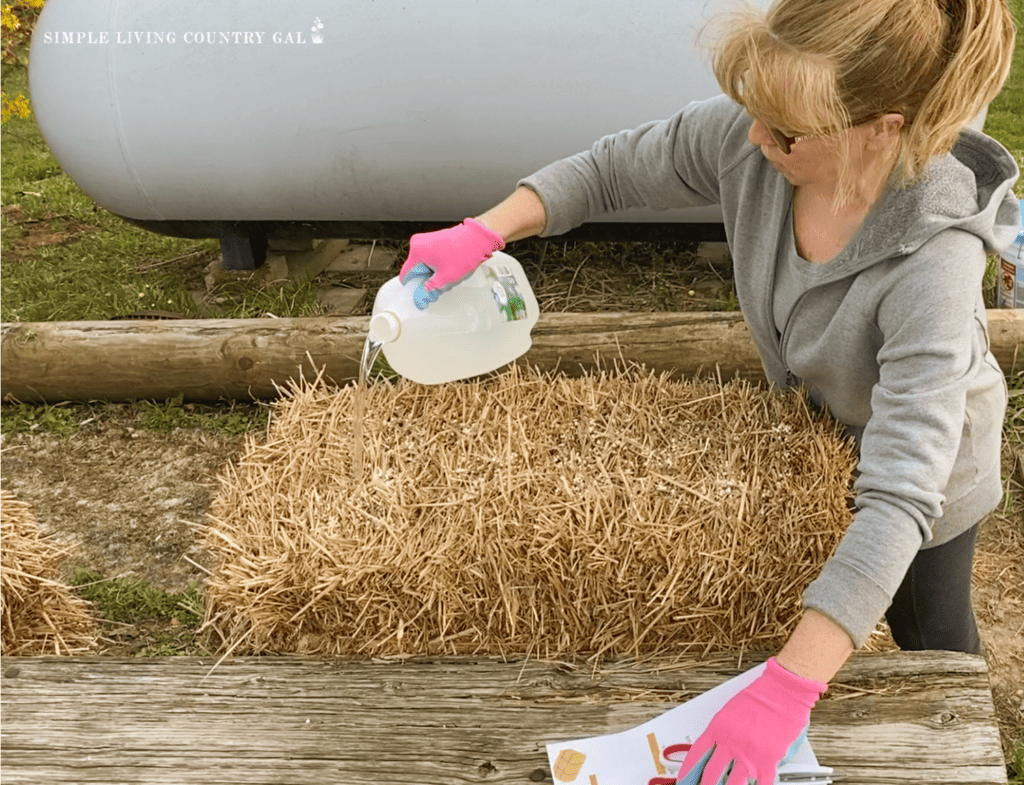
- Day one: Sprinkle 2 cups of fertilizer over each bale and water thoroughly.
- Day two: Water each bale.
- Day three: Sprinkle 2 cups of fertilizer over each bale and water thoroughly.
- Day four: Water each bale.
- Day five: Sprinkle 2 cups of fertilizer over each bale and water thoroughly.
- Day 6: Water each bale.
- Days 7-13: Sprinkle 1/2 cup of fertilizer over each bale every day followed by a good watering.
- Day 14: Add 3 cups of bone/fish meal plus wood ash if you have any on hand.
After day 14, your straw bales are ready for planting.
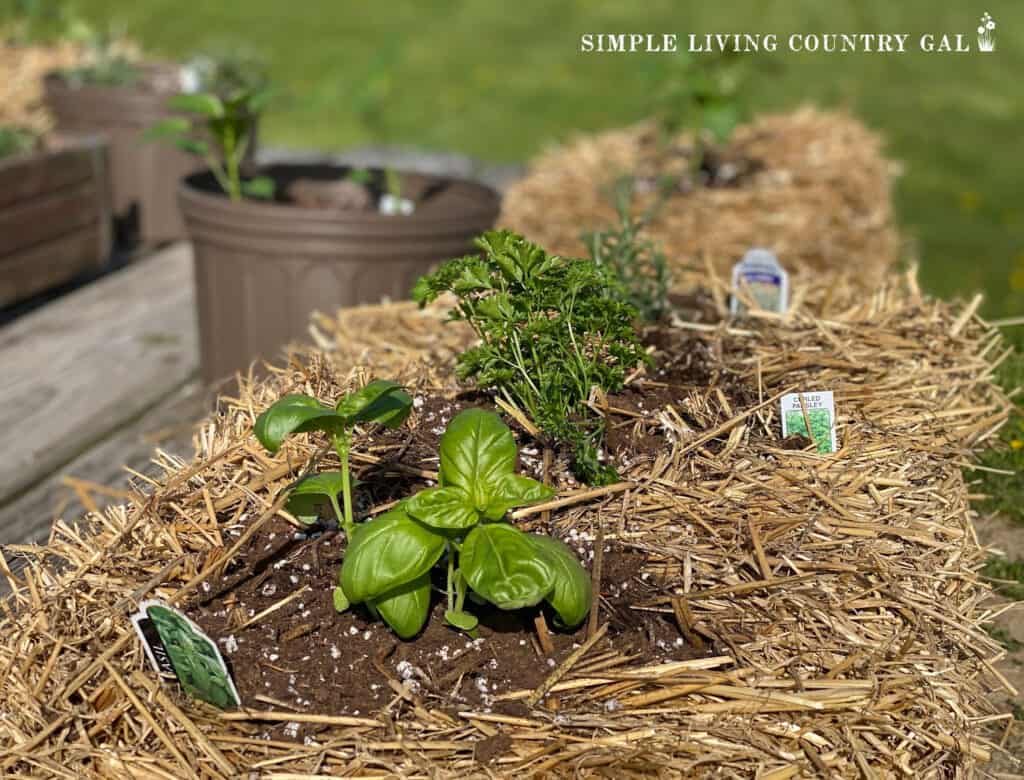
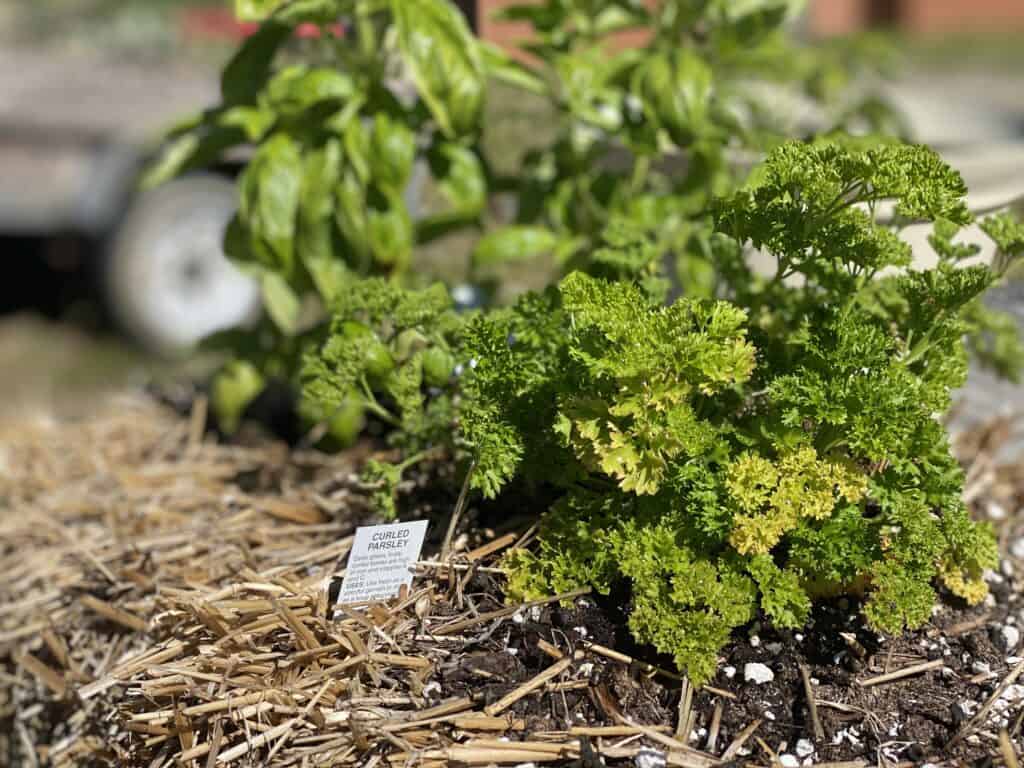
What herbs grow well in a bale of straw?
Herbs like basil, parsley, thyme, cilantro, oregano, mint, and dill are all fantastic choices for growing in straw bales. These herbs thrive because straw bales create a warm, nutrient-rich environment with great drainage, which mimics ideal growing conditions.
Be sure to partner up each herb with friendly herbs, so they support each other and grow more successfully. This is called companion planting, and it is a great way to improve the quality of your herbs.
Step 3: Plant Your Herbs
The way you plant seeds and herbs in a bale will be different, let’s go over each.
Planting Seeds
To plant seeds in a straw bale, spread a layer of potting soil on top and follow the instructions on the seed packet for spacing and depth. The soil helps keep the seeds in place and prevents them from sinking into the bale. Gently press the soil down with your hand and finish with a light watering.
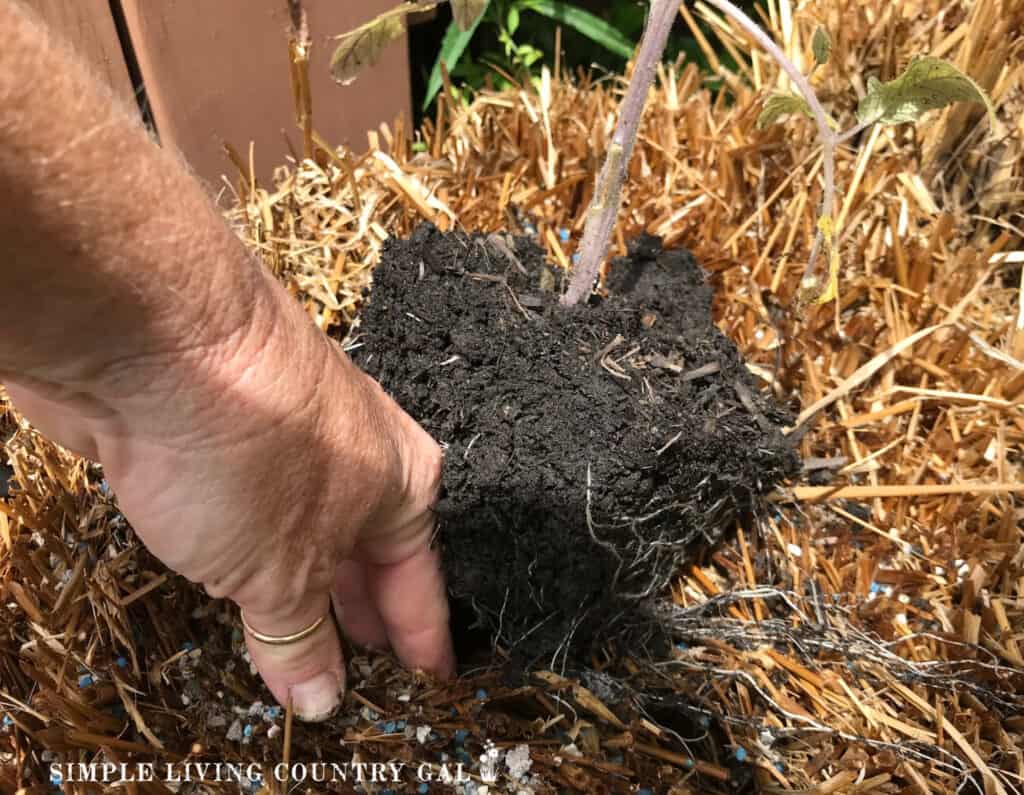
Planting Seedlings
If you’ve chosen seedlings, make a hole in the top of the bale using your hands or a trowel. Add a small amount of potting soil to the hole, giving the roots a good area to grow in. Next, gently remove the seedlings from their pots using your hands to break up the roots.
Put the seedling into the hole, adding more soil to hold the plant in place. Refer to the directions of the seedling for spacing and depth.
Step 4. Water
You should water your straw bale garden daily, especially early on, to keep the bales consistently moist. As the plants grow, adjust based on the weather—hot, dry days may need extra watering, while rainy days might not need any.
You will want to water just enough so you are not over-watering your plants.
If your herbs are overwatered, you’ll notice signs like yellowing leaves, wilting despite wet soil, or a musty smell from the roots, which could indicate root rot. To prevent this, check the soil by sticking your finger in—if it feels soggy, hold off on watering until it dries out a bit.
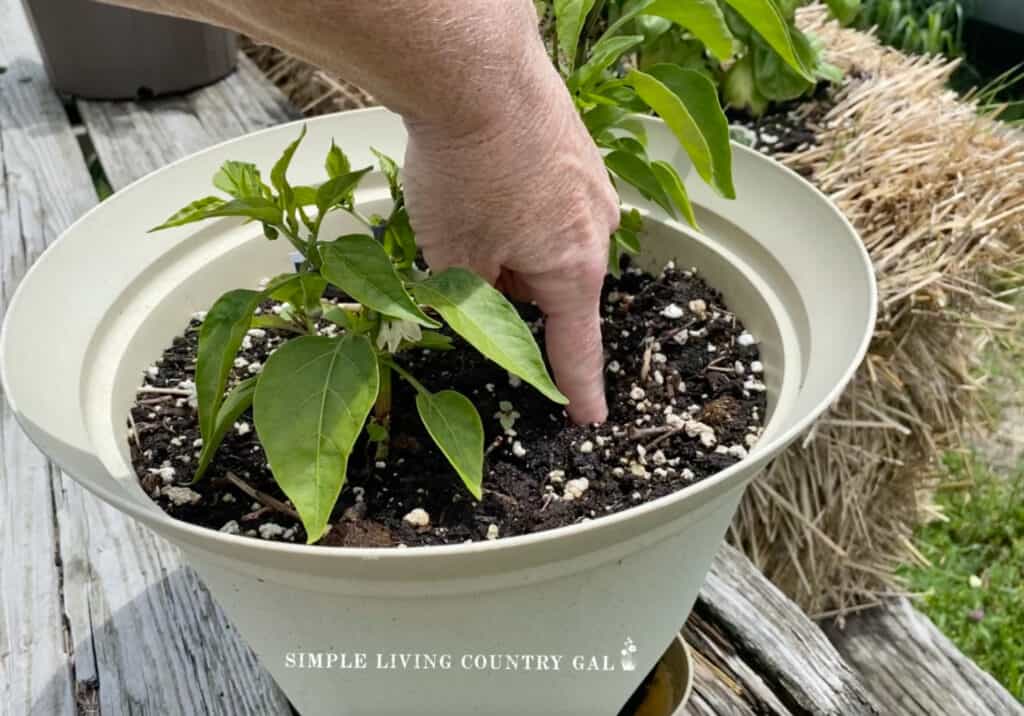
Healthy herbs prefer a balance, so aim for soil that’s damp but not soaked.
If you have overwatered your plant, allow it to dry out. Many times a plant can recover on its own, and only time will tell you if you caught the issue in time.
Step 5. Fertilize if needed
When it comes to feeding your herbs, you can use compost or manure tea to give them an extra boost of nutrition. You can also feed them diluted fish emulsion fertilizer once per month for maximum growth.
Liquid Compost | (32 fl. oz.) | Worm Tea with Trace Minerals, Vitamins, and Aerobic Microbes | Improves Soil Health, Mobile Microbes, and Enhance Nutrient UptakeCompost Tea, Boosts Microbial Activity in Gardens for All Plants, 8 oz (250mL)Sustane Compost Tea Bags


Step 6. Watch for Pests and Diseases
Regularly check your herb straw bale garden to keep it healthy and thriving.
- Inspect leaves, stems, and fruits for damage, discoloration, or bite marks that may signal pests.
- If you spot damage, identify the likely pests and use organic solutions like diatomaceous earth or a water-dish soap spray to manage them.
- Watch for signs of disease, such as wilting, rot, or unusual discoloration, and promptly remove infected plants to protect the others.
By staying alert and addressing issues early, you’ll keep your garden productive and free of pests and diseases.
Step 7. Trim as needed
Trimming or pruning herbs in your straw bale garden is important to keep them healthy and productive. You’ll need a pair of clean, sharp pruning shears to trim your herbs. It is important to clean your pruning shears before and after you use them to prevent the spread of disease.
• Start with dead or wilted leaves trimming away any affected leaves. This will help to keep the plant healthy and prevent the spread of disease.
• Trim your herb plants to maintain a compact shape and promote growth. Cut a few inches above where you would like the plant to grow.
• Some herbs, like basil, produce flowers that can signal the end of the growing season. When you see flowers forming, trim them to encourage the plant to continue producing leaves and delay flowering.
• Be careful not to trim your herbs too much, as this can shock the plant and slow its growth.
• After you’ve finished trimming, dispose of the trimmings and clean up the area around the plant to discourage pests and disease.
Harvesting Herbs Grown in Straw Bales
Knowing when to harvest your herbs is essential for getting the best flavor and quality from your straw bale garden.
• Different herbs have different ideal harvesting times because of their growth patterns. For example, basil should be harvested at around 6 inches tall or when it starts blooming. While herbs such as thyme or oregano can be harvested most of the season.
• One of the best ways to know when to harvest is simply by their smell. Sniff the leaves of your herbs; if they have a strong aroma, they are ready to harvest.
• Keep an eye out for the first set of leaves on the stem as they mature. The first set often pulls away from the stem; the area underneath should form a rounded leaf structure indicating that it is ready for harvest.
• When harvesting, cut leaves at the base of their stem and do not remove the full plant at once. This allows the herb to continue growing and producing more leaves.
• The best time to harvest herbs is in the morning after the dew has dried or in the late afternoon. Do not harvest when leaves are wet, as they are more susceptible to damage.
Closing up Bales at the End of Your Growing Season
After using the straw bales to grow your herb garden, you have a few options for what to do with them next.
• The straw bales can be added to a compost pile or used as winter covering mulch in your garden or over any garlic beds. Over time, they will break down and add nutrients to the soil.
• If the bales are too damaged or infested with pests, they should be discarded. Check with your local waste management facility to see if they accept straw bales for pickup.
By composting or disposing of the bales properly, you are maintaining the sustainability aspect of the straw bale gardening method and continuing its benefits to our environment.
Creating an herb straw bale garden is a fun and unique way on how to start a backyard garden that fits your space and time of life. With the right supplies, some prep work, and regular maintenance, you can have your very own herb garden in no time.
More Herb Growing Resources:
How to Grow Herbs in Straw Bales

If you love fresh herbs but have no room for a garden, this article on how to grow herbs in straw bales is the solution you need. Get the step by step help on prepping, how to plant, tend to, harvest, and so much more.
Materials
- Herb Seeds
- Water
- Straw Bales
- Fertilizer or compost (optional)
- Lime (optional)
Tools
- Gardening Gloves
- Hand Trowel
- Pruning Shears
- Compost Thermometer
Instructions
- Prepare the straw bales in a location with at least 6 hours of sun per day.
- Condition the straw bales:
- Day one: Sprinkle 2 cups of fertilizer over each bale and water thoroughly.
- Day two: Water each bale.
- Day three: Sprinkle 2 cups of fertilizer over each bale and water thoroughly.
- Day four: Water each bale.
- Day five: Sprinkle 2 cups of fertilizer over each bale and water thoroughly.
- Day 6: Water each bale.
- Days 7-13: Sprinkle 1/2 cup of fertilizer over each bale every day followed by a good watering.
- Day 14: Add 3 cups of bone/fish meal plus wood ash if you have any on hand.
- Plant herbs in your conditioned straw bales. If using seeds, add some potting soil to the top of the bill and plant as directed on your seed packet. If using seedlings, make a hole in the top of the bale using your hands or a trowel.
- Water a few times a day more if hot and dry day.
- Check moisture levels daily by sticking a finger into the bale about two inches deep, and feel the moisture level.
- Trim your herbs regularly to keep them healthy and productive.
- Harvest your herbs just before flowering.
- Store your herbs based on expected use time. Herbs can be stored fresh, dried, or frozen.
Notes
- Do not harvest more than 1/3 of the stem at a time for woody herbs (such as rosemary) as it will kill the plant.
- Herbs can be pruned and harvested throughout the growing season when needed. Softer varieties can be cut back by half and still regrow and flourish. Woody types, like rosemary, should only be cut back by 1/3.
- Be careful when cutting back woody herbs not to remove the stem. Cutting all of their foliage will kill them.
- After harvest your straw bales can be added to a compost pile or used as winter covering mulch in your garden or over any garlic beds. Over time, they will break down and add nutrients to the soil.
Recommended Products
As an Amazon Associate and member of other affiliate programs, I earn from qualifying purchases.
-
 Gardening Gloves for Women
 -
GROWNEER 3 Packs Pruning Shears with Curved Blades Gardening Hand Pruning Snips Titanium Coated Precision Blades
-
Gardening Hand Trowel
-
Long Stem Compost Soil Thermometer for Gardening Stainless Steel Soil Testing Thermometer Fahrenheit and Celsius 1.5" Dial Display Easily Monitor The Temperature in Compost Heaps and Soil (16'')
-
Sereniseed Certified Organic Herb Seeds (10-Pack) – Non GMO, Heirloom – Seed Starting Video - Basil, Cilantro, Oregano, Thyme, Parsley, Lavender, Chives, Sage, Dill Seeds for Indoor & Outdoor Planting
-
Jobe’s Organics 09526 Organic All Purpose Granular Fertilizer 4-4-4, 4 lb