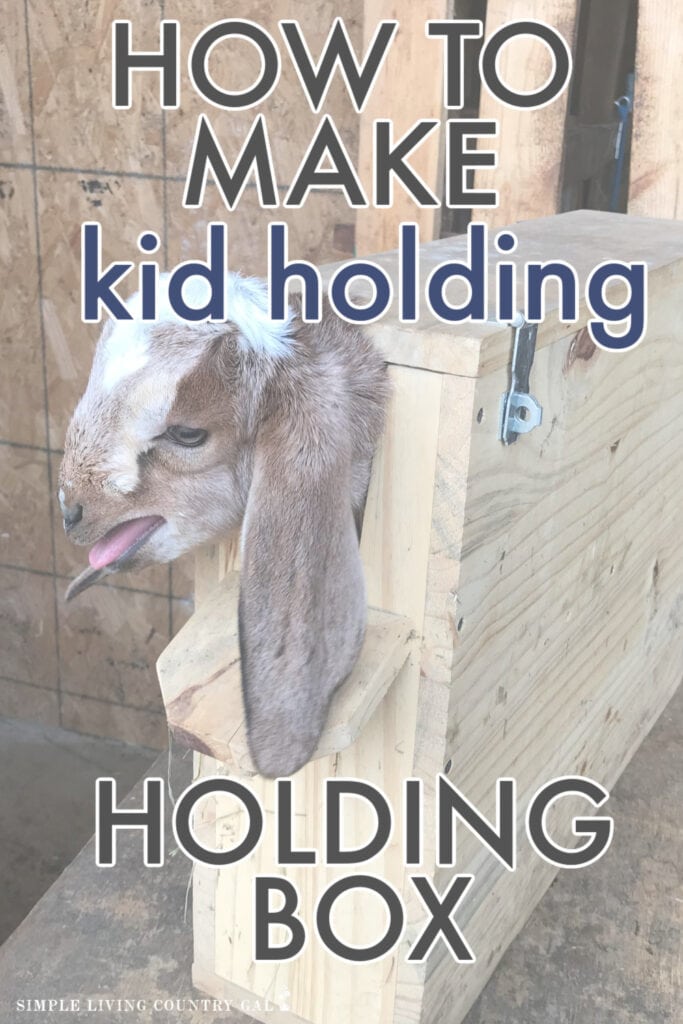
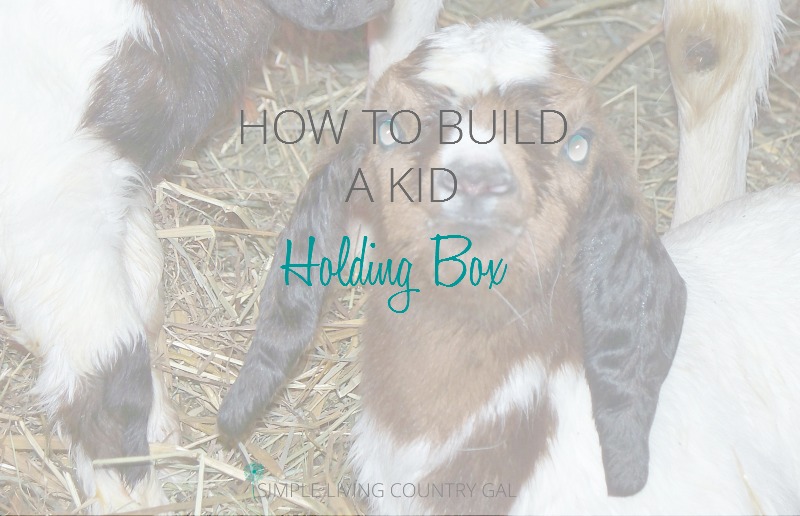
Building A Kid Holding Box
This guide will walk you through building a kid holding box. This helpful tool will make handling and caring for young kids easier.
Tips for goat breeding and kidding that will help you care for little goats more efficiently.
Little goat kids are cute, super entertaining, and very wiggly. If you have every tried to worm a baby goat, then you know exactly what I mean. Having a way to keep your kids still so you can work on them safely is important for any goat owner. That is why you will want to have a goat kid box.
What is a kid holding box?
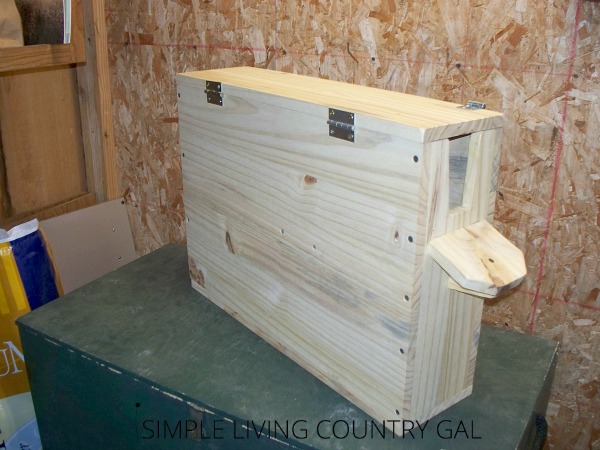
A kid holding box is a wooden box that safely holds a baby goat kid so you can work on them without the risk of hurting them. It is thin so they cannot get turned around, has a small opening for their heads to peek through, and a support bard for under their belly to ensure they do not get choked.
Why do you need a kid holding box?
The most common reasons to use a kid box are for disbudding or dehorning. This is the removal of horns when they are little buds. Doing this at a young age is less painful and invasive than doing it when your goat is older.
Another reason to use a kid box is for tattooing or tagging. This is usually done on the inside of the ear and identifies the goat and herd.
I went to my hubby and showed him a picture I found online and he took it from there. We got our plans from betterhensandgardens.com. The plans were shown using an aluminum neck piece. I really didn’t want to purchase anything additional so we made our own.
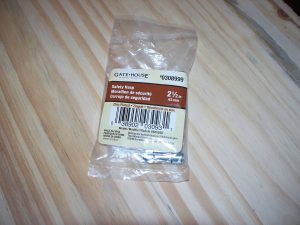
Items purchased:
- Wood
- Hinges
- Metal latch
The total cost of the project was $37.00, but I am sure you could make it for much less using what you have on hand. We chose to purchase pine wood since this box will be getting a lot of use.
Supply list:
Supplies for building a wooden kid holding box.
- Wood
- Hinges (we used two)
- Latch

Instructions:
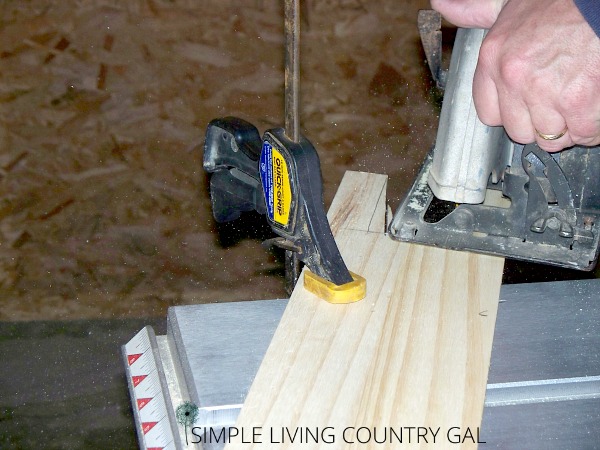
The skill required for this project is basic, requiring some use of a skill saw. Be sure to exercise caution and wear appropriate safety gear when sawing the wood.
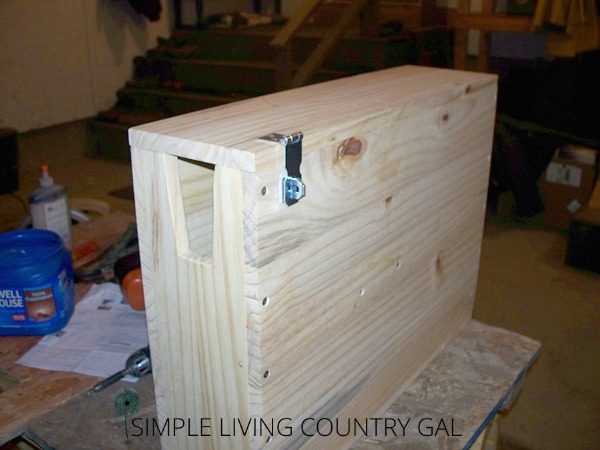
#1. Cut out the following pieces.
You will need wood pieces for the box in the following sizes.
- Two sides 16 x 24
- Top and bottom 5 x 24
- Two ends 5 x 15 3/4
- Belly board 5 x 4

#2. Assemble the pieces
Begin by assembling your sides and end pieces. At this point, a clamp comes in handy if you do not have someone to hold things in place as you are screwing and gluing.
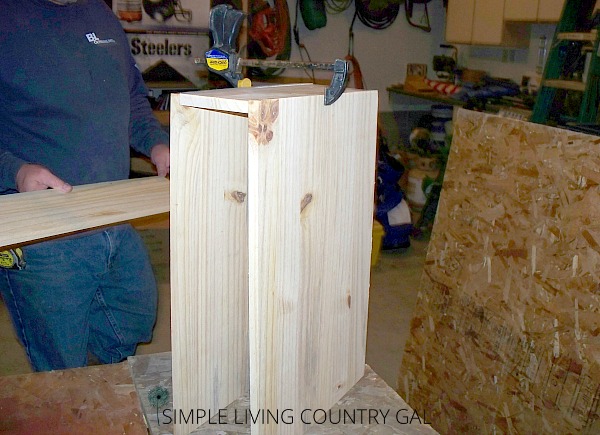
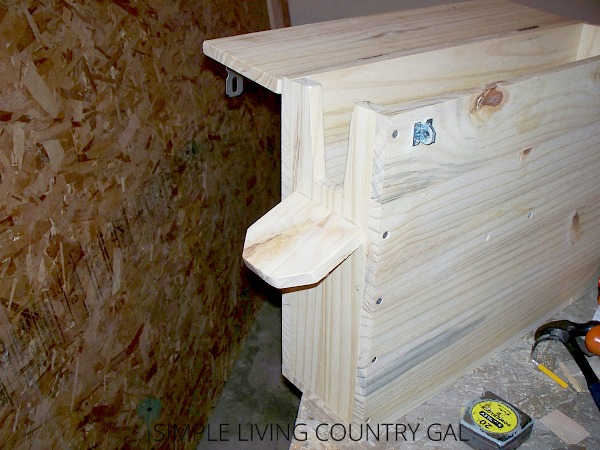
Since we chose not to use the metal neck piece shown in the original directions, my Hubby made one using a skill saw. He drew a V shape on one end of the board and use the markings as a guide for cutting.
Using a drill, screw the pieces together, screws will help to prevent splitting of the wood.
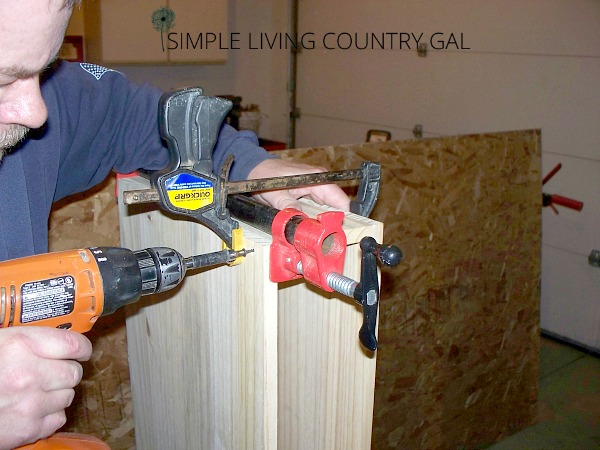
Next, we attached the belly board, this was a bit tricky since we had the sides on already.
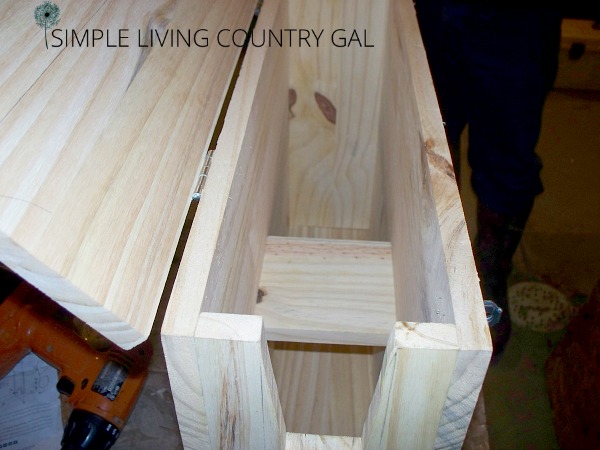
Why do you need a belly board in a kid box?
The purpose of the belly bar is to hold your baby goat up to the height of the neck hole. This will prevent choking if they should happen to slip inside of the box. The belly board is an important safety measure to have, so do not skip this step.
We found it helpful to test the size with our kids to ensure it would work for different-sized goats. Since we raise Nubians and Alpines, our kids are larger than miniature breeds. If you raise smaller goats, you will want to adjust the belly board accordingly.
If you find, upon testing, that your goat is still too small and the belly board is not high enough, you can roll up a small hand towel and put it on the belly board lifting your smaller goat up higher.
Don’t worry if your kid’s feet cannot touch the ground; the belly board helps them to feel stable enough. Your goal is to ensure your kids are high enough that there is no pressure on their neck.
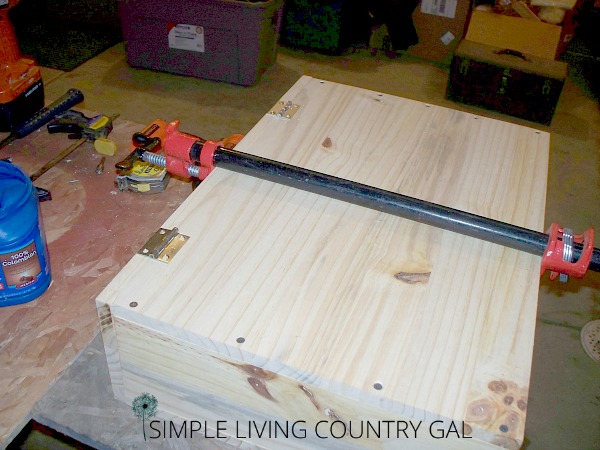
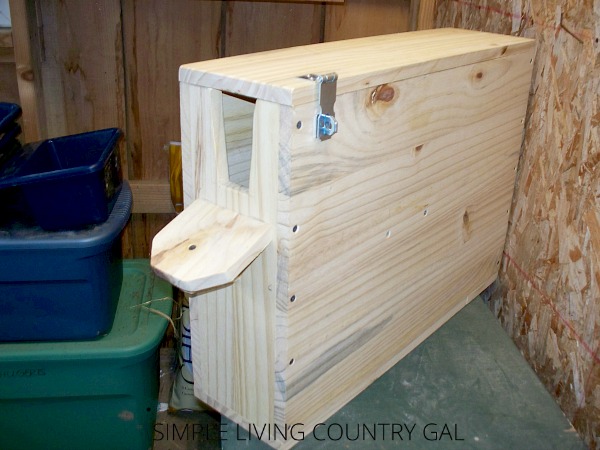
#3. Add the Hinges for the Lid
We chose to put our hinges on the side of the top panel. Use a clamp to hold the lid in place so you can attach the hinges.
#4. Attach the Latch
The latch is needed so a rambunctious goat will not jump and pop the top off. We placed our latch towards the front, and I find that location works well. The latch is there to hold the box securely closed. This will reduce the risk of injury to the goat by holding them safely and securely inside.
#5. Test
You will want to test out the neck hole frequently to make sure it comfortably fits your kids. When we tried ours out with our own kids we found the opening to be a bit small for our larger kids. We then filed down the opening to allow for more room.
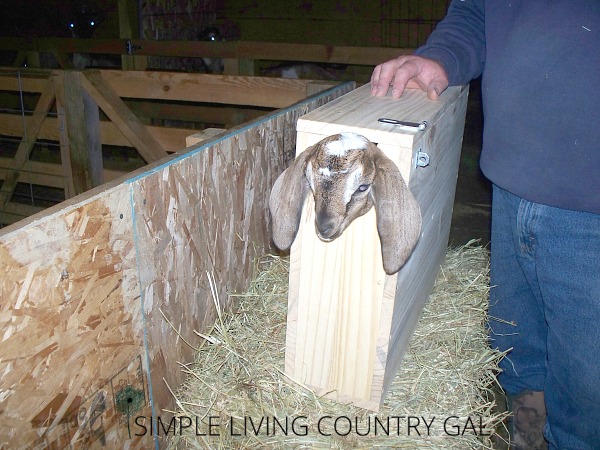
To help our kids feel more secure, we added a chin ledge they could rest their chins on. This extra stability helped to keep our kids calmer once inside. At first, I wasn’t sure we needed this, but the extra stability did help.
The chin ledge also prevents choking if you have a smaller kid inside.
A goat kid holding box is a convenient tool to have around for basic kid care. It is especially helpful if you find yourself doing much of the care on your own. It is like having an extra set of hands.
All in all, the project took about one evening to finish, even with me stopping our progress to take pictures every 10 minutes.
This size box will hold a Nubian or Alpine kid up to 2-4 weeks old. It will hold a slightly older goat kid if it is a smaller breed, such as a dwarf or mini. If you place a small block of wood inside that the goat kid can straddle, you can help the kid’s head fit a bit better through the opening.

Having a secure way to hold goat kids so you can safely work on them is essential to caring for them more effectively. We use our goat kid box in all sorts of situations because the tight enclosed container calms the kids down allowing them to relax and let us work.
Keep this guide on building a kid holding box so you can DIY one for your homestead.
More Goat Kid Resources:
