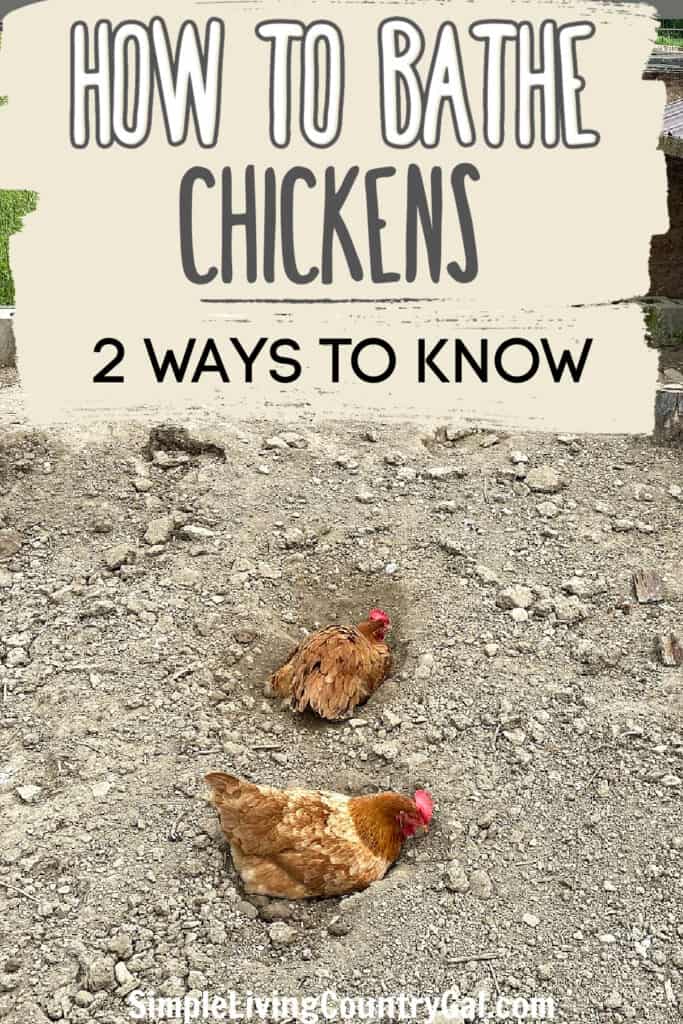
Bathing Chickens
Bathing chickens isn’t something most owners need to do, as hens usually handle their own cleaning in unique ways. Still, when it comes to bathing chickens, there are two methods, and we’ll walk you through the best approach for each.
Understanding how to care for your flock is key to raising chickens and being a responsible livestock owner.
Chickens are remarkably self-sufficient, other than giving them shelter, water, and food, they can handle the rest of their maintenance on their own.
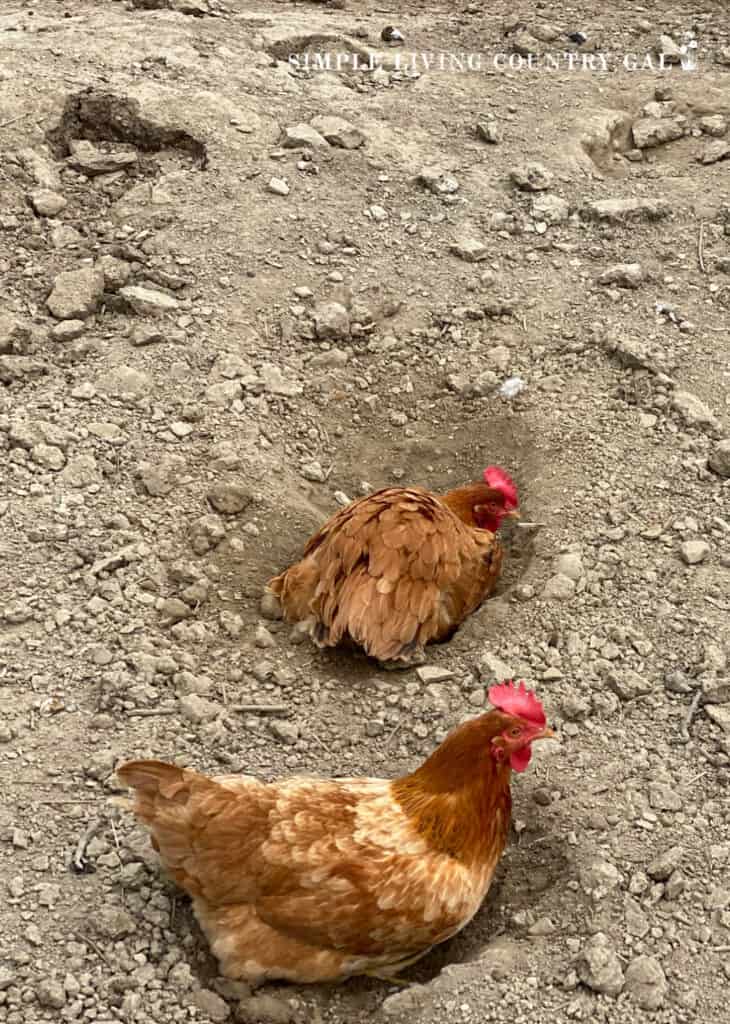
When I first started raising chickens, keeping them clean never entered my head until, one day, I was out by the coop and found a chicken rolling in the dirt. What I thought was play was actually a hen taking a bath.
Different ways to bathe a chicken
There are two ways to keep a chicken clean—one is hands-on and requires your help, while the other is handled entirely by the chicken.
- Wet bathing – uses water, gentle soap, and a tub.
- Dry bathing – uses dust, loose soil, and, in some cases, additional ingredients for extra care.
How do chickens bathe?
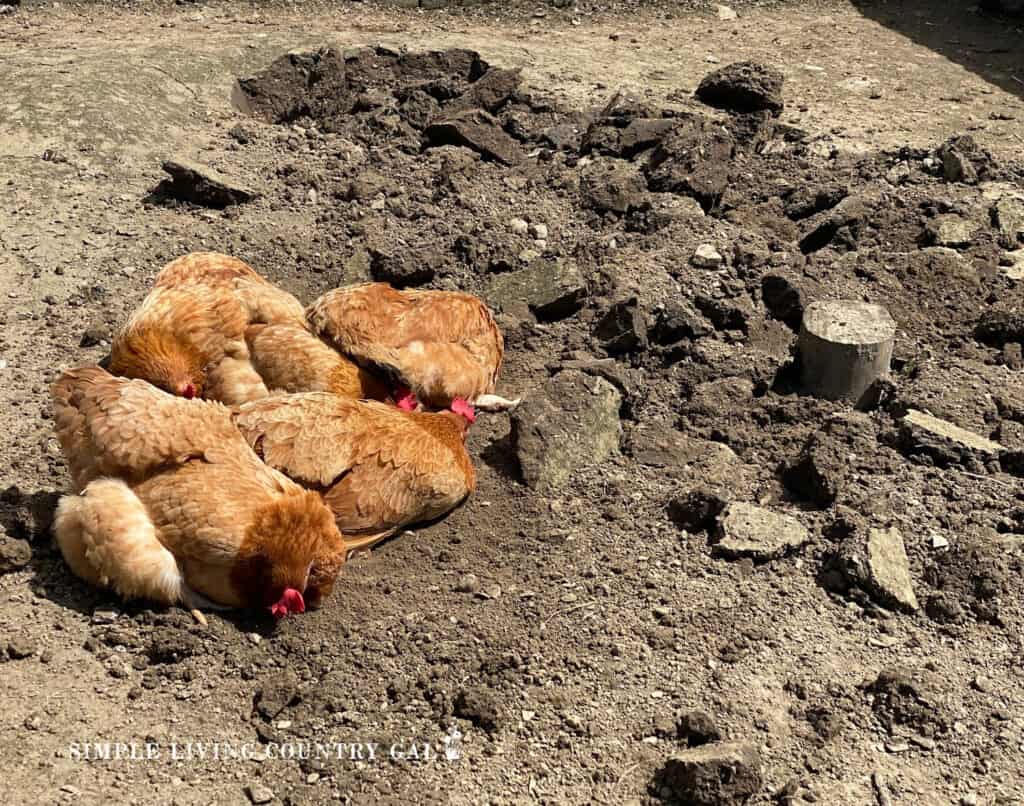
Chickens have a unique way of staying clean called dust bathing. Instead of water, they use dry dirt or sand to coat their feathers. Using their feet to “kick” the loose material onto their feathers this routine can help remove parasites like mites and lice. It also absorbs excess oil and keeps their feathers in great shape.
Dry Bathing Chickens
Dust bathing is a natural behavior that also helps to relax a chicken, allowing them to clean and rest in the warm sun.
When given the chance, chickens will create their own dust baths by digging shallow holes in dry dirt or soft sand. They will then roll around in the dirt, using their wings and feathers to fluff up the dust and distribute it all over their body down to their skin.
Creating a dust bath for your chickens is simple and an important part of a healthy flock.
What You’ll Need:
- A container such as an old tire, wash tub, kitty litter box, or a plastic pool.
- You can also designate an area in the ground that is nearby.
- Fine, dry soil, sand, or a mix of both
- Optional additives: wood ash (natural and chemical-free) or food-grade diatomaceous earth, dry fine mulch.
- Shovel or rake
Diatomaceous Earth DiatomaceousEarth 10 LBS Food Grade 100% Organic All Natural Diamateous Powder – Diametaceous for Humans is Safe Around Children Roosty’s Naturals Chicken Dust Bath | 5.5LB Dust Bath for Chickens | Made in The USA | Suitable as a Chinchilla Dust Bath, for All Animals | Easy-Pour Chicken Dust Bath PouchChicken Dust Bath Tub Chicken Coop Cleaner Container Essential Chicken Coop Accessory (1 Pack)


Step-by-Step Process
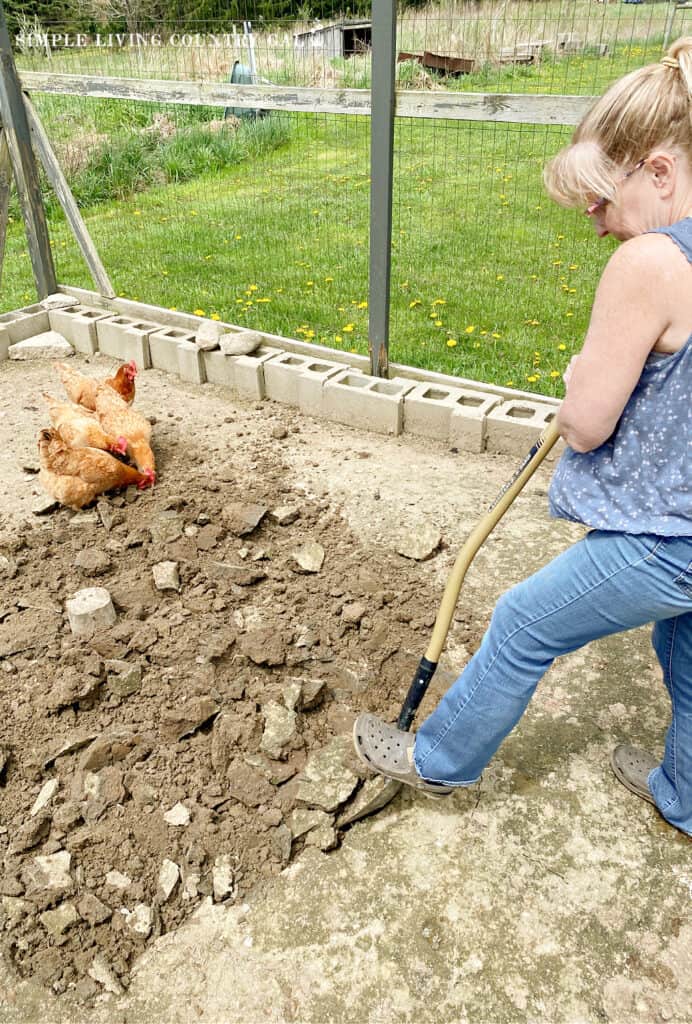
- Choose a Location
Pick a sunny, dry location that’s sheltered from too much wind or rain. Chickens love dust bathing in sunny spots so they can soak up some warmth while bathing. If you live in a wet and rainy area, consider placing the bath under a roof or inside the coop. - Prepare the Base
If you’re using a container, make sure it’s sturdy and large enough to comfortably fit a couple of chickens at a time. If creating a ground bath, dig out a shallow hole, about 6–8 inches deep. The size depends on the number of chickens in your flock—bigger is better to avoid crowding. - Add the Dusting Material
Fill the base with a mixture of fine, dry soil or dirt and sand. Aim for a depth of at least 4–5 inches so the chickens can properly fluff the dust through their feathers. - Option Additives
Mix in a handful of wood ash to help repel parasites like mites and lice. You can also add a small amount of food-grade diatomaceous earth, which is highly effective against pests. - Introduce the Bath
Once it’s done, guide your chickens to the dust bath. They’ll quickly figure out what to do on their own. - Optional Cover
When not in use, cover the dust bath with a tarp or lid to keep it dry and clean. This will also prevent other animals from using it or contaminating the area.
Maintenance Tips
- Keep It Dry: If using a container, regularly check the dust bath to ensure it’s dry and still has enough materials that are loose inside. Add fresh soil or sand as needed to replenish and keep it full.
- Mulch by Hand: If using a dugout area, routinely use a shovel to break up large chunks so the materials are fine and loose.
- Refresh the Additives: Occasionally replace or mix in more wood ash and diatomaceous earth to keep things effective.
- Clean Debris: Remove large clumps, droppings, or other debris as needed.
Benefits of a Proper Dust Bath
Dust baths allow chickens to stay healthy by cleaning their feathers, removing oil buildup, and keeping parasites like lice and mites at bay. Plus, it’s a natural and relaxing ritual essential for their happiness.
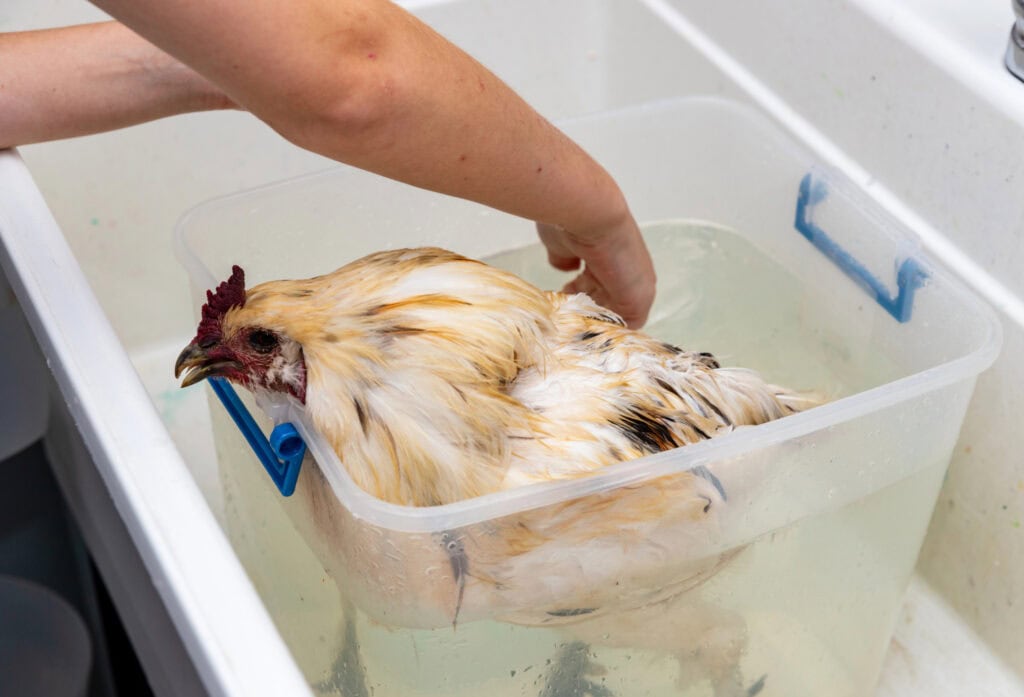
Wet Bathing Chickens
Sometimes, a chicken may need your help to get clean—whether it’s due to illness, stubborn dirt, or pest infestations.
Wet bathing is not something done routinely; in fact, you may never have to bath your chickens at all. However, knowing the best way to do so safely will help you to be prepared in case you ever need to.
What You’ll Need:
- Two large tubs or buckets (for washing and rinsing)
- Lukewarm water (use your elbow to test the temperature.)
- Gentle dish soap such as Dawn or pet-safe shampoo
- An soft sponge
- Large towels
- Blow dryer (optional, with a low heat setting)
- A calm location away from loud noises or distractions
Step-by-Step Process
- Prepare the Tubs
Fill one tub with clean, lukewarm water for rinsing and one tub with water mixed with a small amount of gentle dish soap or pet-safe shampoo for washing. Make sure the water level is shallow enough not to submerge the chicken entirely—you don’t want them to feel overwhelmed. - Secure the Chicken
Handle your chicken gently but firmly to avoid any flapping and stress. Supporting its body with one hand under the breast and the other on its back helps it feel secure. - Wet the Chicken
Slowly lower your chicken into the soapy tub, letting them get used to the water. Use your hands or a small cup to pour water over its body, avoiding the eyes, ears, and face. - Wash Gently
Focus on areas with dirt or poop build-up, like around the vent and under the wings. Use the soft sponge to scrub gently where needed. Be patient and speak calmly to reassure your chicken. - Rinse Thoroughly
Move the chicken to the rinse tub and use your hands to wash away all soap residue. Continue rinsing to ensure there’s no leftover soap, as it can irritate their skin. - Dry the Chicken
Wrap the chicken in a clean, absorbent towel and pat its feathers dry. You can also use a blow dryer on a low and warm setting, keeping it at a safe distance to avoid overheating or stressing the bird. Some chickens enjoy the dryer’s warmth, but others could be scared, so adjust based on their behavior. - Keep the Chicken Warm
Until your chicken is completely dry, keep them in a warm, draft-free area. Chickens can get chilled easily when wet, so make sure they’re comfortable and protected until their feathers are fully dry and fluffy.
Precautions to Take
- Never Force a Bath: Only bathe your chicken if it’s absolutely necessary, as it can be stressful for them.
- Avoid Over-Washing: Water removes their natural oils, which are vital for feather health, so bathe sparingly.
- Stay Calm: If your chicken seems too stressed, pause and give them time to settle. Speak gently throughout the process.
- Mind the Face: Never submerge a chicken’s head or get water into its nostrils, eyes, or ears.
Being a hands-on owner is not only helpful; it is an essential part of being a responsible livestock caretaker. Whether it’s setting up a bathing area for your chickens to care for themselves or stepping in when hands-on care is needed, understanding the different methods for bathing chickens will help you raise a healthy and happy flock.
More Help With Chicken Care:
How to Bathe Chickens

This guide covers everything you need to know, from preparing the water to drying their feathers.
Materials
- Pet-safe shampoo or mild dish soap
- Absorbent towels
- Warm water
Tools
- A small cup for pouring water
- A soft sponge or small scrubber for cleaning dirty areas
- A blow dryer with adjustable settings
Instructions
- Set up two tubs: one with lukewarm water mixed with a small amount of pet-safe shampoo or mild dish soap for washing, and another with clean lukewarm water for rinsing.
- Hold your chicken gently but firmly to keep it calm. Support its body by placing one hand under the chest and the other on their back to minimize flapping and stress.
- Gradually lower your chicken into the soapy tub so it can adjust to the water. Use a small cup or your hand to pour water over the chicken, avoiding its face, eyes, and ears.
- Focus on cleaning dirtier areas like under the wings and around the vent. Use a soft sponge to scrub gently.
- Transfer your chicken to the rinse tub and carefully remove all traces of soap.
- Wrap your chicken in a soft towel and gently pat their feathers dry. You can also use a blow dryer, but make sure to keep it at a safe distance.
- Place the chicken in a cozy, draft-free spot until their feathers are fully dry and fluffy.
Notes
- Bathing is best done indoors or outdoors on warm days. Cold temperatures can make it difficult for your chicken to warm up afterward. Always consider the weather before planning a bath.
- Wear old clothes or an apron, as chickens tend to shake off water or flap unexpectedly. You might get splashed during the process.
- Set up all tools, towels, and materials within easy reach before starting. Chickens can be unpredictable, and you don’t want to scramble for items mid-bath.
Recommended Products
As an Amazon Associate and member of other affiliate programs, I earn from qualifying purchases.