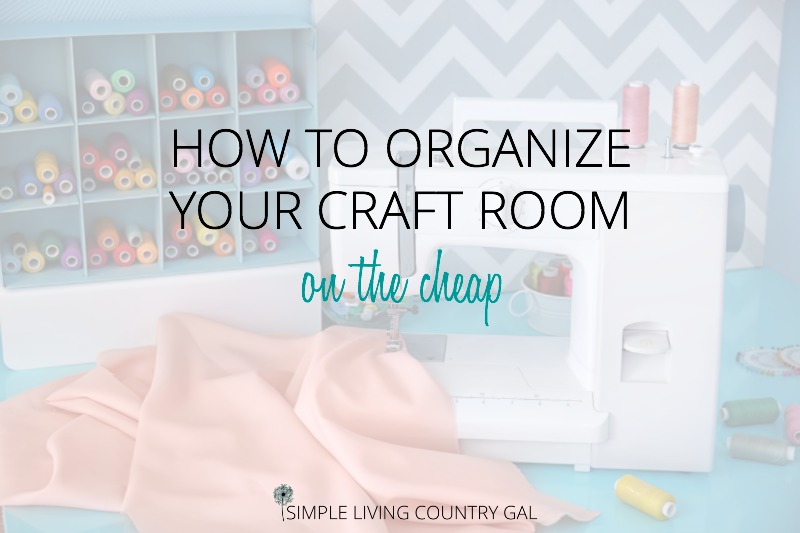
Craft Room Organization Tips on the Cheap
If you have struggled to set up an area where you can work on DIY projects, then you are in the right place. I am going to help you find craft room organization tips on the (very) cheap. The secret is to look inside your home for items you can repurpose as craft supply organizers. Get ready to think outside of the box.
I vital part of simple living is learning to organize and keep a tidy space. Another vital part is doing it without spending hardly any money. And that might be what we love about living simply. The challenge of finding ways to do our projects, like organizing a craft room, without spending a fortune.
If you are lucky (or unlucky) enough to have an entire room set aside specifically for crafting this can be a good or a bad thing. I find that most crafters are like me. They (well, we) believe you can never have too many craft supplies and purging rarely happens because you just never know when you might need that random purple button shaped like a unicorn. Just sayin’.
Rather than purge some of those beloved supplies, how about we find a way to organize and sort what we have. And how about we do it spending next to nothing.
Challenge accepted.
No, it may not be pretty…but pretty just isn’t how I roll. Simple and effective is my thing and if that is your thing too then stick around for a while. We are going to be great friends.

If your craft room needs to be decluttered because it is a hot mess, jump over to my sister site and get step-by-step help on How to Declutter Your Messy Craft Room.
Craft Room Organization Tips on the Cheap
Organizing small craft supplies
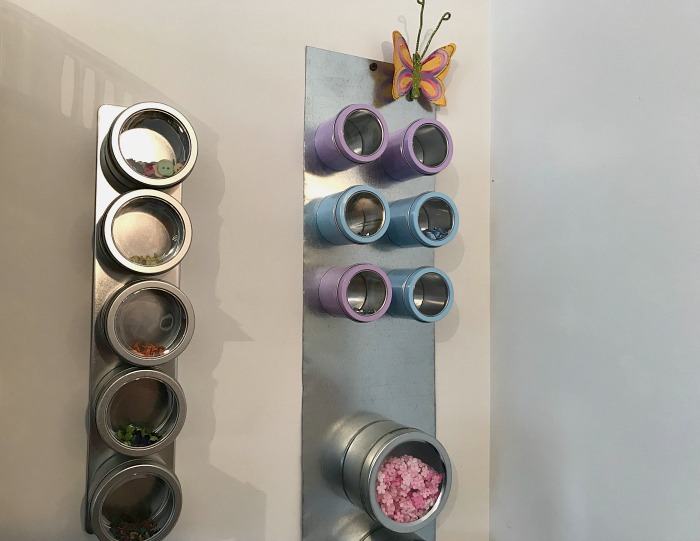
I am a card maker so brads are a must. Of course, you can never have just one color, you need many MANY assorted colors and sizes of brads. I stumbled across these magnetic containers at the Christmas tree shop and they were 3 for a dollar. I asked Hubby for a sheet of metal that I could have and glued that onto the wall. Next, I simply sorted my brads out and filled my containers, and was done. Super simple, costs less than a few dollars, and is easy to use.
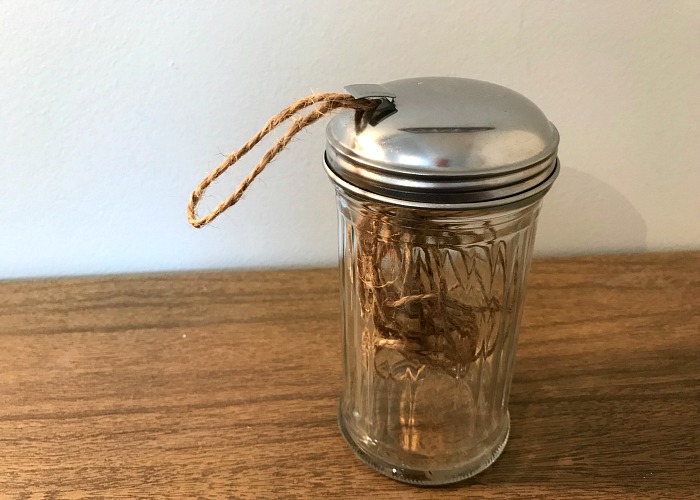
Another of my favorite things to make are Christmas ornaments. Twine is used with most of my ornaments and there is nothing worse than tangled twine. I had this sugar container in my kitchen that I was going to purge and thought that might work perfectly for my twine.
Now my twine is kept on a shelf, is easy to find, and even easier to use.
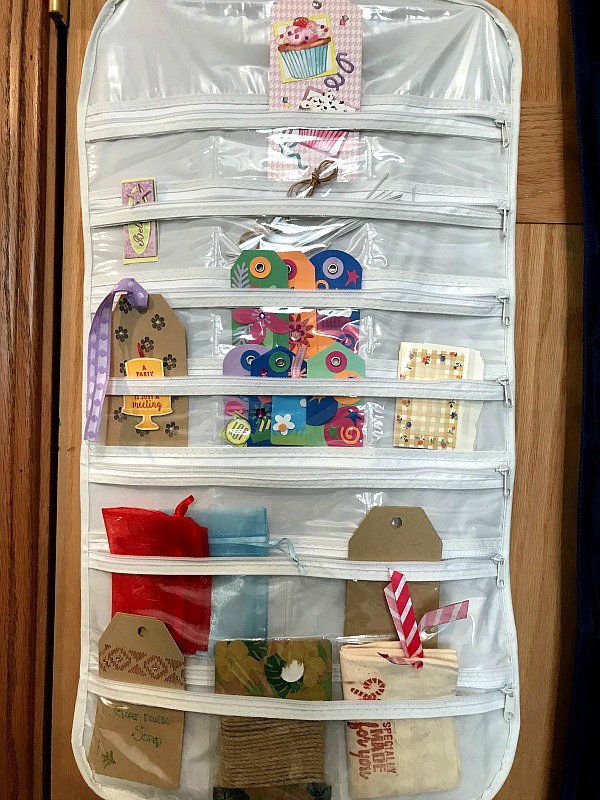
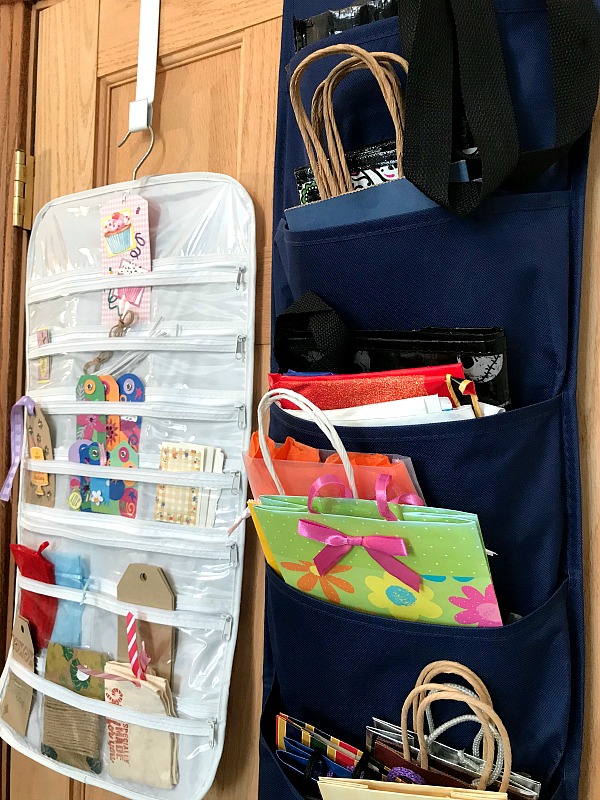
Not only do I like to make greeting cards but I also love to make gift tags. The problem is I would just toss those tags into a basket and later would spend so much time looking for the perfect tag for my wrapped gifts. I stumbled on this idea online and have been using it ever since. A hanging jewelry organizer will hold all sizes of gift tags so I can see them all clearly and quickly. The best part is there are two sides to this organizer so it holds twice as much.
Along the same lines, I found a larger organizer that holds my gift bags.
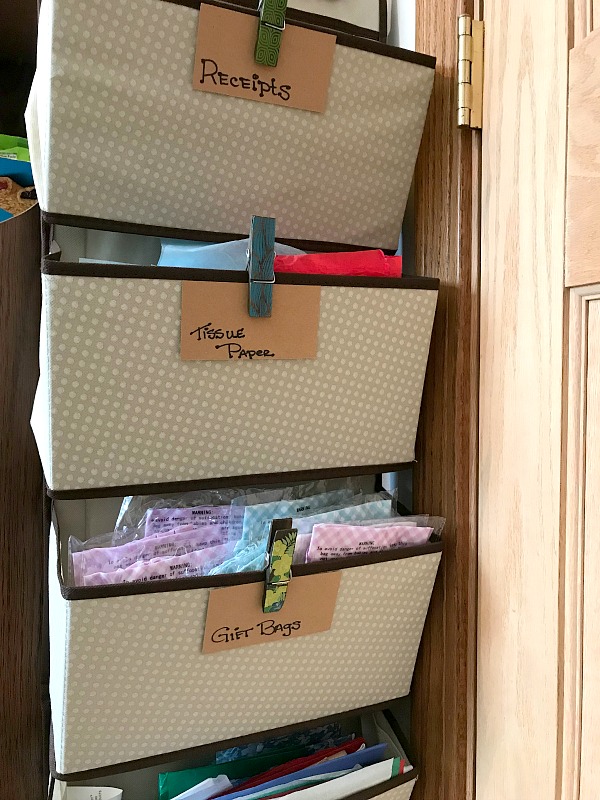
It is important to remember when organizing a space to use all the areas you have available to you. Behind a door is the perfect location for organizers that you can then use to hold small random items that you may use often.
And finally, this hanging door organizer to hold tissue paper and a few canvas-type bags as well. This style of craft supply organizer would also work great for material, ribbons, yarn, and other crafting or sewing supplies.
This is a great way to get your most frequently used supplies up where you can reach and see them.
Organizing Ribbons and Bows
I keep my wrapping paper in an old trash can close by. Now I have a gift-wrapping station all set up and easy to use. Luckily my craft room also has a closet that is perfect for keeping gifts I find throughout the year.
Read: The Gift Closet. My Favorite Frugal Tip.
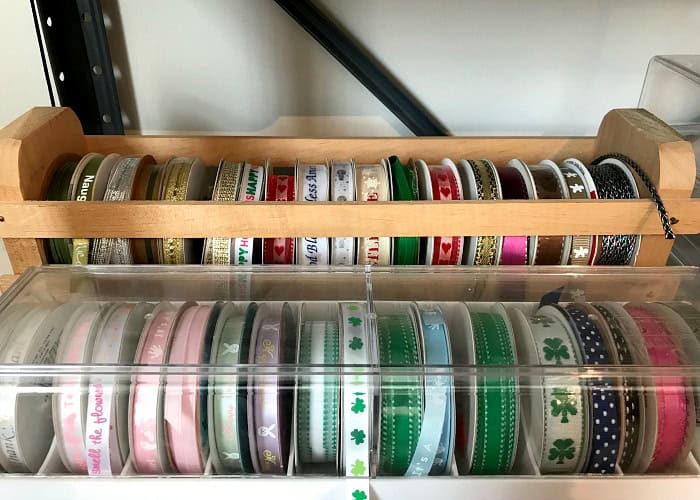
Next, we have ribbons. If you are like me then ribbons are another weakness of yours. I love them for my cards, tags, even gift toppers. I tried many different ways to organize my ribbons but these few work the best for me.
I grabbed this kitchen wooden tray at a yard sale and purchased this ribbon organizer from the Container Store. Both work just as well but one cost $19.99 and the other was just 50 cents. This just goes to show you that you do not need to spend a ton of money to organize your things.
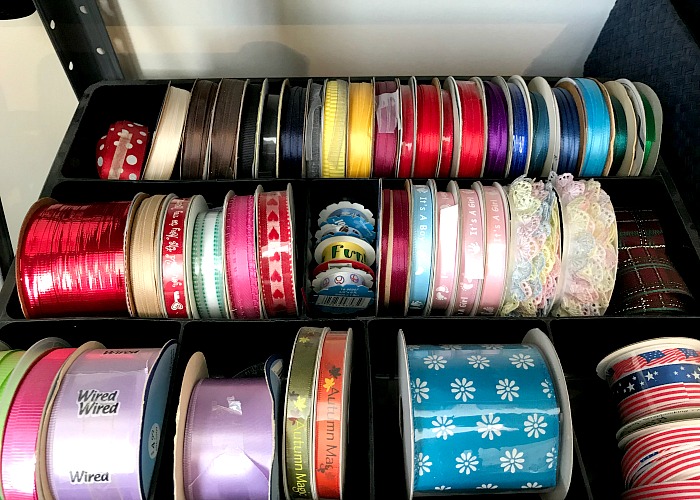
For my odd-sized ribbons, I use a simple desk organizer that was $4 at Walmart. The dividers are perfect for different-sized ribbons and it fits on my shelf so all my ribbons are easy to see. Another bonus is I can pull the entire organizer how as I am wrapping a gift for working on a new project. These all-in-one organizers work great to keep a room easier to keep organized.
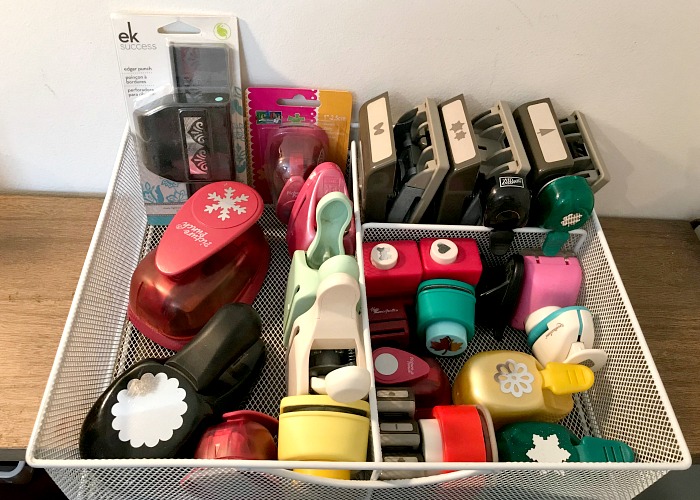
Another love of mine is paper punches. This organizer was an expensive purchase but I did not buy it for my craft room originally. I instead bought it for my kitchen but ended up not liking it at all. So, I tossed it into my attic frustrated that I wasted so much money on something that simply did not work. A year later when I was in my attic I stumbled across that forgotten organizing tray once again and thought it might just work for my paper punches. It is very durable and made of metal, which is good because these styles of punches are pretty heavy. With this sturdy tray, I am able to pull the entire collection out when I am working and see all the punches at a glance.

Before you go out shopping for organizers you will want to shop your home first. Look for tools that aren’t working in one space that may work in another. If you have a forgotten stash of random organizers this will be a great place to start looking.
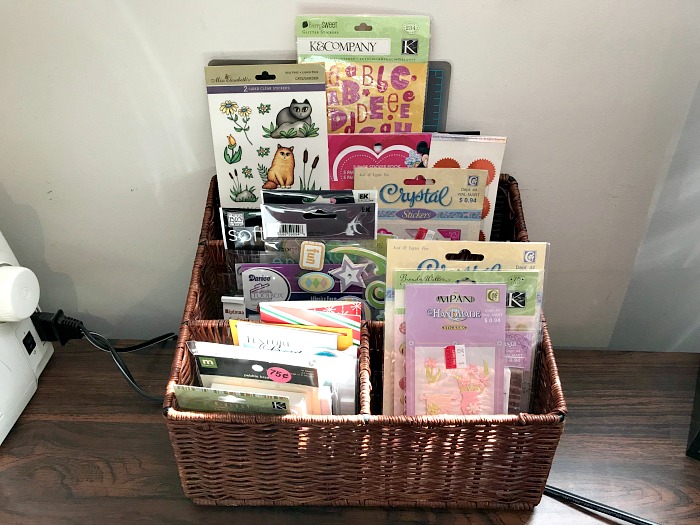
Organizing Stickers and Cutouts
Stickers are another thing I love and this divider is perfect for my frequently used stickers. It keeps them out where I can see them easily and it’s easy to move when I am working. Cost? 25 cents from a yard sale. BOOM! This is the same stadium-style organizer I used but a bit more than my 25-cent price tag I’m afraid.
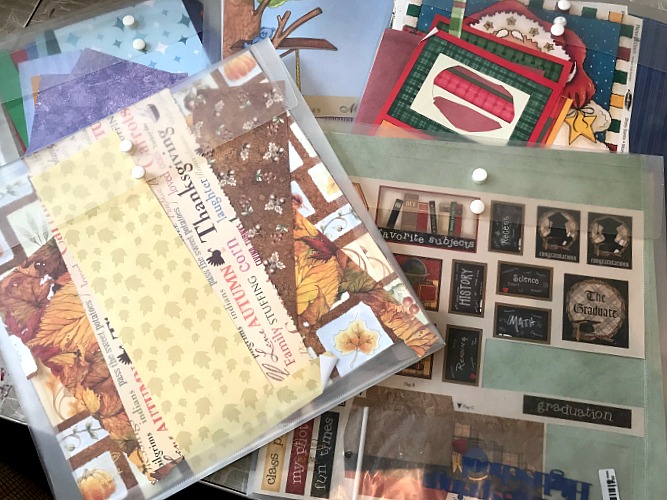
Organizing Themed Paper
One of the hardest craft supply organizers to find that doesn’t cost a fortune is one for crafting paper.
This was another yard sale score were these clear envelopes. I love these things and I find that they are definitely worth the cost even if you pay full price. I keep my craft paper organized by theme this way and it makes things super quick when working on a project. There is nothing better than finding a yard sale of a crafter that is cleaning out their craft room! I got these brand new clear envelopes at 10 cents each!
SLCG PRO TIP: If you are a starter of projects yet a finisher of only a few this tip is for you! Clear plastic totes like these are great for holding a project in progress. Label the outside with what the project is, who it is for, and the due date. Place that due date on your calendar so you force yourself to stay on track.
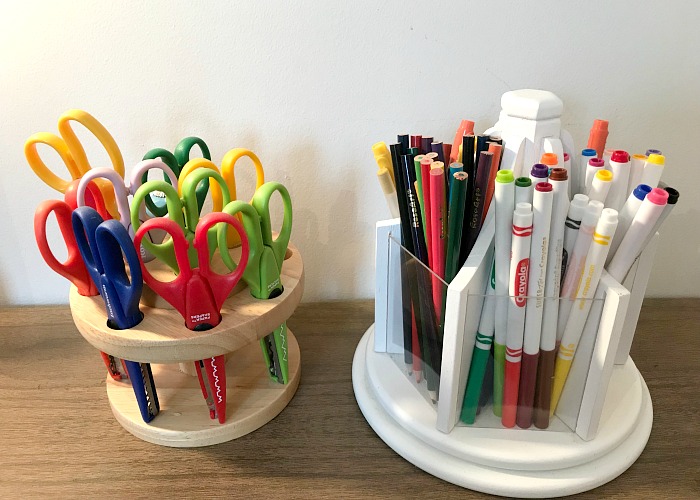
Organizing Scissors, Paintbrushes, or Markers
There are many options out there to organize these tools all while reusing items you have lying around the home. Sure you can buy specific craft supply organizers like the ones pictured below…
Or you can use excess mugs and glass on a tray or a bin. Remember, organizers, do not need to be fancy to work great! Find what you have that might work better as something else.
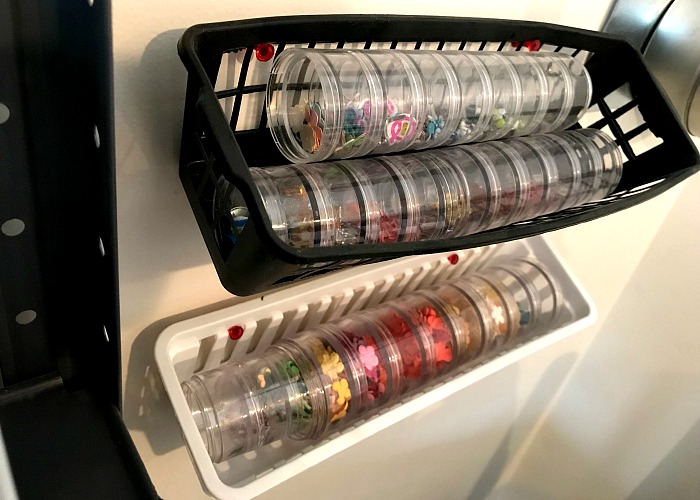
Trays attached to the wall like these can be used to hold scissors as well. Or you can use them to hold small embellishments, buttons, or stickers. These were found at the dollar store as well.
A few ideas are:
- Glasses or mugs to hold scissors or paintbrushes
- Study cardboard boxes (paint and labeled) to hold paints
- Extra laundry baskets to hold yarn
- Shoe boxes (cover in colorful paper) to hold cardstock
- Silverware tray to hold markers or colored pencils
- Coffee containers (paint and label) to hold misc craft items
- Old baking tins to hold anything you need!
Remember when organizing you don’t have to spend a fortune. Look at what you want to organize then take a walk around your home searching for a solution. Sometimes exactly what you need is right under your nose. Think outside of the box and find unique ways to sort and organize what you have in a way that makes sense and works specifically for you.
Finding affordable craft room organization ideas can really help you to dedicate a space that is all your own.